This document is the owner's manual for the 2023 Airstream Rangeline Touring Coach. It provides comprehensive information on the operation, function, and care of the vehicle's various systems.
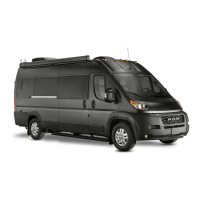
The Rangeline is built on a Ram ProMaster Van chassis. The manual emphasizes that information regarding the ProMaster van, its engine, power train, and other related components is covered in the Ram ProMaster Owner’s Manual and other literature provided by Ram. Airstream disclaims responsibility for these components, which are warranted by Ram or its suppliers.
The manual includes a Disclaimer and Copyright statement, noting that all information, illustrations, and specifications are based on the latest product information available at the time of publication approval. Airstream reserves the right to make changes to improve product quality or due to material substitutions. The manual also includes a California Proposition 65 Warning regarding exposure to chemicals like engine exhaust, carbon monoxide, phthalates, and lead.
Safety
The safety section stresses prudence in operation and maintenance. Key safety precautions include:
- Weight Distribution: Distribute cargo evenly, with heavier objects placed as low as possible. Refer to "Loading" on page 8-2 for detailed information.
- Tire Safety: Properly maintained tires are crucial for steering, stopping, traction, and load-carrying capability. Refer to the Ram ProMaster Owner’s Manual and "Tire Care" on page 9-5.
- Electrical Appliances and Outlets: Avoid touching or using electrical components with bare or wet feet, or while standing in water or on damp ground.
- Generator and Hydronic System Safety: Do not operate these systems in enclosed or partly enclosed areas like garages due to exhaust fumes. Follow all instructions and warnings in this manual and the generator manufacturer's manual. The coach is equipped with an Automatic Generator Start System and a cycling heating and hot water system, which can start unexpectedly.
- Mold: Mold and mold spores are naturally occurring. Control indoor mold growth by managing moisture and humidity levels.
- Chemical Sensitivity and Ventilation: New recreational vehicles may have a strong odor from off-gassing chemicals like formaldehyde. Ventilation is crucial to reduce exposure, especially when new or exposed to elevated temperatures and humidity. Open windows, roof vents, and operate AC to force out stale air. Smoking inside the vehicle is discouraged.
- Alarms and Detectors: The vehicle is equipped with a combination Smoke/Carbon Monoxide Detector. Batteries are shipped deactivated and must be activated upon delivery. The detector chirps when batteries are low and should be replaced after 5 years.
- Smoke Alarm Indicators: Power/Smoke LED flashes RED, Horn sounds 3 BEEPS, pause, 3 BEEPS, pause. CO LED is OFF.
- Carbon Monoxide Alarm Indicators: CO LED flashes RED, Horn sounds 4 BEEPS, pause, 4 BEEPS, pause. Power/Smoke LED is OFF.
- Carbon Monoxide (CO): A highly poisonous, invisible, odorless gas produced when fuels burn. Generator and vehicle engine produce CO. Proper ventilation and precautions are essential. Symptoms of CO poisoning range from mild headache to convulsions and death.
- Fire Extinguisher: Located near the side door entrance. Check charge regularly and ensure all family members know how to operate it.
- Emergency Exit: Four avenues of escape: driver’s door, passenger door, sliding door, and rear doors. Ensure access is not blocked.
Limited Warranty Policy
The warranty covers defects in workmanship and materials for the first retail owner and subsequent owners for 36 months or 36,000 miles, whichever comes first. It excludes tires, batteries, stereo, television, appliances warranted by other manufacturers, normal wear, damage from accidents, misuse, exposure, overload, chemical gassing, and the ProMaster van components. Warranty service requires notifying Airstream or an authorized dealer within 10 days of defect discovery and delivering the motorhome for repairs at the owner's expense.
Camping
- Pre-Travel Check List: Includes verifying stored power/sewer hoses, hitch connections, exterior lighting, lug nut torque, tire pressure, turning off water pump/heating, closing windows/vents/cabinet doors, latching refrigerator/microwave, securing cargo, draining toilet, and turning off 12-volt lights.
- Touring Coach Equipment and Accessories: Lists essential items like water hose, holding tank cleaner, power cord adapter, electric cord, wheel chocks, torque wrench, and tire gauge.
- Motoring Essentials: Includes vehicle registration, driver’s license, insurance, ignition keys, flashlight, and pet supplies.
- Overnight Stop/Extended Stay: Instructions for using self-contained luxury, including battery disconnect, generator, inverter, and water pump. Emphasizes leveling the coach for longer stays.
- Effects of Prolonged Occupancy: Discusses condensation and humidity issues in small recreational vehicles and provides tips to minimize them, such as ventilation, using AC, and keeping cabinet doors open.
- About Molds: Molds thrive in warm, humid conditions with moisture sources. Inhibiting mold growth involves controlling relative humidity, frequent cleaning, wiping spills, and checking sealants.
- Waste Water System: Comprises toilet, holding tanks (black and gray), and dump valves. Designed for self-contained use. Emphasizes proper draining procedures and what not to put into toilets or drains (e.g., facial tissues, automotive antifreeze, table scraps).
- Winter Traveling: Precautions for sub-freezing temperatures, including maintaining at least 1/4 tank of fuel for the hydronic heating system, shoreline hookup, minimizing electricity use, leaving cabinet doors open, and insulating water lines.
- Heated Tanks: 12-volt heat pads for fresh and gray water tanks activate when outside temperature is near freezing and tank contents drop to 44°F, deactivating at 64°F. These deplete the house battery quickly without external AC power or generator.
Floor Plans and Specifications
- Rangeline Floor Plan: Visual representation of the interior layout.
- Specifications: Detailed table of technical specifications for the Rangeline, including:
- Chassis: Ram® ProMaster 3500 High Roof, Extended.
- Engine: 3.6L Pentastar® V6 24V VVT engine, 280 HP @ 6,400 RPM, 260 Torque @ 4,400 RPM.
- Transmission: 9-Speed Automatic 948TE.
- Axle Ratio: 3.86.
- Wheelbase: 159”.
- MPG: 18-20* Estimated Highway.
- Dimensions: Exterior Overall Length 20’ 11”, Height 9’ 3” (with A/C & Antenna), Width 8’ 2.25” (with Mirrors); Interior Height 6’ 2.25”, Width 5’ 11”.
- Weights: GVWR 9,350 lbs, GCWR 12,000 lbs, UBW 7,661 lbs, NCC 1,689 lbs.
- Tow Capacity: Up To 3,500 lbs**.
- Tank Capacities: Fuel 24 gallon, Fresh Water 28 gallon, Gray Water 19 gallon, Black Water 12 gallon.
- Systems: Hydronic Heating/Hot Water System (Gasoline Fueled with 120V Element Support), Air conditioner (13,500 BTU).
- Appliances: Refrigerator & Freezer (3.2 cu ft Refrigerator, 0.4 cu ft Freezer), Microwave (0.7 cu ft), Cooktop (1,000 Watt, Single burner, Induction).
- Electrical: House Battery (12 Volt 270 Ah Deep Cycle Lithium Battery (LiFePO4)), Converter/Inverter (100 Amp Charger/ 2,000 Watt True Sine Inverter), Generator (2.8 Kw Ultra Quiet w/ Auto Start (Gasoline fueled)), Shore Power (30-Amp/120-Volt Service w/Smart Plug), Solar Power (200 Watts).
- Bed Size: 53” X 73”.
- Tires: Lug nut torque Max (145 ft lbs), Tire Size (LT225/75R16), Max Cold Inflation Pressure (80 psi), Max Load Rating (2680 lbs).
- Specification Tags: Located on the driver’s door jamb, these tags provide precise cargo capacity, tire and loading information, and vehicle manufacturing details.
Interior
- General Information and Cleaning: Instructions for cleaning upholstery, cabinets, overhead lockers, countertops, aluminum interior skin, sinks, and luxury woven vinyl floor. Emphasizes using mild, non-abrasive cleaners and avoiding harsh chemicals.
- Window Coverings: Velcro-attached coverings can be rolled up or removed. Clean with lukewarm water and mild detergent.
- Wet Bath: Slide tambour door to open. Clean with warm water and liquid detergent; avoid abrasive cleaners. Do not wax the shower bottom.
- Shower Head: Designed for water-saving.
- Toilet: Dometic 301 toilet. Flush by pressing foot pedal. Add water by pressing halfway. Ensure slide mechanism is clear before closing. Use deodorizers and biological chemicals.
- Lavy Fold Down Sink: Pull outward to open, adjust water flow with knob. Dry bowl before folding.
- Faucets: Clean with soft, damp cloth; avoid scour pads, cleansers, or chemicals.
- Storage: Cabinets, roof lockers, and cubbies have integrated latches. Store heaviest items on bottom shelves. L-Track Cargo Storage and Molle Panels provide customizable mounting surfaces for gear (Molle panels have a 30 lb MAX weight limit).
- Second Row Bench Seat: Seats two additional passengers, includes storage, 120 VAC receptacles, USB ports, and LATCH child seat anchors.
- Folding Bed and Access Step: Hinged metal bed frame and mattress secured by velcro straps. Integrated roll-out step next to the lavy doubles as storage.
- Pet Amenities: Pet drawer under refrigerator with bowls, storage under human bed for a pet bed, and a paw-shaped leash holder/tie-out on the running board.
- Table: Adjustable forward/backward and with an extension. Must be locked in place before travel.
- Electrical System Overview:
- Power Center: Self-contained 120 VAC power distribution center with circuit breakers and fuses. Distributes 120 VAC power from shoreline, generator, or inverter. Converts 120 VAC to 12 VDC. Located next to the wardrobe on the roadside bed base.
- Circuit Breaker Protection: Resettable circuit breakers protect 120 VAC loads. Main 30 amp breaker feeds individual branch breakers. Breakers trip to OFF on overload.
- Ground Fault Circuit Interrupter (GFCI): Provides overload and short-circuit protection, protecting against ground faults. Calibrated to trip at 5 mA. Includes auto-self-test functionality.
- 120 volt System: Shoreline power enters through SmartPlug Cordset. Inverter/charger converts 120 VAC to DC for battery charging and diverts 120 VAC to systems.
- Outlets and USB ports: Several 120V receptacles and USB charging ports, including a retractable popup outlet in the galley countertop.
- Energy Management System (EMS): A Firefly Multiplex system function that monitors 120 VAC power draw and sheds loads (e.g., heating/hot water electric element, AC compressor, microwave, cooktop) to prevent breaker tripping.
- 12 Volt System: House battery (270Ah 12V LiFePO4) powers most systems except AC, hot water electric element, outlets, cooktop, and microwave. Power routed through a 12 volt fuse block and thermal breakers.
- Solar System: Rooftop solar panel maintains battery charge. Solar charge controller gathers energy and stores it. Panel must be clean and unshaded.
- Electrical System Operation:
- Battery Disconnect Switch: Located behind the left rear door. Must be ON for battery charging and electrical systems.
- House Battery: Battle Born 270Ah 12V LiFePO4 Deep Cycle Gamechanger 3.0 with built-in Battery Management System (BMS). Offers longer life and faster charging than lead-acid batteries.
- Battery Management System (BMS): Internal component of the house battery, monitors cell voltages, currents, and temperatures. Features over/under voltage protection, high current protection, high/low temperature protection, and cell balancing.
- High Voltage Disconnect: BMS prevents charging if cell voltage exceeds 14.7V.
- Low-Voltage Disconnect: BMS prevents further discharge if cell voltage falls below 10.6V. To "wake up" the battery, apply 11V DC or greater via vehicle engine, shoreline power, or external charger.
- Temperature Limits: Operating range -4°F to 135°F. BMS prevents charging below 25°F and charging/discharging above 135°F. Internal heaters engage below 35°F.
- Inverter/Charger: Converts DC battery power to AC for appliances/outlets, and shoreline AC to DC for battery charging. Turn off when not in use to conserve power. Overloading causes automatic shutoff.
- Generator: Onboard gasoline-powered 2.8 Kw Ultra Quiet generator provides 120 volts when shore power is unavailable. Controlled via Multiplex panel. Stops running at 1/4 fuel tank level.
- Automatic Generator Start (AGS): Automatically starts generator to charge battery when SOC drops to a predetermined level. Disables when battery reaches 95% SOC.
- Automatic Transfer Switch: Automatically switches 120 volt feed between shoreline and generator. Protects against power surges, open ground/neutral, low/high voltage, reverse polarity, miswired pedestals, and multi-mode surge suppression.
- Battery Charging: Monitor State of Charge (SOC) on Multiplex panel. Charging via shoreline connection, generator, alternator, or solar power.
- Multiplex System: Firefly system provides advanced automation and mobile electrical solutions. Touchscreen interface controls generator, inverter, bath vent fan, solar, lights, climate, tank monitoring, battery SOC, tank heaters, water pump, and EMS.
- Multiplex Remote Controls: Two RF remote controls (one removable, one fixed) for system control.
- Cleaning the Multiplex Touchscreens: Power down, wipe gently with soft, slightly damp cloth (water or lens cleaner).
- Ceiling and Directional Lighting: LED lights, controlled by lens press or Multiplex touchscreen. Light Master switch turns all interior lights on/off, with memory feature.
- Entertainment Systems: Wireless Bluetooth Speaker (removable/rechargeable, housed in springloaded bracket). Cordless Phone Charger/Holder (stationary and adjustable arm, USB port). TV and Antenna Prewire for optional TV antenna and 5G Wi-Fi.
- Appliances: Owner's manuals for all appliances are in the owner’s packet.
- Air Conditioner: 13,500 BTU. Controlled by touchscreen multiplex panel. Requires 110-120 volts. Clean filters weekly.
- Cooktop: Single burner induction cooktop, stowed in galley drawer. Requires cookware with magnetic properties. Plug into popup countertop outlet.
- Ceiling Vent Fan: High-volume roof vent system for exhausting stale air. Controls on vent. Turn off fan before closing vent.
- Exhaust Vent (Lavy): Removes moisture from bath. Controlled from multiplex panel.
- Hydronic Heating and Hot Water System: Gasoline/electric hydronic heating and on-demand hot water system. Fuel from vehicle gas tank. Heater portion circulates heat transfer fluid through air handlers. Water heater portion uses instantaneous heat exchanger. Controlled by Timberline touchscreen display.
- Microwave Ovens: Refer to microwave user manual.
- Refrigerator: 12V refrigerator with dry-erase marker board front panel. Thermostat knob adjusts temperature. Defrost when 1/4 inch of frost builds up. Clean with non-abrasive cleaner.
Exterior
- Exterior Care: Maintain paint finish by regular washing and polishing. Check caulking and sealant annually.
- Roadside Exterior Components: Ceiling vent fan, rooftop air conditioner, front bumper step foot well, water service compartment (sprayer port, city water fill, black tank rinse, courtesy light), black tank dump valve, SmartPlug power cord inlet.
- Curbside Exterior Components: Awning, awning support brackets, exterior 120 Volt AC outlet, paw-shaped leash holder/tie-out, front bumper step foot well.
- Windows: Depress red button and silver latch to open. Clean seals with damp cloth and mild detergent, apply silicone lubricant.
- Gravity Water Fill: Behind right-rear door. Fill with FDA-approved drinking water hose. Monitor tank level on multiplex panel.
- Water Service Compartment: Contains exterior fresh water inlets and outlets.
- Sprayer Port: Provides external water service from fresh water tank or city water.
- City Water Hookup: In-line regulator limits pressure to 50 psi. Use 1/2-in. diameter high-pressure hose.
- Black Tank Flush (San-T-Flush): Garden hose connection to flush black water holding tank.
- Shoreline Power Inlet and Cordset: SmartPlug power inlet with Reverse Polarity Indicator System (LED lights indicate power status).
- Awning: Extends/retracts even with sliding door open. Support legs can be placed on ground or locked into clips. Retract before driving or in high winds/rain.
- Manual Awning Operation: Instructions for extending and retracting using an awning rod.
- Awning Care and Maintenance: Clean fabric with water or Thule PVC Cleaner. Check hinges, brackets, pivot points, end caps, awning rail, canopy stitching, and tension knobs periodically.
- Screen Doors:
- Sliding Screen Door: Accordion-style, provides ventilation and insect control. Pull to open, reverse to stow. Stow before operating main sliding door.
- Rear Screen: Modular, held by magnetic strips. Can be unzipped, rolled up, or removed.
Ram ProMaster Van
- Important ProMaster Information: Ram ProMaster Owner’s and Warranty Manuals contain crucial information.
- Fuel: Unleaded regular gasoline with 87 octane.
- Component Identification: Lists components serviced by Ram (chassis, engine, electrical, etc.) and Airstream (interior furniture, appliances, smoke/CO detector, window coverings, floor covering, plumbing).
- Tires: Underinflated/overinflated tires are dangerous. Check inflation pressures ("cold") regularly, especially when changing load. Proper front-end alignment and wheel balance are essential.
- Vehicle Placard and Tire Inflation Pressure Label: Lists number of people, total weight, tire size, and cold inflation pressures.
- Proper Tire Inflation: Air pressure affects performance. Check monthly.
- Underinflation: Increases damage susceptibility, reduces durability, and causes fuel economy loss.
- Tire Inflation Procedure Precautions: Use calibrated gauge, permanent air seal metal valve caps. Do not bleed air from warm tires. Do not inflate beyond rim specifications. Damaged tires must be dismounted and inspected by a professional.
- How Overloading Affects Your Tires: Overloading causes stress, brake failure, handling problems, and tire failure.
- Tires and Wheels: Examine for wear, damage, and tightness of lug nuts. Use only approved wheels and tires. Break in new tires.
- Tire Grip: Decreases on wet/icy roads. California Tire Chain notice: motorhome cannot be operated with tire chains.
- Hydroplaning: Reduce speed in rain.
- Flooded Roads: Avoid driving through moving water.
- Changing a Tire: Physically demanding. Use specialized tools and safety procedures. Airstream does not provide a spare tire.
- Precautions When Changing a Wheel: Keep hands/feet away from lifted vehicle, set parking brake, block wheels, use jack on level surface, do not jack more than 1-2 inches, use jack stands.
- Jack: Read ProMaster manual for instructions. Place on firm, flat surface. Do not crawl under vehicle or start engine while jacked.
- Installing and Removing a Wheel: Clean rust/dirt from contact surfaces. Note specified wheel/tire size. Tighten lug nuts in a crosswise pattern. Retighten after 25 miles.
- Lug Nut Tightening: Tighten evenly in crosswise sequence.
- Tire Rotation: Rotate every 6,000-8,000 miles. Inspect for irregular wear.
- Tire Support: Ensure tires are fully supported when leveling with blocks to prevent damage.
Driving
- Loading: Critical for safety. Consider cargo weight, limits, location, and effect on handling. Refer to Cargo Carrying Capacity tag. Weigh vehicle on scales. Balance load. Secure items.
- Vehicle and Trailer Weights and Ratings Definitions: GVWR (Gross Vehicle Weight Rating), GVW (Gross Vehicle Weight), GAWR (Gross Axle Weight Rating), GTW (Gross Trailer Weight), TWR (Trailer Tongue Weight Rating).
- Procedure for Weighing a Touring Coach: Fill in specifications, weigh vehicle, weigh individual wheel positions, calculate other side.
- Weight and Loading Considerations: Fluid tanks and storage offer flexibility. Distribute heaviest objects low. Reducing water load increases cargo capacity.
- Safety:
- Seatbelts: Federally approved. All occupants must use seatbelts. Adjust seat for control access. Place seatbelts low around hips. One occupant per seatbelt.
- Child Safety Seat: Rear-facing child restraints in the rear seat only. LATCH system (Lower Anchors and Tethers for Children) is a standard feature on the second row bench seat.
- How to Install a LATCH Equipped Seat: Fasten top tether and lower attachments.
- Trailer Towing and Driving Tips:
- Trailer Hitches: Units have hitches and wiring installed by Ram (7-way connector). Remove hitch ball adapter when not in use.
- Loading a Trailer: Do not exceed GTW or trailer GVWR. Tongue weight 10-15% of loaded trailer weight. Inflate touring coach tires to highest pressures.
- Checking Weights of Vehicle and Trailer: Weigh combination on commercial scale. Check axle weights and tongue weight.
- Attaching a Trailer: Observe maximum permitted dimensions. Use crisscrossed safety chains. Separate brake system required for trailers over 1000 lb.
- Towing a Trailer: Be aware of different laws. Check hitch, brakes, tires, and mirrors. Secure items. Vehicle/trailer combination is heavier, requires longer stopping distances, and is less stable. Avoid sudden maneuvers. Practice turning, stopping, and backing up.
- Towing a Boat: Not recommended by Airstream due to sensitive electronics. Do not submerge touring coach in water.
- Tracking: Trailer wheels track differently. Use truck/trailer-type fender or door grip rear view mirrors. Maintain plenty of space. Signal and pull over for faster traffic.
- Brake Controller: Activates trailer brakes when tow vehicle brakes are applied. Helps maintain straight line. Practice on clear highway.
- Backing Up: Go slow. Turn steering wheel bottom in desired trailer direction. Practice.
- Passing: Exercise extreme care. Requires additional distance.
- Parking Your Touring Coach: Keep right foot on brake, shift to N, place wheel chocks, release brake, press electronic parking brake button, shift to P. Turn wheels toward curb on inclines.
- Additional Towing Information: Refer to Ram ProMaster Owner’s manual. Never open radiator cap when hot.
- Towing Your Touring Coach: Use qualified professional towing service companies.
- Safety Check List: Thorough check before each trip.
- Exterior Check List (Before Entering Vehicle): Tires, exterior components, water/waste connections, stored items, fluid levels, exterior lights.
- Interior Check List (Before Driving): Doors, water pump/faucets, refrigerator, heavy items, table, bed, cooktop, countertops, internal stowage, lights/switches, driver’s seat, seatbelts, pedals, mirrors, window coverings, child restraints.
Maintenance
- Maintenance Schedule: Regular maintenance prevents premature breakage and erratic operation.
- First 20 Hours: Generator oil change.
- Every 1,000 miles or 60 days: Smoke/CO alarm test/battery replacement, tire pressure check, GFCI circuit breaker test/record.
- Once a Month: Hydronic system burner run.
- Every 5,000 miles or 90 days: Wheel lug nuts torque, 7-Way plug spray with contact cleaner.
- Every 10,000 miles or 6 months: Tires inspection/rotation, windows/door seals cleaning/protectant, exterior wax.
- Every Year: Hydronic system coolant alkalinity test/exhaust system inspection, seams check/reseal, interior cabinets inspection/silicone spray.
- Every Year or 150 Hours: Generator oil change, air filter element replacement.
- Every 450 Hours: Generator spark plug, fuel filter, air filter element replacement.
- Once every three years: Hydronic system heat transfer fluid/boiler antifreeze replacement.
- Suggested Maintenance and Replacement Parts: Lists Airstream part numbers for exterior and interior 12-volt lighting and replacement breakers.
- Tire Care: Traction, steering, stopping. Maintain proper inflation. Inspect for damage. Store in cool, dry area.
- Tire Inspection and Storage: Inspect sidewalls, tread, valve stems, wheel rims for damage. Replace tires with less than 2/32 inch tread.
- Plumbing:
- Water System (Self-Contained): City water hookup, gravity fill, fresh water tank, drain valve, water pump, hot/cold lines, hydronic heating.
- Water Pump and Strainer: Behind curbside bed base. Turn on via Multiplex screen. Strainer at pump inlet. Clean dirt/debris.
- Disconnecting the Strainer/Water Pump Lines: Self-sealing, quick-connect fittings.
- Sanitizing: Periodic sanitization with RV fresh water cleaner/deodorizer or bleach/water mixture.
- Sanitizing the Fresh Water System: Determine bleach amount (Tank Capacity x .13), pour into tank, fill with water, run pump, open faucets until chlorine odor, let sit for 4 hours (or 1 hour if double bleach), drain, refill, flush.
- Drain and Waste System: Waste-holding tanks (black and gray) with dump valves. Drain black tank first, then gray. Use black tank flush.
- Black Water Tank Flush: Garden hose connection to spray tank interior.
- Drain Systems Cleaning: Use household ammonia or tri-sodium phosphate. Avoid petroleum distillates, dish detergent, abrasive cleaners.
- Winterizing and Storage: Protect plumbing, waste systems, and battery from freeze damage.
- Instructions for Winterization: Level coach, turn off water pump, disconnect city water, open faucets, open low-point drain valve, drain sprayer port, apply air pressure (MAX 50 PSI) at city water inlet, operate toilet foot pedal, remove quick-connect outlet fitting from water pump, run pump briefly, check strainer, reconnect pump if adding antifreeze.
- Optional-Additional Steps for Winterization: Add non-toxic RV antifreeze using winterize valve and water pump.
- Water Heater Winterizing: Drained with low point drain valves.
- Restoring Service: Close drain valve, reconnect water pump line, add water to fresh water tank, turn on water pump, open/close faucets until water runs clear, turn off water pump, hook up city water, open faucets, recheck water clarity.
- Toilet: Dometic 301. Winterize using procedures on page 9-10. Ensure toilet valve is open when blowing water out. Do not flush frozen water.
- Electrical Diagrams: 12-Volt Main Schematic, 30-Amp 120-Volt Schematic (USA and Canada), Audio and Video Schematic, Standard 30-Amp Circuit Breaker Layout (USA and Canada).
- Solar Panel Wiring: Diagram shows wiring for solar systems.
- Fresh Water Layout: Diagram of fresh water plumbing.
- FAQs and Answers: Common questions regarding generator, battery, inverter, plumbing, and audio-video systems.