Installation
3.7.12 Match Unit ID with IP Address
Note: You can skip this step if you did not change the address of the unit from the default 172.168.11.X where
X is the unit #.
The IP address of each unit must be matched to a unit ID. When this step is done, each unit will have a
corresponding IP address.
1. Hold the Esc button until the main screen is displayed.
2. From the Main Screen, press Prg and enter the password (0004).
3. Press Down until the cursor is over “Control Config” and press Enter.
4. The cursor should be over “Network”. Press Enter.
5. Press Down until the cursor is next to “Network configuration”
6. Press Enter until the cursor is next to “Unit ID”.
7. Use the Up and Down buttons to select a Unit ID and press Enter to confirm.
8. Press Enter until the cursor is over the IP address.
9. Use the Up and Down buttons to change the value of each part of the IP address. When finished, press
Enter to move to the next part of the IP address.
10. Once done, repeat steps 5-8 until each Unit ID in the control network has been assigned an IP address.
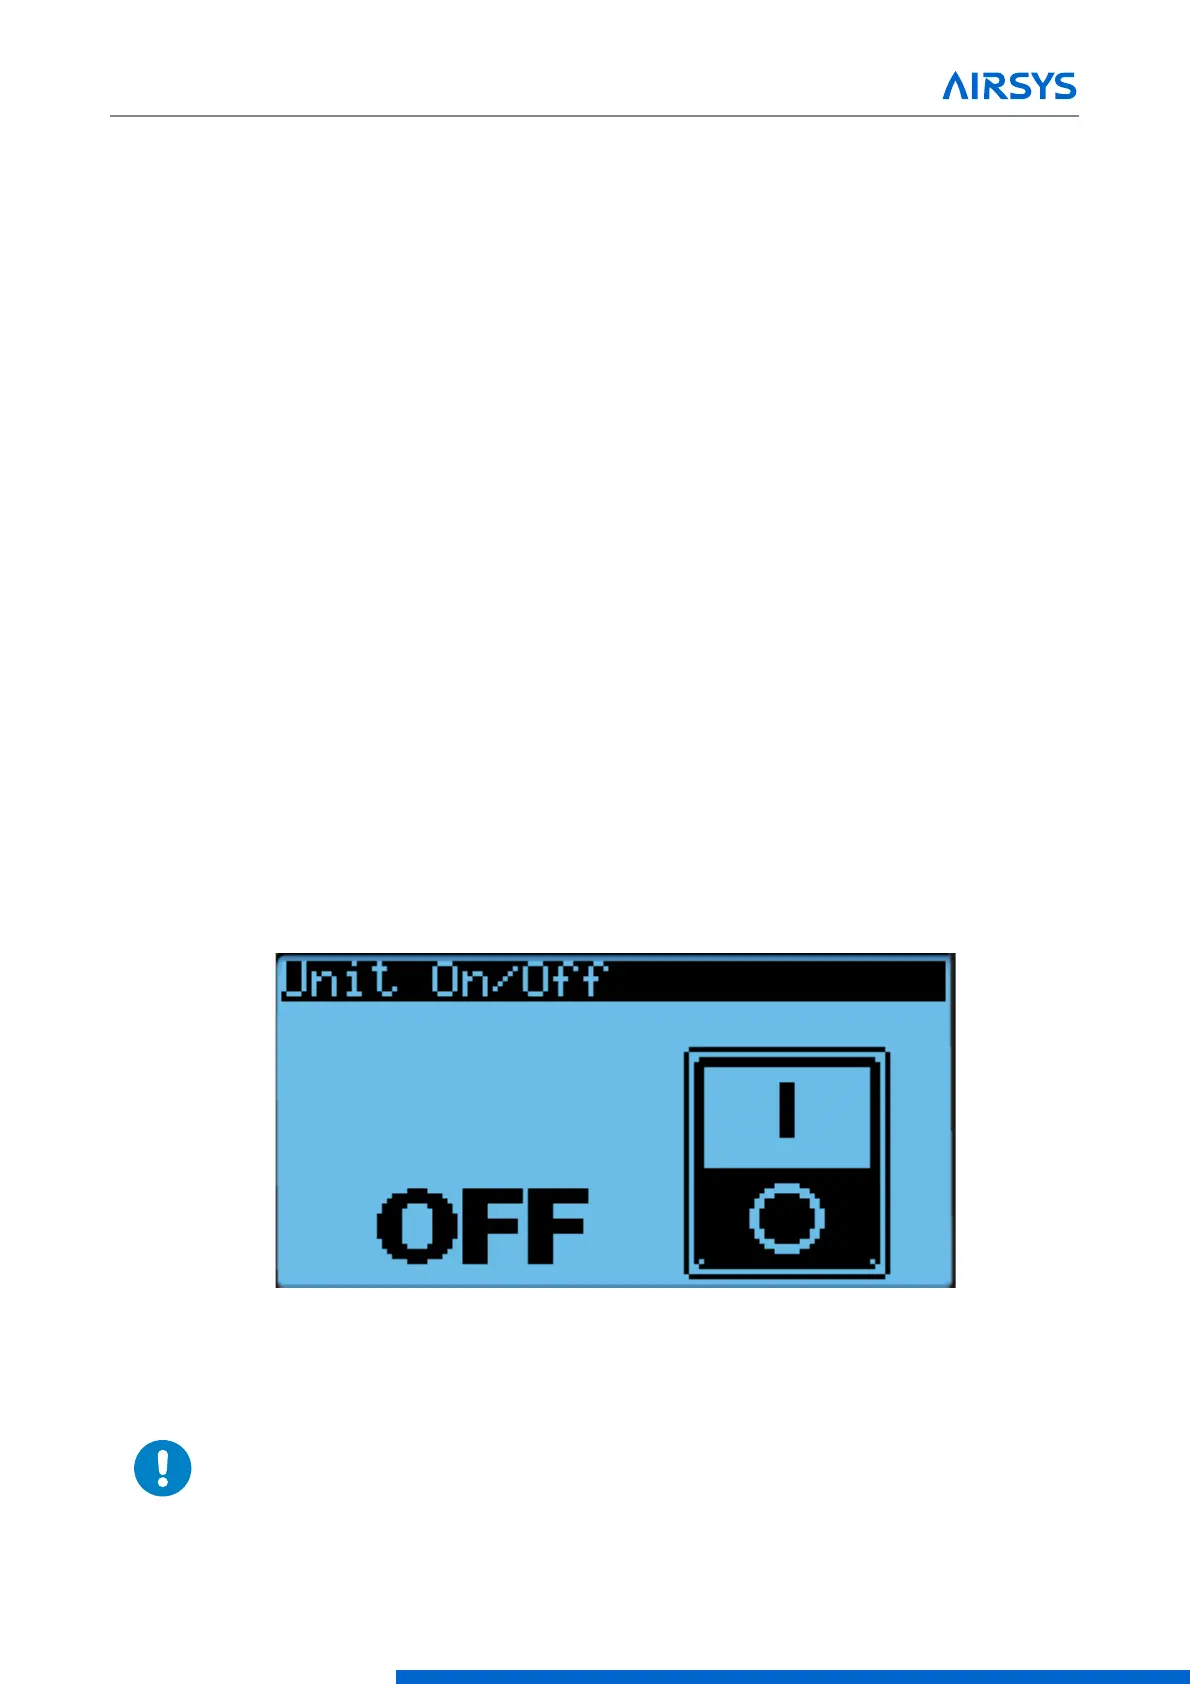
3.7.13 Turn the HVAC System On
1. Press Esc until the main screen is displayed.
2. Press Down until a power icon is displayed in the lower right corner of the display.
3. Press Enter.
4. Press Up until ON is displayed and then press Enter.
Figure 3-14 On/Off Screen
Warning. Never leave the site with the HVAC system in the off state. The site
will have no cooling, which likely will result in a high temperature alarm requiring
an urgent site visit to correct. When the HVAC system is on, the status in the
bottom left corner of the main screen should read “ON”.