6
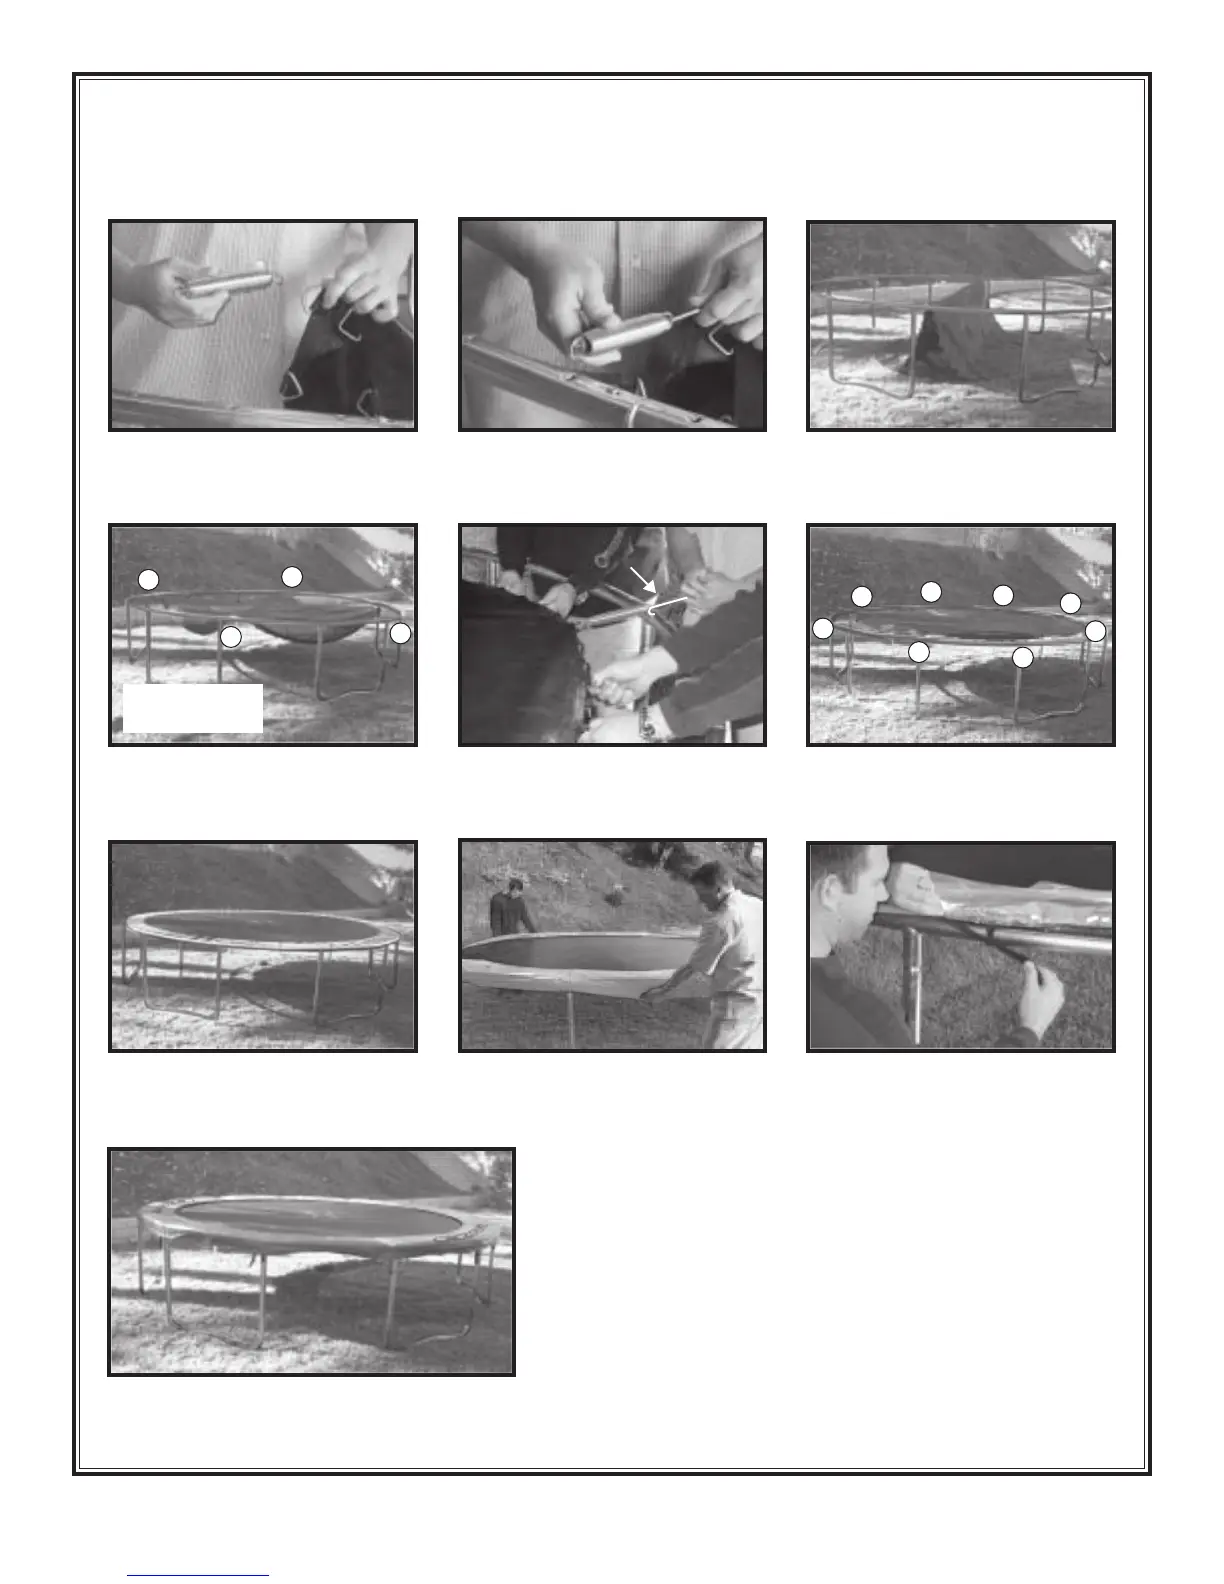
TRAMPOLINE MAT & COVER ASSEMBLY
1 With stitching portion facing down,
lay jumping mat inside frame and
attach a spring into one of the triangle
rings on the mat.
2 Attach spring with ring to frame.
WARNING: Trampoline is under heavy tension,
more effort may be required to attach springs to
frame. Be careful not to pinch fingers or slip.
Serious injury may occur!
DANGER: 3 adults may be required to complete placement of all springs ias illustrated in STEP 12. Springs will create high levels
of tension when assembled. Please use extreme caution not to pinch your fingers.
4 Attach two more springs half
distance between the first two,
directly across from each other.
8 Lay yellow frame cover on outer edge
so springs are covered - just like a
shower cap.
9
7 Attach remaining springs until all
springs are placed on frame.
10 That’s it! Your AIRZONE trampoline
is complete!
20 holes in each
quarter section
1
1
3
4
5
6
7
8
2
2
3
4
3 Repeat this step directly across from
where you attached first spring.
(There should be 41 holes on either side of these
two springs).
5 Springs under heavy tension may
require adjacent springs to be
attached first. Use spring tool as
shown.
6 Repeat the process of placing the spring
half distance among the already placed
springs. To even out tension, attach the
opposite end of the previous spring.
completely covers the top rail. Tie all
Rings on mat. These inner straps MUST
normal use of the trampoline. Do not tie
to springs.