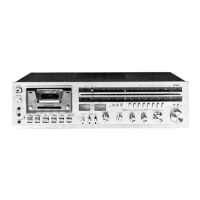
Do you have a question about the Aiwa AF-3090 and is the answer not in the manual?
General specifications including semiconductors, power, dimensions, and weight.
Detailed specifications for the FM tuner performance and capabilities.
Detailed specifications for the AM tuner performance and capabilities.
Detailed specifications for the tape deck mechanisms and performance.
Detailed specifications for the pre-amplifier stages and inputs.
Detailed specifications for the power amplifier output and performance.
Overview of the main parts removal sequence following a flowchart.
Step-by-step instructions for removing the main cabinet assembly.
Instructions for safely removing the tuner circuit board.
Instructions for removing the FM muting and Dolby FM circuit board.
Instructions for removing the power supply circuit board.
Instructions for removing the bias and equalizer circuit board.
Instructions for removing the heat sink and main circuit board.
Instructions for removing the front panel components.
Instructions for removing the counter and center meter assemblies.
Instructions for removing the Hall IC circuit board.
Instructions for removing the dial lamp assembly.
Instructions for removing the switch circuit board.
Instructions for removing the volume and tone control circuit board.
Instructions for removing the main tape mechanism block.
Instructions for removing the record/playback circuit board.
Instructions for removing the flywheel assembly.
List of included accessories and package items.
Diagram and list of hardware types used in the unit.
Diagram showing the exploded view of the main chassis and front panel.
Diagram showing the exploded view of internal chassis components.
Diagram showing the exploded view of power supply and circuit boards.
Diagram showing the exploded view of tape mechanism and front controls.
Diagram showing the exploded view of the tape transport mechanism.
Diagram showing the exploded view of the tape mechanism and switches.
Detailed list of all mechanical parts with part numbers.
List of main electrical components for various circuit boards.
Required instruments and general steps for regulator adjustments.
Procedure for aligning the AM intermediate frequency stages.
Procedure for aligning the AM radio frequency stages.
Procedure for aligning the FM intermediate frequency stages.
Procedure for aligning the FM radio frequency stages.
Procedure for adjusting the bias trap for tape recording.
Procedure to adjust the equalizer for Fe-Cr tape recording.
Procedure to adjust the equalizer for CrO2 tape recording.
Procedure to adjust the equalizer for LH tape recording.
Procedure to adjust sensitivity for CrO2 tape record/playback.
Procedure to adjust sensitivity for Fe-Cr tape record/playback.
Procedure to adjust sensitivity for LH tape record/playback.
Procedure to adjust the FM muting sensitivity level.
Procedure for adjusting the FM 19kHz pilot tone signal.
Procedure to adjust FM stereo separation.
Procedure for adjusting the Dolby FM signal level.
Procedure to adjust the tape head azimuth for optimal playback.
Procedure to adjust tape bias for Fe-Cr tape.
Procedure to adjust playback frequency response for tape.
Procedure to calibrate the audio level meter.
Procedure to calibrate the peak audio indicator LEDs.
Procedure to adjust the Dolby system playback level.
Procedure to adjust tape bias for LH tape.
Procedure to adjust tape bias for CrO2 tape.
Procedure to adjust the tape transport speed.
Procedure for adjusting the main amplifier idling current and DC balance.
Diagram illustrating signal levels throughout the audio path.
Complete circuit schematic of the receiver.
Wiring diagram illustrating connections on the first set of boards.
Wiring diagram illustrating connections on the second set of boards.
Wiring diagram illustrating connections for power and main amplifier.
| Type | Car Stereo System |
|---|---|
| Model | AF-3090 |
| Brand | Aiwa |
| CD Player | Yes |
| MP3 Playback | Yes |
| USB Port | Yes |
| Bluetooth | No |
| Equalizer | Yes |
| Auxiliary Input | Yes |
| Remote Control | Yes |
| Detachable Faceplate | Yes |
| Tuner | AM/FM |