Do you have a question about the Aiwa NSX-A707 and is the answer not in the manual?
Guidelines for safe and optimal placement of the unit.
Instructions on connecting and using the power source safely.
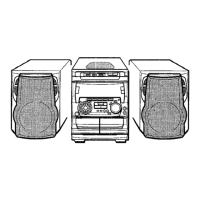
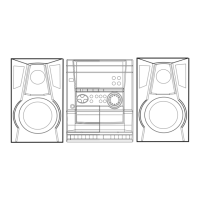
Connecting speakers, antennas, and accessories to the main unit.
How to connect the right and left speakers to the main unit.
Verifying the unit's rated voltage matches the local voltage.
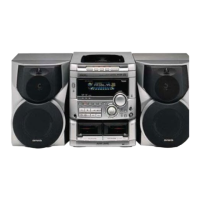
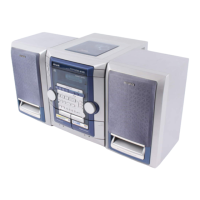
Lists system components and accessories to check.
How to insert batteries into the remote control.
Indicators for replacing remote control batteries.
Explains the dual function buttons on the remote.
Describes the PRESET function on the remote.
How to power on the unit using function buttons or POWER.
How to power off the unit.
Controls for the unit's top window illumination.
Steps to adjust the display brightness levels.
Description of the unit's demo mode.
Adjusting sound settings like Volume, T-BASS, and BBE.
How to adjust the main volume using the unit or remote.
Enhancing high-frequency sound clarity with the BBE system.
Enhancing low-frequency sound realism with the T-BASS system.
Steps to select a rhythm pattern from the available list.
Adjusting the tempo of the selected rhythm pattern.
How to stop the rhythm play function.
Selecting pre-defined equalization settings like Rock, Pop, Jazz.
Customizing equalization by adjusting low and high frequency levels.
Connecting and using headphones with the unit.
Selecting pre-programmed surround sound modes like Disco or Live.
Tuning into radio stations manually using buttons or remote.
How to reduce noise by switching to mono reception.
Adjusting the AM tuning interval from 10 kHz to 9 kHz.
Using auto search to find stations quickly.
Directly selecting preset stations using numbered buttons on remote.
Removing a stored preset station.
Basic operations for playing cassette tapes.
Procedures for inserting tapes and choosing playback decks.
Setting reverse modes, starting playback, and using the tape counter.
Fundamental operations for playing compact discs.
How to load discs and start playback, including direct play options.
Managing playback: stopping, pausing, resuming, and track skipping.
Removing discs and replacing them during playback.
Displaying remaining time and selecting tracks.
Playing all tracks on a disc or all discs in random order.
Repeating a single disc or all discs.
Displaying the programmed track list.
Erasing the programmed track list.
Adding more tracks to an existing program.
Modifying the programmed track sequence.
How to record audio from various sources onto tape.
Preparing tapes and setting the recording start point.
Inserting 4-second blank spaces for Music Sensor function.
Procedure for erasing recorded content from a tape.
Adding tracks from different discs to the current AI edit program.
Explains how editing time relates to actual cassette tape length.
Verifying the sequence of programmed tracks.
Modifying programmed tracks for side A or side B.
Erasing the entire programmed edit session.
Mixing microphone sound with music sources.
Recommended microphones, vocal fader, and multiplex functions.
Reserving up to 15 tracks for karaoke playback.
Managing karaoke track reservations: adding, checking, stopping, skipping, clearing.
Setting the current time on the unit.
Using the remote to set the clock.
Viewing the currently set time.
Changing the clock display format to 24 hours.
Setting the timer to automatically turn off the unit.
Viewing the remaining time on the sleep timer.
Deactivating the sleep timer.
Ensuring the clock is set correctly before setting the timer.
Viewing the set timer time, source, and duration.
Temporarily deactivating the timer standby mode.
Operating the unit normally with the timer set.
Instructions for timer recording from TUNER or VIDEO/AUX.
Connecting external audio equipment to the unit.
Connecting powered subwoofers.
Connecting an outdoor antenna for better FM reception.
Connecting analog sound sources like turntables or VCRs.
Connecting an MD player to the unit.
Outputting analog sound signals to external audio equipment.
Outputting digital CD audio signals to compatible equipment.
Connecting surround speakers to the unit.
How to play audio from connected external sources.
Selecting VIDEO/AUX or MD as the playback source.
Renaming the displayed source name for VIDEO/AUX.
Adjusting the volume of external sources.
Routine care and maintenance of the unit for optimal performance.
Instructions for cleaning the unit's exterior surfaces.
Cleaning tape heads and paths using cleaning cassettes or swabs.
Demagnetizing heads to prevent noise and restore tape quality.
Proper handling and cleaning of discs.
Tips for storing and handling cassette tapes.
Guide to diagnosing and resolving common unit issues.
Troubleshooting common issues related to sound and display.
Troubleshooting radio reception problems like static or distortion.
Troubleshooting issues with tape playback, recording, or erasure.
Troubleshooting problems with CD playback.
Steps to reset the unit to its default settings.
Detailed specifications for the CX-NA707 main unit.
Detailed specifications for the SX-NA702 speaker system.
Trademark information for the BBE system.
Copyright notice regarding recordings.
Warning about unauthorized modifications to the product.
| Brand | Aiwa |
|---|---|
| Model | NSX-A707 |
| Category | Stereo System |
| Language | English |