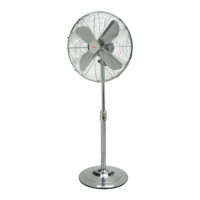
3 Locate the fan blades (item 3) and align the centre of the blades over the metal spindle
protruding from the motor unit. The intent on the metal spindle aligns with the locking
screw on the fan blades. After the blade has been put on, tighten the locking screw on
the fan blades and ensure that the blades is secured to the motor unit.
4 Align the front guard to the rear guard and lock into place with 3 locking tabs
that are located on the guard. Locate the security nut and bolt (item 1) and secure
the front and rear guards together with security nut and bolt. This is a safety
precaution to prevent the accidental dismantling of the fan.
5 Locate the pedestal base of the fan(item 13). Insert the base of the stand (item
10) into the pedestal base,then fasten the base (item12,13) and the pole with the
screws provided.
6 Undo the thumbscrew at the top of the stand(item 10) and align the motor unit
complete with guards before fastening.
THERMAL CUT-OUT DEVICE
A Thermal protector device was mounted in the motor. When overheats due to
various reasons, the temperature of the motor reaches the fusing point, it will cut
o automatically, make the fan safe eciently. When the protector is fused, the fan
should be eliminated trouble and replace a new thermal protector before the fan is
used again.
CLEANING INSTRUCTIONS
1. Be sure to unplug the fan from electrical supply source before cleaning.
2. Plastic parts should be cleaned with mild soap and a damp cloth or sponge.
Thoroughly remove soap lm with clean water.
3. To disassemble each part, reverse the order of assembly.
Distributed by Tempo (Aust) Pty Ltd ABN 70 106 100 252
Unit8/14RodboroughRd,FrenchsForest,AustraliaNSW2086
Customer Help Line : 1300 886 649 (AU) | 0800 836 761 (NZ)
Telephone:(02)99752199Fax:(02)99752688
Email: info@tempoaustralia.com.au
 Loading...