English
• 3.2" backlit LCD
• Dual USB port charger(output 5V 1.1A+5V 2.1A)
• Dual alarm clock and choose to wake up to radio or default
melody snooze function
• Digital FM radio
• 3.5mm stereo line-in cable for playing other audio devices
• Built-in thermometer(Celsius or Fahrenheit)
FUNCTIONS
Open K1's box, and you will find:
• K1 Alarm Clock x 1 • Aux-in Cable x 1
• Power Adapptor x 1 • User Manual x 1
WHAT'S INCLUDED
DETAILS ABOUT BUTTONS
1. About Time - Time Setting, Alarm Setting, Snonze Setting
1.1. Time Setting
• In the energized state, long press the rotary button to enter time
setting, when HOUR figure begins to flash, please revolve the
rotary button o adjust HOUR. Then, short press the big button to
confirm the HOUT setting and begin to set the MINUTES. WHen
MINUTES figure begins to flash, please revolve the rotary button to
adjust MINUTES. Then, short press the big button to confirm the
MINUTE setting and exit time setting.
• Press 12H / 24H button can be switched time display mode for 12
hours(AM / PM) or 24 hours display.
Note: Time setting can not be adjusted in FM or AUX mode (There is
a symbol of FM or AUX in the upper left part of LCD screen).
1.2. Alarm Setting
• In theenergized state, long pressing alarm 1 button to enter alarm
setting, when HOUR figure begins to flash, please revolve the
rotary button to adjust HOUR. Then, short press alarm 1 button to
confirm the HOUR setting. When MINUTES figure begins to flash,
please revolve the rotary button to adjust MINUTES. Next, short
press alarm 1 button to confirm the MINUTE setting and begin to
set ring tone. Please revolve the rotary buttton to choose FM radio
or buzzer after confirming the Alarm setting. (If you choose FM
radio as ring tone, there is a FM symbol in the middle-left part of
screen. If you choose buzzer as ring tone, there is a Wi-Fi symbol in
the middle-upper part of screen). Then, short press alarm 1 button
to confirm fing tone and begin to choose alarm volume. Please
revolve the rotary button to choose the alarm volume. Finally,
short press alarm 1 button to confirm.
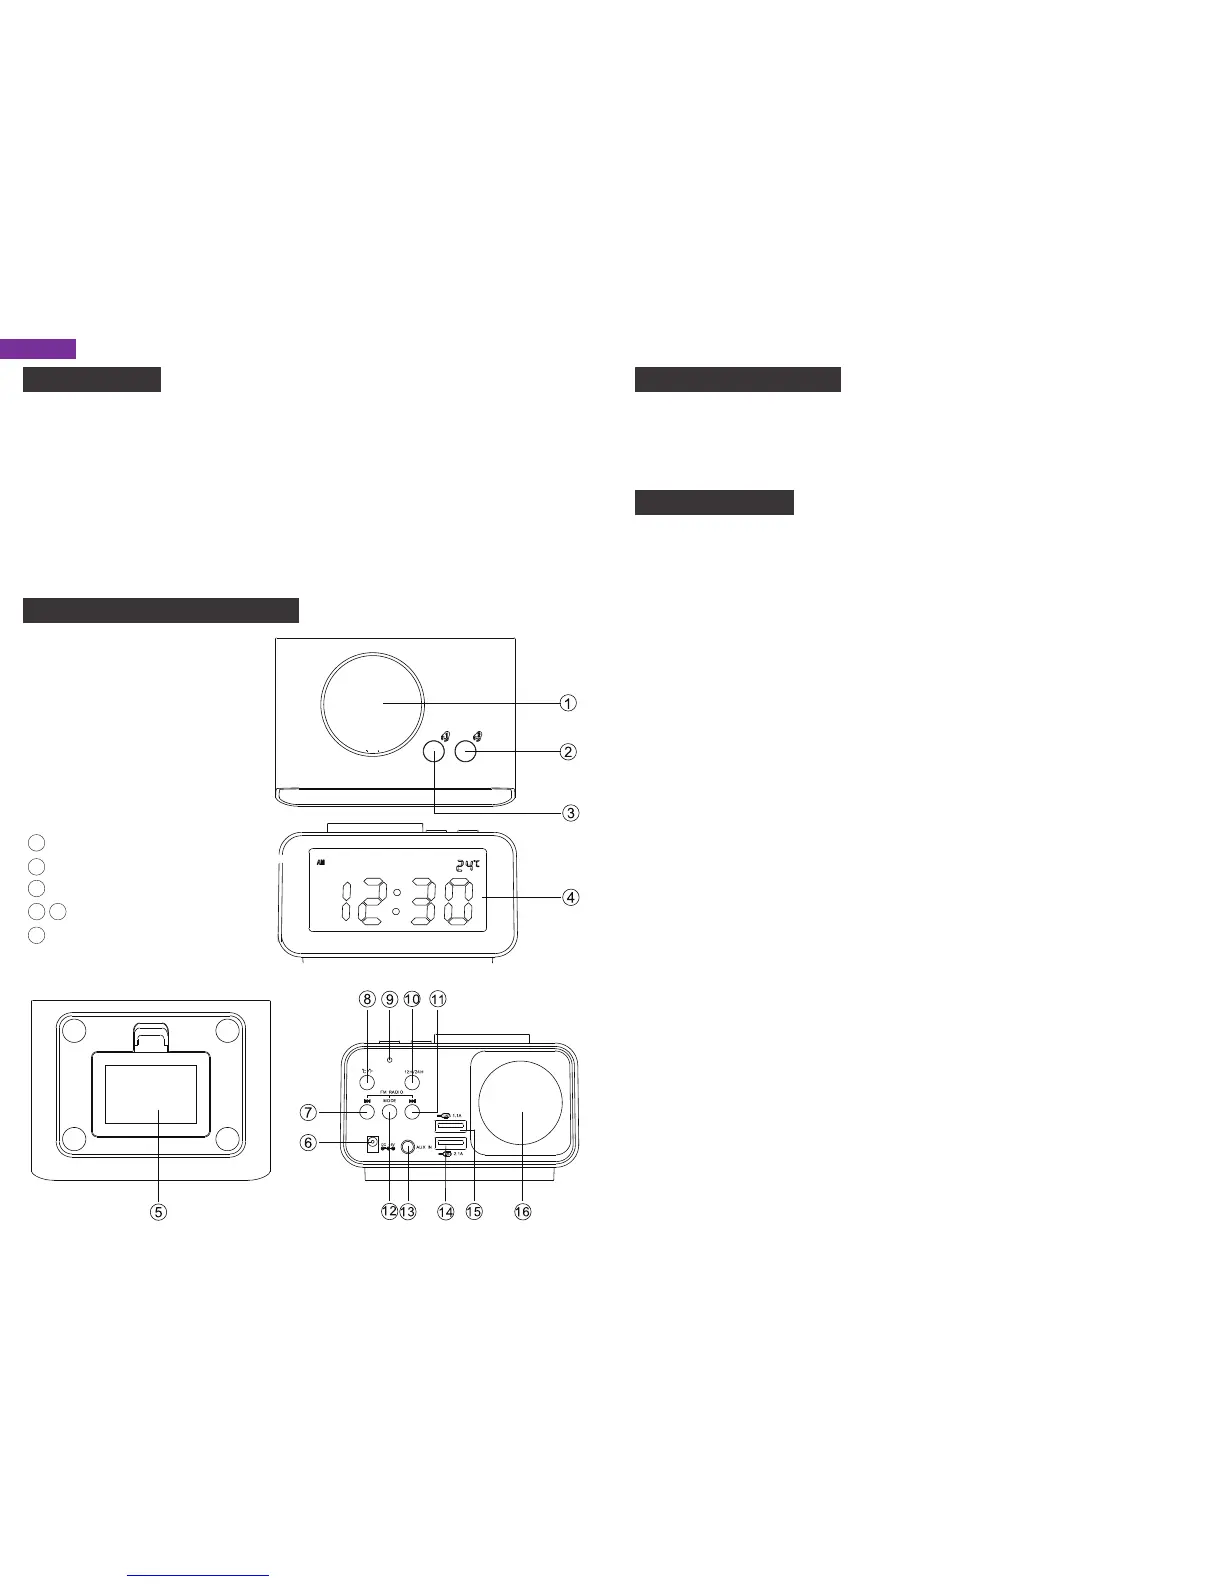
INSTRUCTION
① Rotary Button
②③ Alarm Setting Button
④ LCD Screen
⑤ Battery Compartment
⑥ Power Input Jack
⑦ Previous Button
⑧ Temperature Switch(°C/°F)
⑨ Temperature Sensor
⑩ 12H / 24H Switch
Next Button
Mode Button
Aux in Jack
USB Port(1.1A / 2.1A)
Speaker
11
12
13
14 15
16
1
2
 Loading...