Do you have a question about the AL-KO Robolinho 100 and is the answer not in the manual?
Stops blades and drive when lifted.
Detects obstacles and changes direction.
Stops machine on steep slopes.
Connects to power and generates signal.
Placement and securing of the base station.
Securing the boundary cable and connecting it.
Connects boundary cable to base station terminals.
Connects transformer to base station with low-voltage cables.
Opening cover and checking LEDs for connection status.
Displays current status or selected menu.
Stops the lawnmower and blades.
Store PIN/PUK codes securely to prevent unauthorized access.
Handling incorrect PIN/PUK entries and lockout periods.
Place the Robolinho in its starting position before operation.
Steps to power on the Robolinho and initial display.
Select the preferred language for the interface.
Enter the initial factory PIN code for registration.
Procedure to change the existing PIN code.
Setting the correct date for scheduling.
Automatic calibration procedure to gauge signal strength.
Mowing window preset at factory is displayed after calibration.
Robolinho is ready for mowing with factory settings.
Set mowing times for specific days or all days.
Access to week program and program info.
Access to time, date, language, PIN, button tones, etc.
Access to software status, faults, etc.
Configure mowing for all days of the week.
Explanation of symbols used in the program menu.
Turn audible button feedback on or off.
Adjust the screen contrast for better visibility.
Displays date, time, fault code, and message for errors.
Adjust cutting height for thick grass.
Recommend mowing during cooler times.
Steps to open the cover for height adjustment.
Adjusting the cutting height lever.
Battery charging status and behavior.
Robolinho returns to base for charging.
Routine checks for damage.
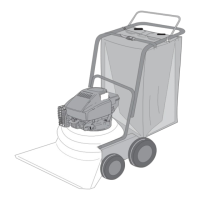
Instructions for safe transport of the lawnmower.
How to clean the lawnmower and blades.
Cleaning and checking charging contacts.
Checking base station contacts.
Step-by-step guide to replacing cutting blades.
General troubleshooting table for common issues.
Possible causes and solutions for low battery issues.
Solutions for incorrect PIN code entries.
Causes and solutions for uneven mowing.
Solution for tilt sensor errors.
Solution for lift sensor errors.
Solution for bumper deflection errors.
Solutions for the lawnmower being outside the loop.
Solutions for battery errors or low charge.
Solutions for battery exhaustion.
Solutions for faulty charging electronics.
Solutions for battery overheating.
Solutions for blocked left or right wheel.
| Type | Robotic lawn mower |
|---|---|
| Cutting width | 280 mm |
| Cutting system | Rotary blades |
| Recommended lawn area | 700 m² |
| Maximum cutting height | 60 mm |
| Minimum cutting height | 30 mm |
| Grass collecting volume | - L |
| Cutting clearance adjustment | 7 |
| Power source | Battery |
| Battery voltage | 18 V |
| Battery capacity | 1.5 Ah |
| Cordless | Yes |
| Weight | 8000 g |
|---|