STEP 20
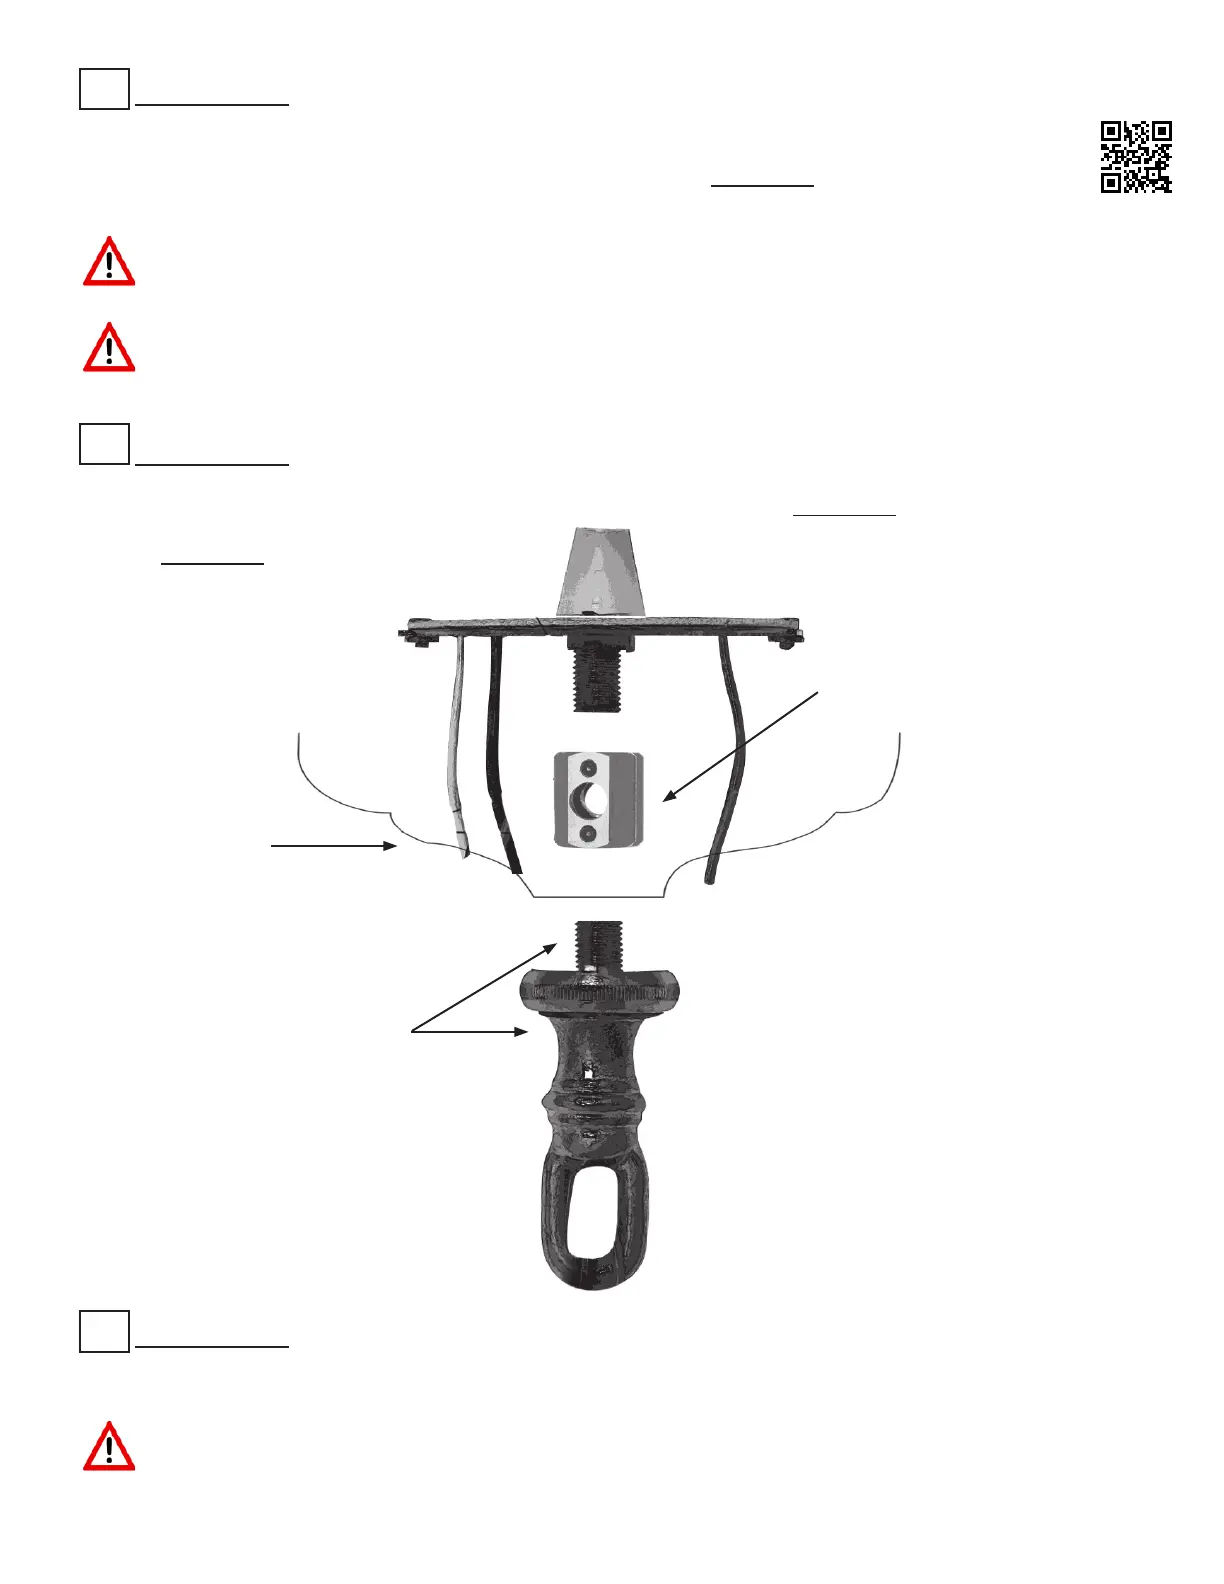
Fully thread screw collar loop or threaded stem that was supplied with chandelier to 1/4 IPS xture coupler.
If chandelier was supplied with a 1/8 IPS, 3/8 IPS, or 1/2 IPS screw collar loop or threaded stem, contact
Aladdin Light Lift (877) 287-4601 to obtain proper coupler. See Diagram H.
https://youtu.be/-MARQGfesIQ
Never install a chandelier on an ALL200 using metric threaded ttings. ey will not thread together
properly and could cause the chandelier to fall, which could cause death, personal injury, and/or
property damage. Only use IPS threaded ttings.
Never hang a chandelier from an ALL200 using anything but the Aladdin Light Lift supplied xture
coupler, bottom contact plate, and dowel pin. is could cause the chandelier to fall, which could cause
death, personal injury, and/or property damage.
STEP 21
Attach chandelier canopy to screw collar loop using screw collar rings. See Diagram H.
1/4 IPS Fixture Coupler
readed Stem/Screw Collar
Loop Supplied with
Chandelier
STEP 22
Adjust chandelier chain to desired length and attach to screw collar loop.
Never cut, modify, or adjust the winch cable and never install an ALL200 with a cut, modied or
adjusted winch cable. Adjust the chandelier elevation by adjusting the chandelier chain or stem. An
ALL200 installed with a cut, modied, or improperly adjusted cable could cause the chandelier to fall,
which could cause death, personal injury, and/or property damage.
Diagram H
Canopy
 Loading...