6
Camera mounting instructions
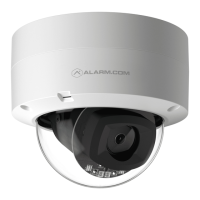
❶ The camera has a cover that must be removed during the installation process. Place
the camera on a flat surface with the lens pointed upwards. Hold the camera body
with one hand and twist the cover counterclockwise with your other hand until the
cover unlatches, then lift the cover away.
❷ The camera should be mounted 8 feet or more above the ground on a flat surface, like
a wall or ceiling.
❸ Ensure that there are no obstructions near the camera. Obstructions can lead to poor
night vision performance.
❹ Use the included drill template to mark the desired location of the holes for the RJ45
ethernet interface and mounting screws. Drill a 1” hole in the center of the template for
the RJ45 ethernet interface. If mounting to drywall, drill three 9/32” holes and insert
the included M5 wall anchors. If mounting to a solid surface, like wood, drill three
1/8th” pilot holes.
❺ Connect the camera to ground. The ground terminal is located at the end of the green
wire and is designated by the ground symbol
. To ground the device, use the included
nut to connect the ground wire to the ground terminal, then connect the other end of
the ground wire to an approved ground according to Article 250 of the National
Electrical Code (NEC). If the camera needs to be removed in the future, ensure that
the ground connection is removed last.
❻ Connect the camera to a properly terminated, unplugged ethernet cable. Seal the
connection using the included weather resistant RJ45 cap. For non-PoE connections,
connect the 12VDC connector to an unplugged 12VDC adapter. Insert the cables and
ground wire into the RJ45 ethernet interface clearance hole.
❼ Line up the camera with the three holes created in step 4. Use the included M5x40mm
screws to fasten the camera to the mounting surface.

 Loading...