3
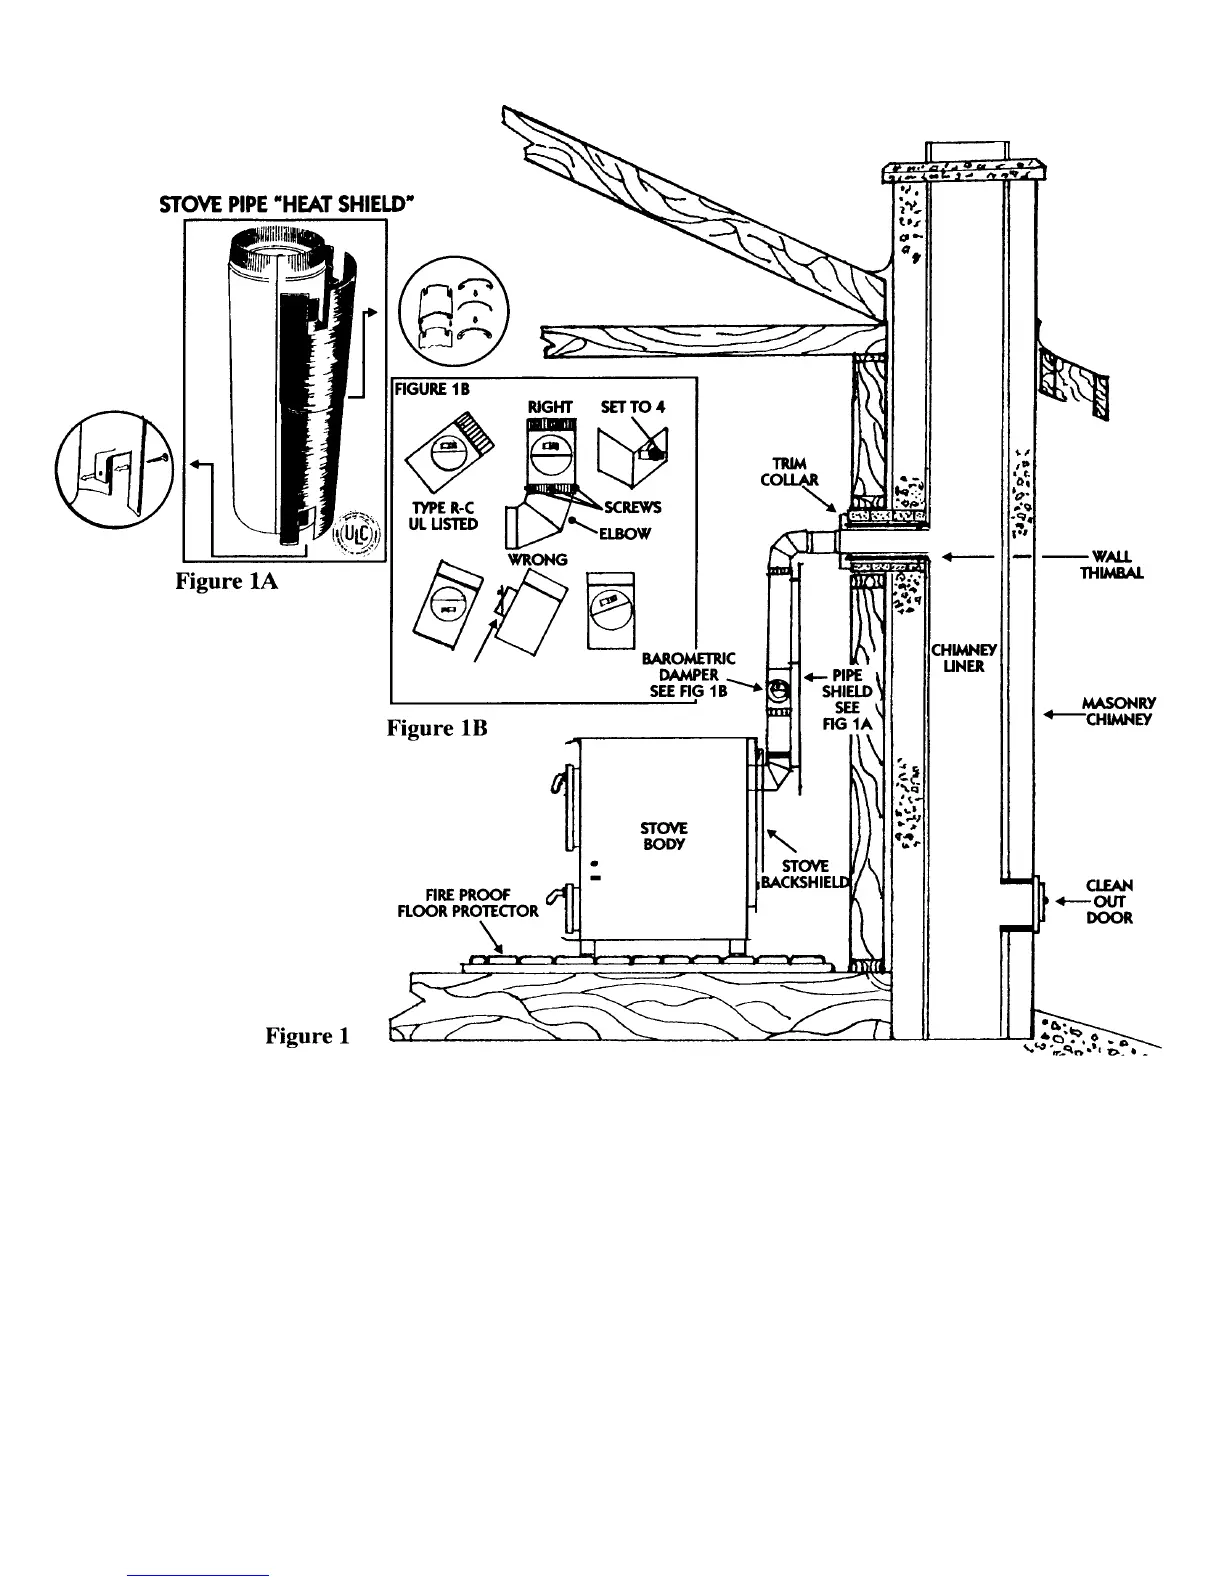
E) Place a 6" elbow (not provided) into pipe coming
out of wall. Add a piece of pipe to join the area
between this elbow and the Barometric Damper,
attach using three screws at each joint.
F) Pipe shield should now be attached with screws on
wall side of pipe. (Note: pipe shield must be
attached to pipe from bottom of lower elbow to at
least 1" of bottom of top elbow. If the pipe shield is
too short, another should be purchased. See Fig. 1
and 1a)
STEP 3 Installation of Glass
A) Remove View Door from stove body. Lay door on a
flat surface. Remove the 3 - 7/16 bolts with tabs.
B) Locate View Glass and Gasket, place gasket material
around entire outside edge of glass. Insert glass into
back slotted area of view door, reattach bolts with
tabs. (Do not over tighten bolts)
STEP 4 Final Preparation
A) Locate Floating Baffle, open view door, look
through door to upper back of stove body and you
will see the baffle hanger. Place bend of baffle on
hanger, center with exhaust hole. (See Fig. 2)
B) Open View Door and see that the Fire Brick is
properly positioned. (See Fig. 3) the back and front
brick should sit against the front and back of the
stove body, flush to metal. End brick should push to
sides of the stove body, locking onto lugs on grate
carriage and wedging the front and back bricks.
OPTIONAL FOR REDUCED CLEARANCE