EasyManua.ls Logo

ALASKA SA-398 - User Manual

ALASKA SA-398
3 pages
Print Icon
To Next Page IconTo Next Page
Loading...
1 | P a g e
Suspended Ceilings-Grid Mount Only!
Patent Pending
CAUTION!
All electrical connections must be in accordance with the local codes,
ordinances, and the National electrical Code. If you are unfamiliar with methods
of electrical wiring, secure the services of a qualified electrician.
1. Be sure electricity is turned off at the main fuse box or
circuit breaker panel before wiring.
2. Be cautious! Read all instructions and safety information
before installing your new Tile Fan.
WARNING! To Reduce The Risk Of Fire Or Electric Shock, Do Not Use This Fan with Any Solid-State Speed Control Device
NOTE: The important safeguards and instructions appearing in this manual are not meant to cover all possible conditions and situations that may occur.
It must be understood that common sense, caution and care are factors which cannot be built into this product. These factors must be supplied by the
person(s) installing, caring for and operating the unit.
Tile Fan Installation:
Step1. (Fig. 1) Align holes from Airflow Grille to the plastic posts from the fan assembly and secure with threaded grille cap.
Step2. (Fig. 2) Choose the location for the Tile Fan taking into consideration a minimum of 8” depth clearance. Remove the ceiling tile where the Tile
Fan will be installed and a second ceiling tile next to it for access to ceiling.
Step3. (Fig. 3&4) Lift and shift Tile Fan onto the framework grid. Make sure Tile Fan rests securely on framework.
TILE FAN INSTRUCTION MANUAL
READ AND SAVE THESE INSTRUCTIONS
Model: SA-398
Question and Answer IconNeed help?

Do you have a question about the ALASKA SA-398 and is the answer not in the manual?

Summary

General Safety Warnings

Solid-State Speed Control Restriction

Do not use this fan with any solid-state speed control device to reduce risk of fire or electric shock.

Electrical Connection Safety

Ensure electrical connections comply with codes and use a qualified electrician; turn off power before wiring.

Tile Fan Installation Steps

Step 1: Align Airflow Grille

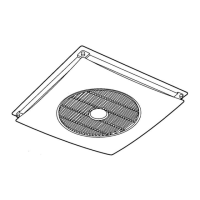
Align airflow grille holes to plastic posts of the fan assembly and secure with threaded grille cap.

Step 2: Choose Location and Prepare Ceiling

Select location with 8" clearance, remove ceiling tile and adjacent tile for access.

Step 3: Mount Tile Fan on Framework

Lift and shift Tile Fan onto the framework grid, ensuring it rests securely on framework.

Electrical Connections

Wiring Instructions

Connect supply wires to push-in connectors (White to White, Black to Red) and secure wiring box cover.

Series Wiring for Multiple Fans

Connect multiple fans in series to the connector from the first fan, ensuring not to exceed circuit breaker amperage.

Remote Control Operation

Fan Speed Control

Turn the fan on by pressing speed buttons (HI-MED-LOW); turn off with FAN OFF.

Airflow Grille Control

Turn the airflow grille on or off by pressing the AIRFLOW button.

Cleaning Instructions

Grille and Housing Cleaning

Remove grille and housing, clean blades and interior with damp cloth and soapy water.

Product Specifications and Parts

Dimensional Drawings

Detailed dimensions for the tile fan, including width, depth, and height.

Parts List

List of all components included in the fan assembly.

Performance Specifications

Technical specifications including speed, noise levels, wattage, voltage, and net weight.

Limited Warranty Information

Warranty Coverage and Exclusions

One-year warranty against defects; excludes damage from accident, misuse, or commercial environments.

Warranty Limitations

Disclaims liability for incidental, indirect, or consequential damages; implied warranties limited to warranty duration.

ALASKA SA-398 Specifications

General IconGeneral
BrandALASKA
ModelSA-398
CategoryFan
LanguageEnglish