USA
Premium Volleyball & Badminton Set
Assembly
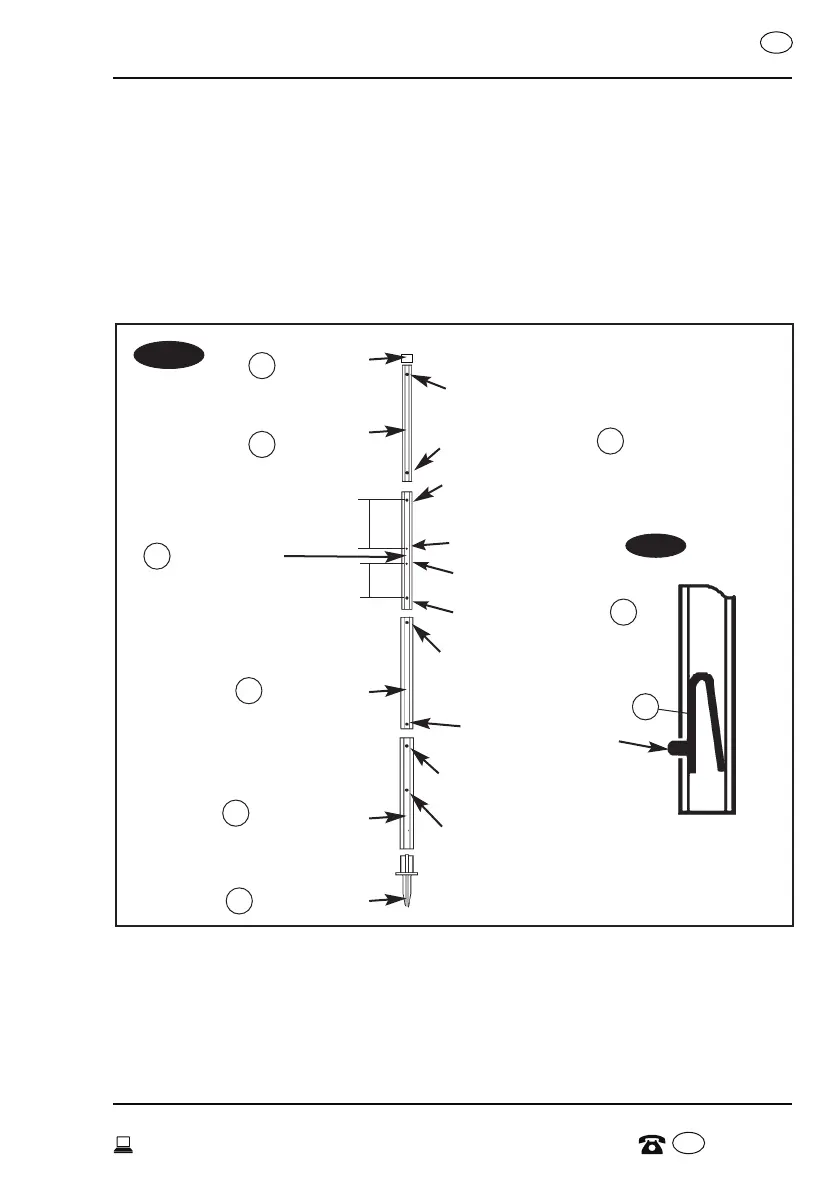
1. POLE ASSEMBLY
Insert the small push buttons (#8) into top and second poles (#2, #3), and the
large push buttons (#7) into the third pole (#4). Make sure buttons protrude
through each hole. See FIG. 1 and 1A.
Assemble the pole sections as follows:
A. Insert the top pole (#2) into the second pole (#3), the second pole (#3) into the
third pole (#4) and the third pole (#4) into the bottom pole (#5) by aligning the
holes and push buttons. See FIG. 1.
FIG. 1
Top Pole
Pole Cap
Second Pole
Third Pole
First Hole - Guide Rope
Pole Anchor
Wide
Push Button Hole
Second Guide Rope Hole
Small Push Button
5 ft 1 in. Hole
5 ft 1 in / 6 ft. Hole
6 ft. Hole / 7 ft. Hole
Bottom Pole
Large Push Button
7 ft. Hole
FIG. 1A
1
2
3
4
5
6
Small Push Button
8
8
7
Narrow
4 AFTER SALES SUPPORT
gssservice@themdsports.com
MODEL: 45082 PRODUCT CODE: 45082 05/2015
1-877-472-4296
USA