Assembly instructions
Assembly instructions
4
5
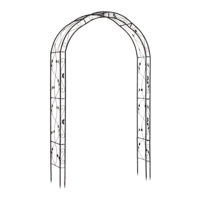
Garden ArchGarden Arch
USA
USAUSA
MODEL: 91975 PRODUCT CODE: 91975 04/2015MODEL: 91975 PRODUCT CODE: 91975 04/2015
USA
1855 754 8297
USA
1855 754 8297 Aldi-US@Supra-elektronik.comAldi-US@Supra-elektronik.com
AFTER SALES SUPPORTAFTER SALES SUPPORT
2 garden arches
Two complete garden arches plus the
respectively enclosed assembly material
are needed for the rose arbour.
Both garden arches will each be
pre-assembled into 2 semiarches
(1 semiarch A-D and 1 semiarch H-E).
The 4 available semiarches will be bolted
to the 4 each corner angles (Part N) in
accordance with the sketch.
Garden arch divided
To ensure a secure footing, please firmly
anchor to the masonry with commercial
quality anchors/dowels/bolts.
(The anchors/dowels/bolts for fastening
are not included)
KK
L
L
LL
LL
L
L
K K
KK
KK
KK
JJ
N
N
N
NN
M
M
Assembly Instructions
1. Lay the arch sections next to each other (in the order shown in
the sketch in Fig. 2) on the side double-frames (sketch Fig. 1.)
Make sure the leaves face up towards the round arch.
2. Connect the individual sections with 3 each hex bolts (J) and nuts
(L) plus 2 washers (K) (see figure to left). Please only hand-tighten
the bolts at first.
3. Firmly tighten all bolts and nuts only after all the sections are
connected with each other.
4. To ensure a secure footing of the garden arch simply stick it into
the ground or, for the best support, embed it in concrete in the soil.
A depth of approx. 12 inches is recommended.
We recommend assembly on a flat surface before setting up at the
final location.
1
J
K
K
L
2
A
B
B
C
D
E
F
G
G
H
148 mm 148 mm
210 mm
 Loading...