Do you have a question about the Alentec & Orion 24700 and is the answer not in the manual?
Explains the meter's purpose, operating principle, and key features.
Details installation steps, connection types, and sealant recommendations.
Covers the purpose and cleaning of the inlet strainer, and battery replacement.
Instructions for waking the meter, checking the display, and dispensing fluid.
Explains how to check and reset the trip counter and view the total counter.
Guidelines for when calibration is needed and a step-by-step calibration process.
How to set the unit of measurement (Litre, Gallon, Pint, Quater).
Performing an LCD test and understanding battery status indicators.
A list of available spare parts and their corresponding part numbers.
Comprehensive technical data including materials, output, and performance metrics.
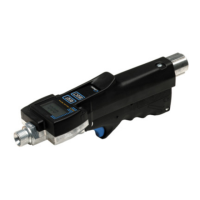
The Alentec & Orion AB Hose-End Meter, standard model 24700, is a digital volume meter designed for precise measurement of fluid dispensed into an object. Operating on the "oval-gear" principle, it utilizes permanent magnets and REED-switches for signal pickup, ensuring accurate readings. The meter features an integrated, pressure-balanced valve that allows for smooth flow control, largely independent of fluid pressure. Its construction with small tolerances guarantees a high degree of accuracy across a wide range of flow rates and fluid viscosities. To conserve battery life, the meter automatically enters a sleep mode after one minute of inactivity, but all data is stored, allowing it to resume operation from where it left off when reactivated.
Before using the meter, it's essential to wake it up from sleep mode by pressing either the RESET or SELECT button. Once awake, the display will show the current volume. To begin a new dispense, press the RESET button after waking the meter to zero the display.
The meter is equipped with two primary counters: a "Trip" counter and a "Total" counter. The "Trip" counter displays the accumulated volume of fluid dispensed since its last reset. To check the "Trip" counter, press the SELECT button when the meter is in normal dispense mode. The display will show the total volume in whole units. To reset the "Trip" counter, ensure the "Trip" counter is displayed, then press the RESET button. This action only resets the "Trip" counter; other data remains unaffected.
The "Total" counter, on the other hand, shows the accumulated volume of fluid dispensed since the meter was first put into use. This counter cannot be zeroed or reset. To view the "Total" counter, press the SELECT button when the meter is in normal dispense mode. The display will then show the total accumulated volume.
Calibration may be necessary if the meter is used with fluids of high or low viscosities or flow rates, or after extended use, especially if dirt has been present in the fluid. For normal workshop oils, calibration is typically not required. To perform a calibration, several rules must be followed: the calibration works for any volume, but at least 1 liter is recommended; the measuring vessel must be of laboratory grade and absolutely empty to avoid inaccuracies from residual fluid; and all air must be removed from the fluid after dispensing, which can be accelerated by vacuum. If a scale is used, air in the oil does not affect the calibration.
The calibration process is semi-automatic. To enter configuration mode, simultaneously press and hold the RESET and SELECT buttons for 5 seconds. The display will change to "Conf" upon successful entry. Then, press SELECT to enter "Set unit" mode, and press SELECT again to enter "Calibration" mode, indicated by "CAL IL" on the display. To start the calibration process, press RESET. The display will alternate between "dISP" and "0.0000". Begin dispensing fluid; the meter will switch between "dISP" and the dispensed volume. Once the desired volume is reached (e.g., 1.5639L), release the meter's handle to stop the flow.
After stopping the flow, press SELECT. The display will move to the received volume input, with the first figure blinking to indicate it's changeable. Use RESET to change the value and SELECT to move to the next figure. For example, if 1.6852 L was received, you would adjust the figures accordingly. Once the last figure is blinking and SELECT is pressed, the display will show the calculated calibration factor. Pressing RESET at this stage will cancel the new calibration. If SELECT is pressed, the calibration is saved, and the meter returns to normal dispense mode. If the calculated factor exceeds +/- 10%, an "E3" error message will appear, and the meter will revert to a new calibration dispense.
The meter's unit of measurement can be set to Liters [L], Gallons [G], Pints [P], or Quarters [Q]. The selected unit is displayed after the value. To set the unit, simultaneously press and hold the RESET and SELECT buttons for 5 seconds to enter configuration mode. Press SELECT to enter "Set unit" mode. Use the RESET button to scroll through the available units. Once the desired unit is displayed, release all buttons and wait. The meter will save the setting and return to "ConF" after a short period. To return to normal operation mode, either wait a short time or press the RESET button.
For maintenance, the meter is equipped with an efficient strainer cup in the flow inlet to prevent solid contaminations from affecting accuracy and valve operation. This strainer should be checked and cleaned regularly. To clean it, remove the inlet swivel and pull out the strainer.
The meter is powered by two AAA 1.5V batteries. These are housed in a battery holder within the rear part of the meter handle, secured by the holder itself and a rubber band. Foam strips further secure the battery holder. To access the batteries, loosen the screw at the lower-back end of the control handle and fold the handle out. The display also shows the battery status. When the batteries are low, they need to be replaced with two new 1.5V IEC LR03 / ANSI AAA batteries, ensuring they are inserted in the correct direction.
To perform an LCD segment test, put the meter in normal dispense mode and press RESET. The meter will perform a reset and briefly display all segments of the LCD.
| battery voltage | 1.5 V |
|---|---|
| battery type | IEC LR03 / ANSI AAA |
| number of batteries | 2 pieces |
| maximum working pressure | 5 MPa |
|---|---|
| minimum burst pressure | 15 MPa |
| normal flow range | 1.5 to 15 L/min |
|---|---|
| possible flow range | 0.5 to 25 L/min |
| viscosity range | 8-2000 cSt |
| weight | 0.5 kg |
|---|