5
HOW TO CHANGE A DRUM WITHIN A DRUMKIT
Background Info
• Individual drum and percussion sounds are all called “Drums” in the
DM Pro.
• Each of the 64 Drumkits in turn contain 64 Drums.
• A Drum is assigned to each of the 64 MIDI Notes across the most
commonly used controller range: A0 (MIDI Note # 33) through C6
(MIDI Note # 96), which just slightly exceeds the range of a 5 octave
keyboard.
Procedure #1 - Using the CHASE Function
1. To change Drums, press the DRUM button.
2. Now press the CHASE button so that it lights, and then play a note
from your controller. The display will show the MIDI Note Number of
the note you just played along with the Drum that is currently
assigned to that MIDI Note.
Procedure #2 - Using the Cursor and Value Encoder
1. Alternatively, if you do not wish to use the CHASE Function, press
DRUM, and then move the CURSOR beneath the MIDI Note Number.
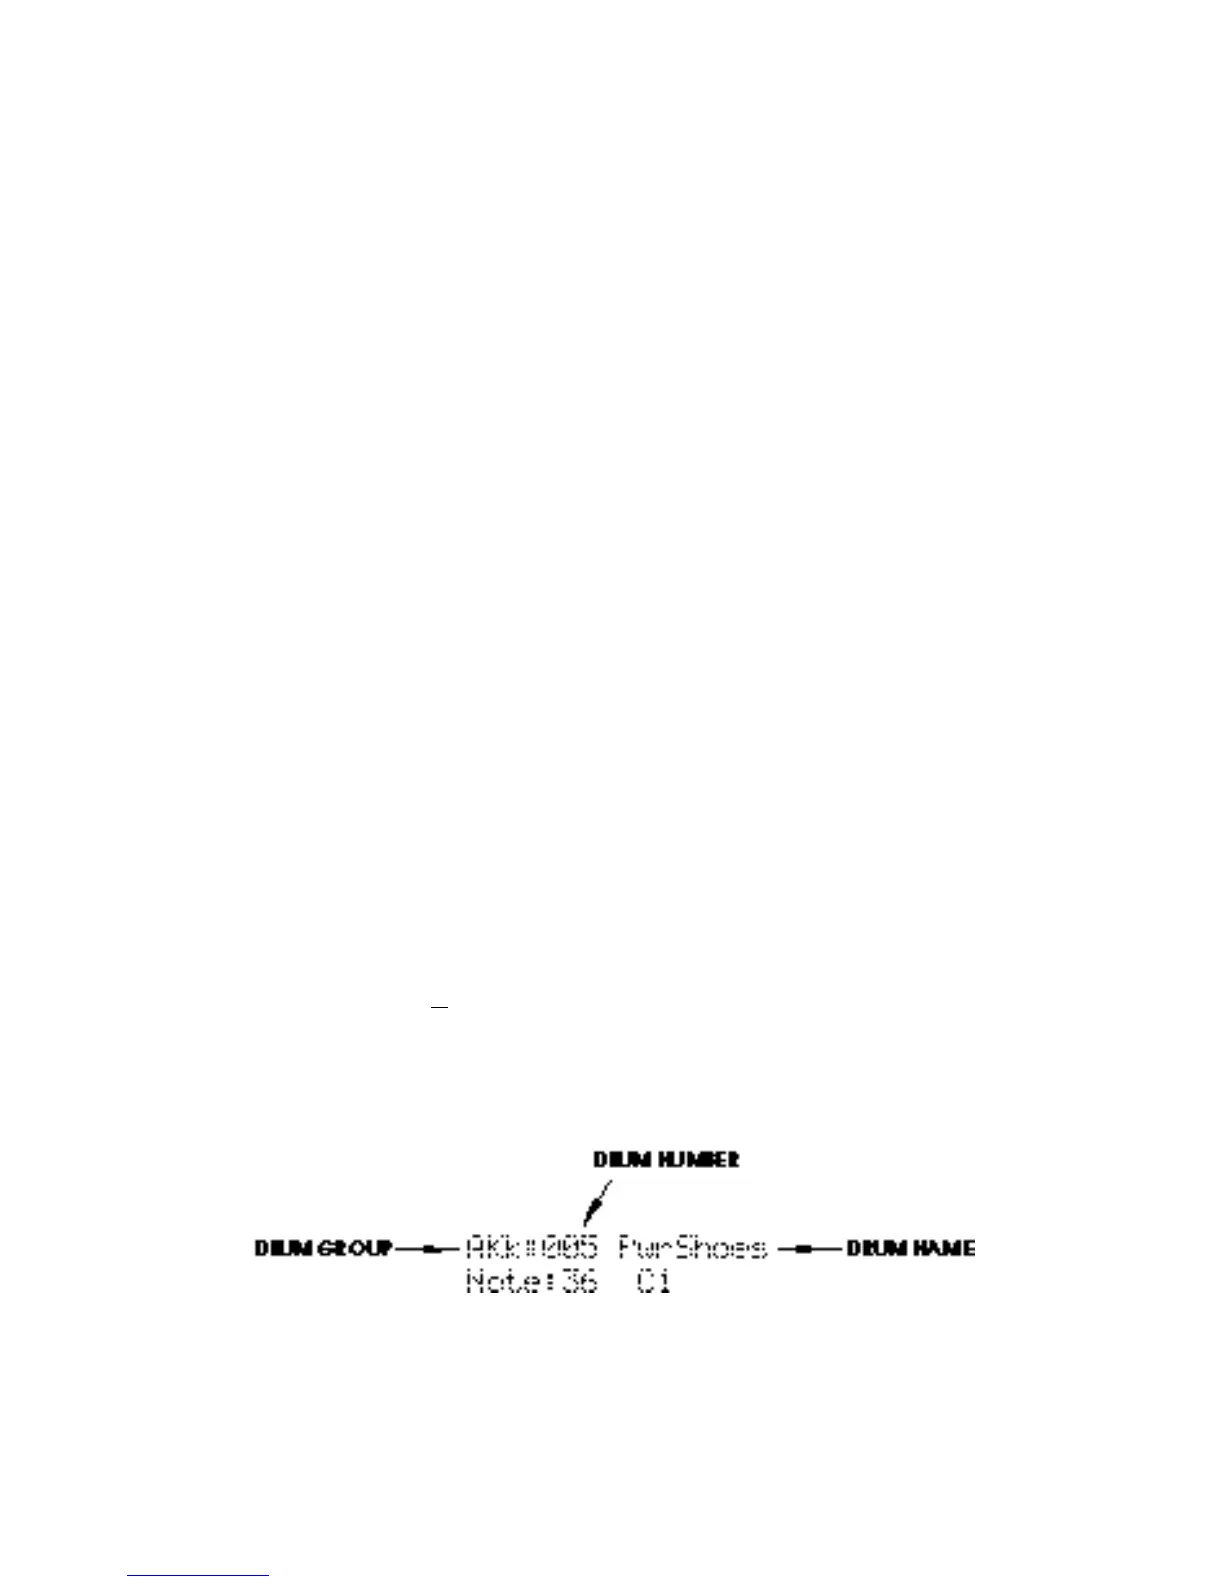
Now you can select the MIDI Note with the VALUE encoder:
AKk:005 PwrShoes
Note:36 C1