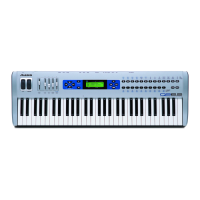
4
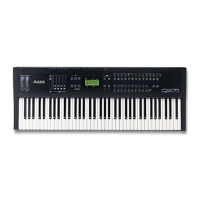
20. Split: Press this button to split the keyboard into two different sounds. The sound that you were using before pressing the Split
button will be applied to the left-hand side of the keyboard. To select a sound for the right-hand side, enter a number for the sound
or use the + and – buttons. Press the Split button again to disable the keyboard split. Press Split and Layer buttons at the same time
to turn Twinova function on or off. See Operation > Twinova for more information.
21. Layer: Press this button to layer two sounds together. The sound that you were using before pressing the Layer button will be used
for one part of the layer. To select the other sound for the layer, enter a number for the sound or use the [<] and [>] buttons. Press
the Layer button again to disable the layer function.
22. Chord Mode: Press this button to enter Chord mode and select how you play chords on the keyboard. See Operation > Chord
Mode for more information.
23. Fade: Press this button to fade an accompaniment track in or out.
24. Intro/Ending: Press this button to play an intro and then start playback of an accompaniment rhythm. Press this button while the
accompaniment rhythm is playing to play an outro and then stop playback of an accompaniment rhythm.
25. Fill A: Press this button to have the first of two types of temporary rhythm play during the accompaniment rhythm.
26. Fill B: Press this button to have the second of two types of temporary rhythm play during the accompaniment rhythm.
27. Sync Start: Press the Sync button, and then play the keys in the lowest two octaves (corresponding to the chords/notes). The play-
along feature will start immediately when playing a key, instead of having to press the Start/Stop button to start it.
28. Start/Stop: Press this button to start or stop playing a style, song, or mix pattern.
29. Store: Press and hold this button, then press one of the Memory buttons M1 – M4 to save the current panel settings.
30. Bank: Press this button to enter Memory Mode and select a memory bank. See Operation > Performance Memory for more details.
31. M1 - M4: Press one of these buttons while in Memory Mode to store or recall panel settings. See Operation > Performance
Memory for more details.
32. Quick Setting [Q.S.]: Press this button to turn the Quick Setting function on or off. See Operation > Quick Setting for more
information.
33. Chord Ref.: Press this button to turn the chord reference function on or off. This function allows you to view a dictionary of chord
diagrams on the LCD screen. See Operation > Chord Reference for more information.
34. SD Card: Press this button to enter the SD card menu. See Operation > Connecting an SD Card for more information.
35. Mixer: Press this button to enter the Mixer menu. See Operation > Playing Mixes for more information.
36. Metro: Press this button to start the metronome. Press this button again to change the time signature of this button or turn off the
metronome. See Operation > Using the Metronome for more information.
37. Demo: Press this button to begin playback of the demonstration songs. Use the number buttons or [<] / [>] buttons to select another
demonstration song. Press this button again to stop the playback.
38. Function: Press this button to enter the function menu. See Operation > Using the Function Menu for more information.
39.
Pitch Bend Wheel: Roll this wheel up or down to apply a pitch-bending effect to the notes you play.