5
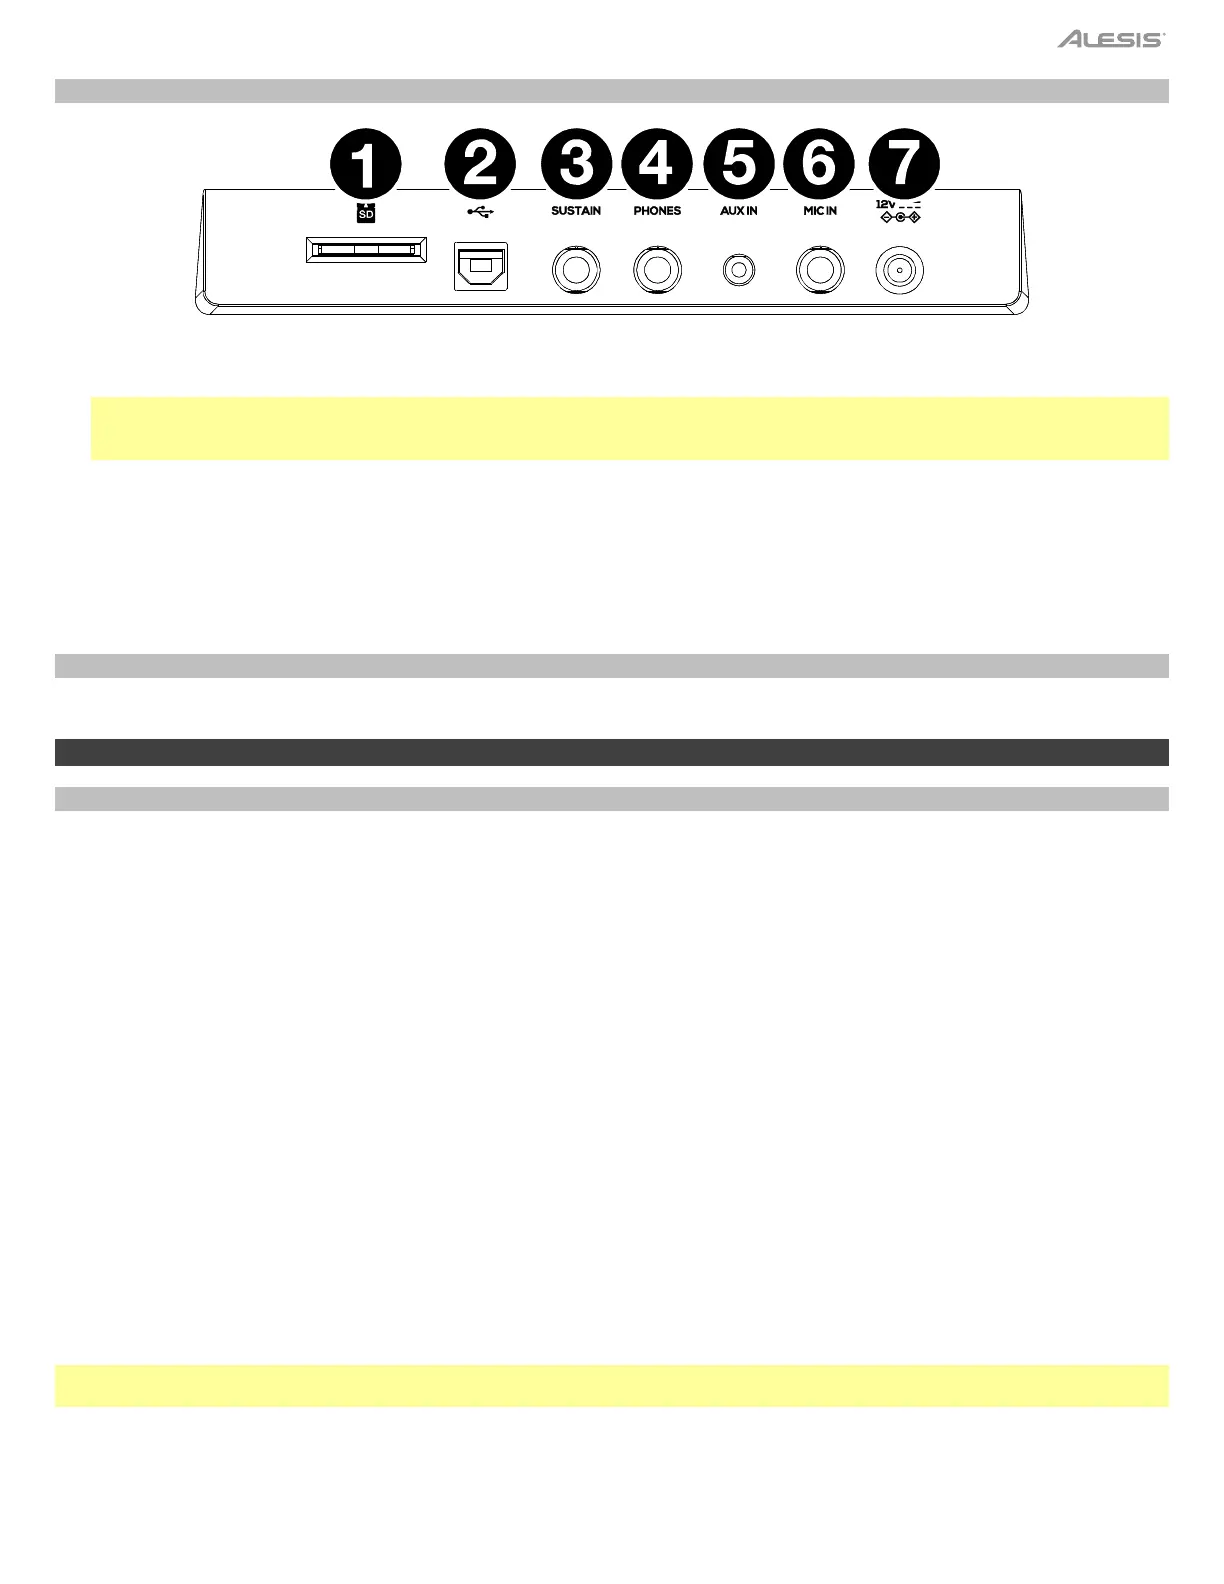
Rear Panel
1. SD Card port: Insert an SD Card containing MIDI or WAV music files here.
2. USB Port: Insert a USB-B cable here to connect the USB-A keyboard to a computer or a mobile device.
Note: The Harmony 61 Pro features a class compliant plug-and-play connection, and this USB port enables sending and receiving
MIDI data, as well as sending and receiving audio between the Harmony 61 Pro and a connected computer. To use these features,
simply connect the Harmony 61 Pro to your computer and select it for use in your software or system preferences.
3. Sustain Input: Connect a sustain pedal with a 1/4” (6.35 mm) cable here.
4. Phones Output: Plug a pair of headphones into the 1/4” (6.35 mm) output here.
5. Aux Input: Connect an external audio source, such as an MP3 or CD player, using a 1/8” (3.5mm) cable here.
6. MIC Input: Connect a microphone with a 1/4” (6.35 mm) cable to the input here to sing along with the keyboard output.
7. Power Input: Plug in the included power adapter here.
Bottom Panel (Not shown)
1. Battery Compartment: Install 6 “AA” batteries here to power the keyboard if you are not using the power adapter.
Operation
Playing a Sound
1. Press the Sound button to enter Sound mode. The “R1” indicator will light up. The LCD will show the current Sound name and
number.
2. Use the data dial or [<] / [>] buttons to select a sound. Alternatively, use the numeric buttons to enter a preset sound number. See
Appendix > Sound List for a full list of sounds.
3. Play the keyboard to use this Sound for performance.
Using Layer Mode:
1. Press the Layer button to enter Layer mode. The “R2” indicator will light up. The LCD will show the current layer sound name and
number.
2. Use the data dial or [<] / [>] buttons to select a layer sound. Alternatively, use the numeric buttons to enter a preset sound number.
3. Play the keyboard. You will hear two different sounds playing together.
4. In Layer mode, press the Layer button to exit this mode.
Using Split Mode:
1. Press the Split button to enter Split mode. The “L” indicator will light up. The LCD shows the current split sound name and number.
The default split point is F#3 (19). You can change the split point in the function menu.
2. Use the data dial or [<] / [>] buttons to select a split sound. Alternatively, use the numeric buttons to enter a preset sound number.
3. Play the keyboard. You will hear different sounds from the left- and right-hand sections.
4. In Split mode, press the Split button to exit this mode.
Note: When layer and split sounds are in use, only the right-hand area plays the layered sound. Use the mixer to adjust the volume of
each part.