4
www.observint.com
© 2015 Observint Technologies. All rights reserved.
Installing the WebComponents plugin may require that you close the browser. Follow the
on-screen instructions, then restart your browser and log in after the installation is nished.
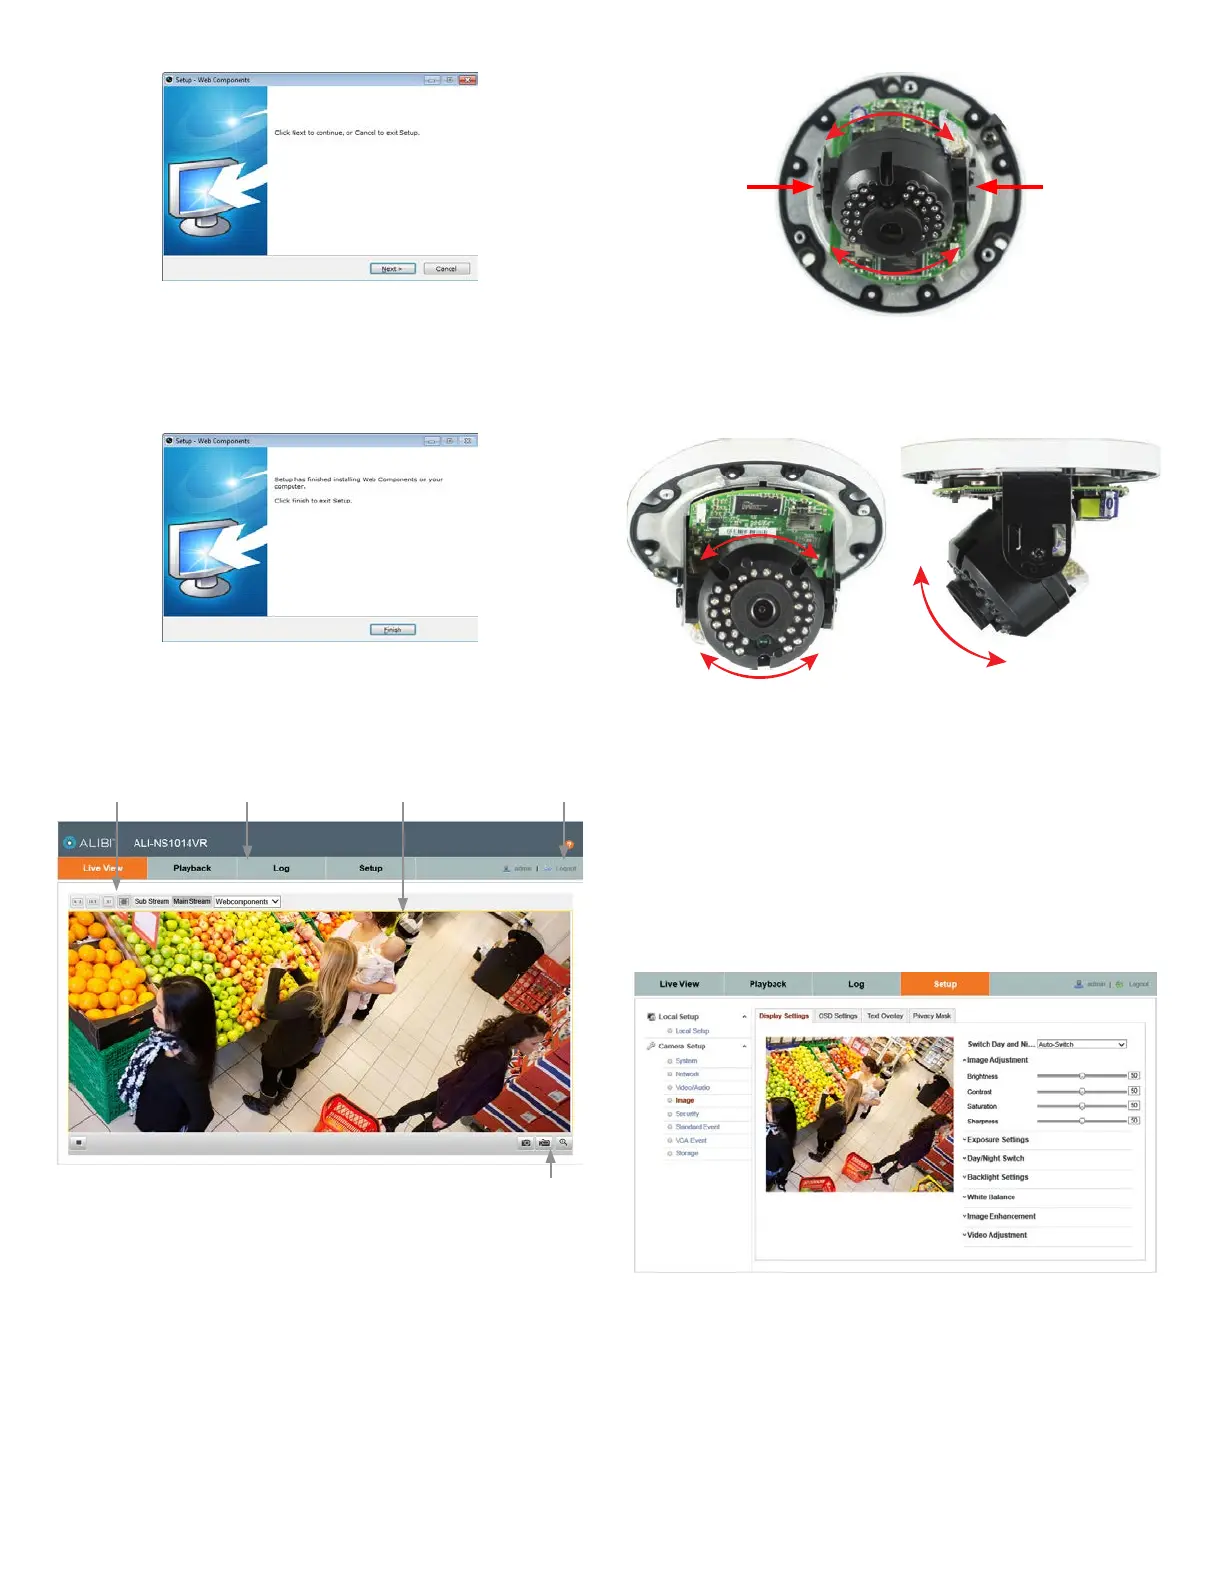
c. Allow the plug-in installation to complete. When the following window appears, click
Finish.
Step 5. Remote Live View screen
After logging into the camera, the Live View - Main stream window initially appears.
Capture, Record, Enable e-PTZ icons
Screen select tabsLive View options Logout buttonLive View image
1. Remove the black plastic shield that covers the camera gimbal.
2. Observe the Live View screen to adjust the direction of the camera. To adjust the camera pan, rotate
the camera gimbal (0˚ ~ 355˚) assemblies and as shown below.
Grasp here on
both sides
Grasp here on
both sides
Pan adjustment
3. To adjust the horizon line (0˚ ~ 360˚) and tilt (0˚ ~ 65˚), rotate the camera module as shown
below.
Horizon line adjustment Tilt adjustment
4. Re-install the black plastic shield.
5. Reattach the lower dome.
Step 6. Adjust the video display
The video Display Settings menu includes the image-related congurable parameters for the camera. It
contains several sub-menus such as Image Adjustment, Exposure Settings, Day/Night Switch, etc. that can
be opened or closed for compactness. Additionally, several adjustments can be seen in the Live View image
on the menu. To open the Display Settings menu, go to Setup tab | Image | Display Settings
Congurable parameters include:
• Switch Day and Night: Select either Auto-Switch or Scheduled-Switch.
— If using Auto-Switch, open the Day/Night Switch submenu to select the Sensitivity,
Filtering Time, and Smart IR feature ON or OFF.
— If using Scheduled Switch, set the Start Time and End Time of the switch, then open
the Day/Night Switch submenu to select the Smart IR feature ON or OFF.
Also, click the Common, Day and Night tabs to set the Saturation, Hue, Brightness,
Contrast and Sharpness for Day and for Night modes.
 Loading...