EasyManua.ls Logo

Allegion LCN 8310-845 - User Manual

Allegion LCN 8310-845
4 pages
Print Icon
To Next Page IconTo Next Page
Loading...
75.5306.02 ALLEGION TIME-DELAY MODULE 8310-845 20180702 Page 1 of 4
8310-845 TIME-DELAY MODULE
PRECAUTIONS
75.5306.02 ALLEGION TIME-DELAY MODULE 8310-845 20180702 Page 1 of 4
Delay-on-make / Delay-on-break time relay
ENGLISH
DESCRIPTION
TECHNICAL SPECIFICATIONS
Power supply: 15 – 24 VAC/VDC -5 – 10%
Operating frequency: 4 MHz (microprocessor)
Power consumption: 10 mA at rest; 50 mA max.
Output: 2 SPST relays
Max. voltage (relay contact): 30 VDC / 120 VAC
Max. current (relay contacts): 1.0A DC / 0.5A AC
Specifications are subject to change without
prior notice.
All values measured in specific conditions.
Shut off all power going to header before attempting any wiring procedures.
Maintain a clean and safe environment when working in public areas.
Constantly be aware of pedestrian traffic around the door area.
Always stop pedestrian traffic through the doorway when performing tests that may result in
unexpected reactions by the door.
ESD (electrostatic discharge): Circuit boards are vulnerable to damage by electrostatic discharge.
Before handling any board, ensure you dissipate your body’s ESD charge.
Always check placement of all wiring before powering up to ensure that moving door parts will not
catch any wires and cause damage to equipment.
Ensure compliance with all applicable safety standards (i.e. ANSI A156.10) upon completion of
installation.
DO NOT attempt any internal repair of the components. Unauthorized disassembly or repair:
1. May jeopardize personal safety and may expose one to the risk of electrical shock.
2. May adversely affect the safe and reliable performance of the product resulting in a voided
warranty.
Question and Answer IconNeed help?

Do you have a question about the Allegion LCN 8310-845 and is the answer not in the manual?

Summary

General Precautions

Electrical Safety

Shut off power before wiring, dissipate ESD charge, and ensure compliance with safety standards.

Work Environment Safety

Maintain a clean environment, be aware of traffic, and stop pedestrian flow during testing.

Component Handling

Check wiring placement before power-up to prevent damage from moving parts.

Repair and Warranty

Do not attempt internal repairs to avoid electrical shock risks and voiding the warranty.

Wiring Connections

Relay Wiring Details

Lists the wire colors for Relay 2 N.O., N.C., COM, and Relay 1 COM, N.O., N.C. contacts.

Power and Input Wiring

Details wiring for power supply (15-24 VAC/VDC) and Act. Device input contacts.

Electrical Installation Examples

General Installation

Shows general wiring for a push plate, motion sensor, or dry input with the time delay module.

Maglock Example

Illustrates wiring for a maglock, including jumper settings for 24V supply.

Electric Strike Example

Depicts wiring for an electric strike, detailing jumper configurations for 24V supply.

Module Settings and Configuration

Jumper Settings for Relay 1

Defines jumper choices for wet or dry output on Relay 1, affecting voltage/current supply.

Dip Switch Settings for Time Delay

Explains dip switch configurations for hold-open time delay on Relay 1 and Relay 2.

Delay Option Configuration

Details the time delay between Relay 1 activation and Relay 2 activation.

Troubleshooting Common Issues

Door Sequencer Not Activating

Troubleshoots faulty power supply or activation input, checking continuity and polarity.

Door Stays Open Too Long

Addresses excessive door open time by adjusting Time Delay Module or door control settings.

Door Unlocks But Will Not Open

Resolves issues with lock devices drawing too much power by installing a separate power supply.

Overview

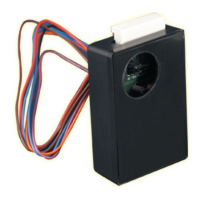
The 8310-845 Time-Delay Module is a versatile device designed for controlling door operations with adjustable time delays. This module functions as a delay-on-make or delay-on-break time relay, providing precise control over door opening and closing sequences. It is suitable for various applications, including integration with push plates, motion sensors, maglocks, and electric strikes.

Function Description:

The module incorporates two independent relays, RELAY 1 and RELAY 2, each with adjustable time delay settings. RELAY 1 offers a time delay adjustable from 0 to 7 seconds, with a red LED indicating its active state. RELAY 2, indicated by a green LED, provides a hold-open time delay for the door, adjustable from 0 to 15 seconds. This relay sends a signal to the door control to hold the door open for the specified duration. A unique feature is the "DELAY OPTION," which allows for a time delay between RELAY 1 activation and RELAY 2 activation, configurable to 0.5 or 1.5 seconds.

The module supports both "dry" and "wet" output configurations for RELAY 1. In a "dry" output configuration, no voltage or current is supplied by the time delay, and both jumpers (JP1 and JP2) are placed on the left and middle pins. For a "wet" output, the time delay supplies voltage and current equal to the input voltage, with both jumpers placed on the right and middle pins. This flexibility allows the module to adapt to different control system requirements.

Important Technical Specifications:

  • Power Supply: 15-24 VAC/DC (-5% to +10%). It is crucial to use an isolated transformer for the power supply, not the door control itself, to ensure proper operation and prevent damage. When using DC power, observe polarity: orange wire for negative (-) and brown wire for positive (+).
  • Operating Frequency: 4 MHz (microprocessor-controlled).
  • Power Consumption: 10 mA at rest; 50 mA maximum.
  • Output: 2 SPST (Single-Pole, Single-Throw) relays.
  • Max. Voltage (relay contact): 30 VDC / 120 VAC.
  • Max. Current (relay contacts): 1.0A DC / 0.5A AC.

These specifications ensure the module's compatibility with a wide range of door control systems and power sources. All values are measured under specific conditions and are subject to change without prior notice.

Usage Features:

The 8310-845 module is designed for ease of integration into existing door automation systems.

  • DIP Switch Settings: The hold-open time delay for both RELAY 1 and RELAY 2 is configured via DIP switches. RELAY 1's time delay is set using DIP switches 1, 2, and 3, while RELAY 2's time delay uses DIP switches 1 through 8. The DELAY OPTION (time delay between relay activations) is controlled by DIP switch 8.
  • Jumper Settings: Jumpers JP1 and JP2 determine the output type (wet or dry) for RELAY 1. Specific jumper placements are also illustrated for common applications like maglocks and electric strikes. For example, for an electric strike, jumpers are placed on pins 2 & 3 and 5 & 6 to supply 24V to the strike. Similarly, for a maglock, jumpers are placed on pins 2 & 3 and 5 & 6 to supply 24V to the maglock.
  • Wiring Diagrams: Comprehensive wiring diagrams are provided for general installations, maglock examples, and electric strike examples, detailing connections for power, relay contacts, and input devices (push plates, motion sensors).
  • Troubleshooting Guide: A detailed troubleshooting section addresses common issues such as the door sequencer not activating, the door staying open too long, or the door unlocking but not opening. Solutions include checking power supply, wiring continuity, and ensuring proper time delay settings. For instance, if the door sequencer does not activate, it suggests checking the power supply (15-24 VAC/VDC) and the continuity of the orange and brown wires. If the door stays open too long, it advises using the module's timer if the door control lacks one, or setting the module to minimum if the door control has its own timer. If the lock device draws too much current, it recommends installing a separate power supply for the lock.

Maintenance Features:

While the module itself is not designed for internal repair, several precautions and best practices are outlined to ensure its longevity and reliable performance.

  • Installation Precautions:
    • Always shut off power before wiring.
    • Maintain a clean and safe work environment, especially in public areas.
    • Be aware of pedestrian traffic around the door area.
    • Stop pedestrian traffic when performing tests that might cause unexpected door reactions.
    • Protect against ESD (electrostatic discharge) by dissipating body charge before handling circuit boards.
    • Verify all wiring placements to prevent moving door parts from catching wires.
    • Ensure compliance with safety standards (e.g., ANSI A156.10) after installation.
  • No Internal Repair: Users are explicitly warned against attempting internal repairs, as this could jeopardize personal safety, risk electrical shock, and void the product warranty.
  • Unused Wires: Unused wires must be insulated to prevent damage. No voltage should be applied to the gray wires to avoid damage to the unit.
  • Installation/Service Compliance: The manual emphasizes that installers and service personnel are responsible for performing risk assessments, ensuring compliance with local, national, and international regulations, codes, and standards. It strongly recommends AAADM-certified technicians for pedestrian doors and IDA-certified for doors/gates. Safety inspections, as per manufacturer recommendations and industry guidelines (e.g., ANSI/DASMA 102, ANSI/DASMA 107), must be performed after installation and during each service call. All appropriate industry signage and warning labels must be in place.
  • Support: If problems persist after troubleshooting, contact Allegion support at 1-877-671-7011. If repairs cannot be completed immediately, the door should be left inoperable for safety.

The 8310-845 Time-Delay Module is a robust and reliable component for advanced door control, offering flexibility and precision in managing door operations while prioritizing safety and ease of installation.

Allegion LCN 8310-845 Specifications

General IconGeneral
BrandAllegion
ModelLCN 8310-845
CategoryTimer
LanguageEnglish