EasyManua.ls Logo

ALLSOP WheelEasy - User Manual

ALLSOP WheelEasy
2 pages
Print Icon
To Next Page IconTo Next Page
Loading...
© 2016 Allsop, Inc. | email: garden.consumer@allsop.com | Phone: 866-426-4303 | www.allsopgarden.com
Tools Required: Adjustable Crescent Wrenches (2), Phillips Screwdriver
Outil requis pour l’assemblage: Clés á molette Crescent (2), tournevis cruciforme
Herramientas para el ensamblaje: Llaves ajustables crescent (2), destornillador de cruz
I - handle, straight part (2)
I - poignée, partie droite (2)
I - manija, parte recta (2)
J - handle, bent part (2)
J - poignée, partie courbée (2)
J - manija, parte curva (2)
Assemble wheel to front frame:
Parts C - F are attached to front
frame for shipment. Remove
parts C - F and assemble wheel to
front frame using illustration
above.
Assemblez la roue sur le cadre
avant: Les parties C - F sont
fixées au cadre avant pour le
transport. Retirez les parties C - F
et assemblez la roue sur le cadre
avant à l’aide de l’illustration
ci-dessus.
Ensamble la rueda en el
armazón de adelante: Las partes
C - F están fijadas al armazón de
adelante para el transporte.
Retire las partes C - F y ensamble
la rueda en el armazón según la
ilustración arriba.
Attach canvas to handles:
Locate 2 holes on bend of handle
and align the holes on the canvas
flap. Use 2 screws and 2 washers
per handle to secure canvas.
Attachez la toile aux poignées:
Localisez les 2 trous sur la
courbure de la poignée et alignez
les trous sur le rabat de la toile.
Utilisez 2 vis et 2 rondelles par
poignée pour fixer la toile.
Fije la lona a las manijas:
Localice los dos orificios en la
curva de la manija y alinée los
orificios en el repliegue de la
lona. Utilice 2 tornillos y 2
arandelas por manija para fijar la
lona.
Assemble handles:
Insert J into the end of I that has
1 set of holes. Rotate J until the
spring-loaded domes click into
the lock holes on part I.
Assemblez les poignées : Insérez
J dans l’extrémité de I qui a un
ensemble de trous. Tournez J
jusqu’à ce que les billes de
blocage s’enclenchent dans les
trous de la partie I.
Ensamble las manijas: Inserte J
en el extremo de I que tiene un
conjunto de orificios. Gire J hasta
que que las bolas cargada por
resorte encajen en los orificios de
la parte I.
K
K
I
J
1 2 3 4
K - phillips screw and washer (4)
K - vis phillips et rondelle (4)
K - tornillo phillips y arandela (4)
161103
Question and Answer IconNeed help?

Do you have a question about the ALLSOP WheelEasy and is the answer not in the manual?

Summary

Parts List

Assembly Instructions

Assemble Wheel to Front Frame

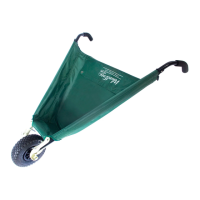
Assemble wheel to front frame for shipment. Attach wheel to front frame using illustration.

Assemble Handles

Insert handle part J into end of I with holes. Rotate J until domes click into lock holes on part I.

Assemble Handles to Front Frame

Align front hole in handle with front hole in frame. Insert detent pin. Use remaining pins for future use.

Attach Canvas to Handles

Locate 2 holes on handle bend, align with canvas flap. Use 2 screws and 2 washers per handle.

Easy To Use

Loading

Open handles to widest position, then fold rear flap down to rake material into WheelEasy.

Lifting

Push handles together as close as possible before lifting. Ensure handles are fully engaged with frame.

Rear Flap Use

Use rear flap to keep loose material in WheelEasy. Attach rear flap straps as shown.

Easy To Store

Position 1 - In-Use

Move detent pins to the forward, "in-use" position.

Position 2 - Transitional

Use additional pins to hold handles while changing positions. Do not use in this position.

Position 3 - Fold and Store

Move detent pins to the rear, "storage" position, to fold and store the WheelEasy.

ALLSOP WheelEasy Specifications

General IconGeneral
Weight Capacity150 lbs
Dimensions60 x 30 x 28 inches
FoldableYes
Wheel TypePneumatic
MaterialSteel, Polyethylene
TypeUtility Cart
ColorBlack