Do you have a question about the Aloka PROSOUND ALPHA 7 and is the answer not in the manual?
Attach the probe to the front of the system; cable extends right.
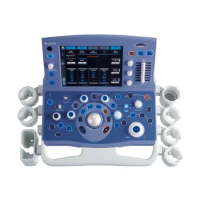
Power on the system using the upper left panel button.
Press 'New Patient' to enter name and ID.
Press 'Preset' to select the desired exam on the Touch Screen.
Press 'Probe' to select the desired probe on the Touch Screen.
Adjust image brightness by turning the B Gain knob clockwise or counter-clockwise.
Use toggle buttons to adjust image depth and size.
Press the Freeze key to freeze or unfreeze the image.
Press Caliper key, move with trackball, press Enter to anchor start point.
Use trackball to end measurement point; number appears in box.
Press Caliper key again to take another measurement.
Press Freeze key again to erase the measurement box.
Switch between split and single image displays.
Use PW Knob for Doppler modes and toggle between 2D and Doppler screens.
Adjust color gain using the Flow Knob.
Use Power Flow key and trackball for color box adjustments.
Use eFLOW key and trackball for color box adjustments.
Add text comments via touch screen or keyboard.
Use Focus key and trackball to adjust the focal point.
Enlarge image with Rotary Knob and move with trackball; turn off with Zoom key.
Freeze image, then press Print or Store keys.
Store video clips while imaging live.
Access and navigate stored images using the Review key.
| Type | Ultrasound System |
|---|---|
| Application | Diagnostic Imaging |
| Display Type | LCD |
| Display Size | 15 inches |
| Transducer Ports | 2 |
| Power Supply | 100-240 VAC, 50/60 Hz |
| Imaging Modes | B-mode, M-mode, Doppler |