01 02
Wiring grid connector plugs, then insert the grid connector plugs into the sockets for the grid connection. When doing
so, make sure to align the key on the grid socket with the keyway on the grid connector plug.
01
SCOPE OF DELIVERY
QUICK INSTALLATION GUIDE
412-10017-01
02
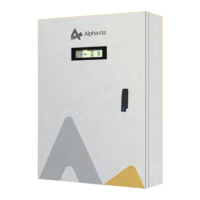
AC WIRING TO GRID AND BACKUP COMBINER CABINET
Wiring sequence
5
From
Backup combiner cabinet
Recommended Cable type*
To
1
Three-core (L, N and PE)
outdoor copper cable, 25~35 mm
2
Three-core (L, N and PE)
outdoor copper cable, 6~10 mm
Three-core (L, N and PE)
outdoor copper cable, 6~10 mm
Three-core (L, N and PE)
outdoor copper cable, 16~35 mm
2
Three-core (L, N and PE)
outdoor copper cable, 6~10 mm
2
Three-core (L, N and PE)
outdoor copper cable, 6~10 mm
2
Grid combiner cabinet
2 Grid combiner cabinet
Grid connection port of
the host inverter
Grid connection port of
the follow inverter
3 Grid combiner cabinet
4 Loads of backup side Backup combiner cabinet
Backup connection port of
the host inverter
6 Backup combiner cabinet
Backup connection port of
the follow inverter
Mains grid
03
UPGRADE FIRMWARE OF THE INVERTERS
Please comfirm the following connection
3.1.
3.2.
3.3.
3.4.
3.5.
BAT power connection and grounding connection between the batteries connected to each inverter have finished.
BMS communication connection between the batteries connected to each inverter have finished.
BAT power connection and grounding connection between the inverter and the first battery (directly below the
inverter) have finished.
3.7.
PARA board
COM cover
PARA COM 3m cables
M3×10 Screws
Labels for PARA COM
cables
WARNING: Inverters that do not follow the same SN encoding rules have hardware differences. For example, inverters of SN ALD00XXXXXXXX
and ALD08
XXXXXXXX cannot operate in parallel. Please check the 4th and 5th digits of the inverters’ SN.
System Wiring and Commissioning for SMILE-G3 Single Phase Inverters Operation in Parallel
Note:
• Cann’t connect all batteries together. The battery cluster connecting the each inverter must connect together.
• The number of batteries connected to each inverter should be same.
• The backup connection ports of SMILE-G3 single phase inverter must be connected parallel.
• The grid connection ports (symbolled with “AC”) of SMILE-G3 single phase inverter must be connected parallel.
• All batteries must be of the same type.
• The number of parallel battery (for example, SMILE-G3-BAT-10.1P, SMILE-G3-BAT-8.2P) connected to each inverter is max. 6.
• The number of series battery (for example, SMILE-G3-BAT-3.8S, SMILE-G3-BAT-4.0S) connected to each inverter is max. 4.
• The number of inverters operation in parallel is max. 3.
• Each inverter operation in parallel must connected with PV modules.
• Each inverter operation in parallel must connected with battery.
• Each inverter should have the same PV installed capacity. Otherwise it will cause the battery SOC difference between the battery clusters.
BMS communication connection between the inverter and the first battery (directly below the inverter) have finished.
Select one inverter which you want to set as host inverter later, finish meter communication connection between this
inverter and meter, finish meter power supply connection between the meter and mains grid.
3.6.
Please finish PV arrays connection to the inverters,
refer to inverter quick installation guide chapter 4.4.
Click
2
1
Wiring backup connector plugs, electrical connection between backup connector plugs of the inverters and backup
combiner cabinet have finished.
Backup disconnection between each inverter and backup combiner cabinet, at this moment only switching off the
backup circuit breakers are not enough yet, please must unplug the backup connector plug from the backup
connector socket of each inverter.
3.8.
Electrical connection between grid connectors of the inverters and grid combiner cabinet have finished.
a. Disassemble the communication cover
b. Plug in the PARA board
c.
2
Mount the PARA boards to the inverters operation in parallel, then do communication connections between these
inverters, refer to the relative system wiring diagram of parallel installation.
TX10×150mm
0.6-0.7Nm
4
1
3
2
1
2
2
1
3.9.
Take out the communication cables. Unscrew the swivel nut, remove the sealing ring and the sealing
plugs. Pass the PARA COM cables through the swivel nut, cable gland body and the COM cover.
NOTICE: Measurement unit at the feed-in point when inverters operate in parallel should use the meter type DTSU666-3*230V 250A/50mA
(with CT). The CT solution for measurement unit at the feed-in point is only suitable for single inverter operating.
2
2
*Depending on the inverter type and quantity and whether enabling the function “Charge Batteries from Grid”.