ALPINE iLX-F509 68-41657Z87-A_QRG (EN)
17-EN
EN
FR
ES
Adjust the up-down position of the
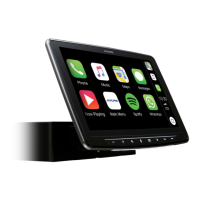
Display unit (iLX-F509/iLX-F511)
Adjust the up-down position of the display according
to the mounting position on the vehicle before
ve the 4 screws on the rear of the
-down
Screws (M2.6× 8)
Attach the Sheet Rear in a position that
-down position of the
for up-down position 0 mm or -60mm
for up-down position -15 mm or -45mm
Sheet Rear
(2×35 mm)
Sheet Rear
(2×35 mm)
-60 mm
Sheet Rear
(2×50 mm)
3 Attach the Cover Rear to the rear of the
display unit using 2 screws (M2.6×6).
Secure the screws, then attach the Sheet
caps.
Screws
(M2.6× 6)
(Included)
Cover Rear (Included)
Sheet caps (Included)
Install the display unit (iLX-F509/
iLX-F511)
1 Fix the Display unit to the slider of the main
unit using 4 screws (M5×8).
Screws (M5×8) (Included)
CAUTION
Do not adjust the display angle when the display
unit is not fixed to the slider of the main unit using
4 screws (M5 × 8). Doing so may not turn power
on.
2 Mount the Power Plate.
Power Plate (Included)
• If the Power Plate is not mounted, the display unit
may not be turned power on. Make sure to
mount it.
3 Mount the Cover Hinge using 2 screws
(M3×4).
Secure the screws, then attach the Sheet
Hinges.
Sheet Hinges
(Included)
Cover Hinge
(Included)
Screws (M3×4)
(Included)
 Loading...