INSTALLATION INSTRUCTIONS
Child Safety
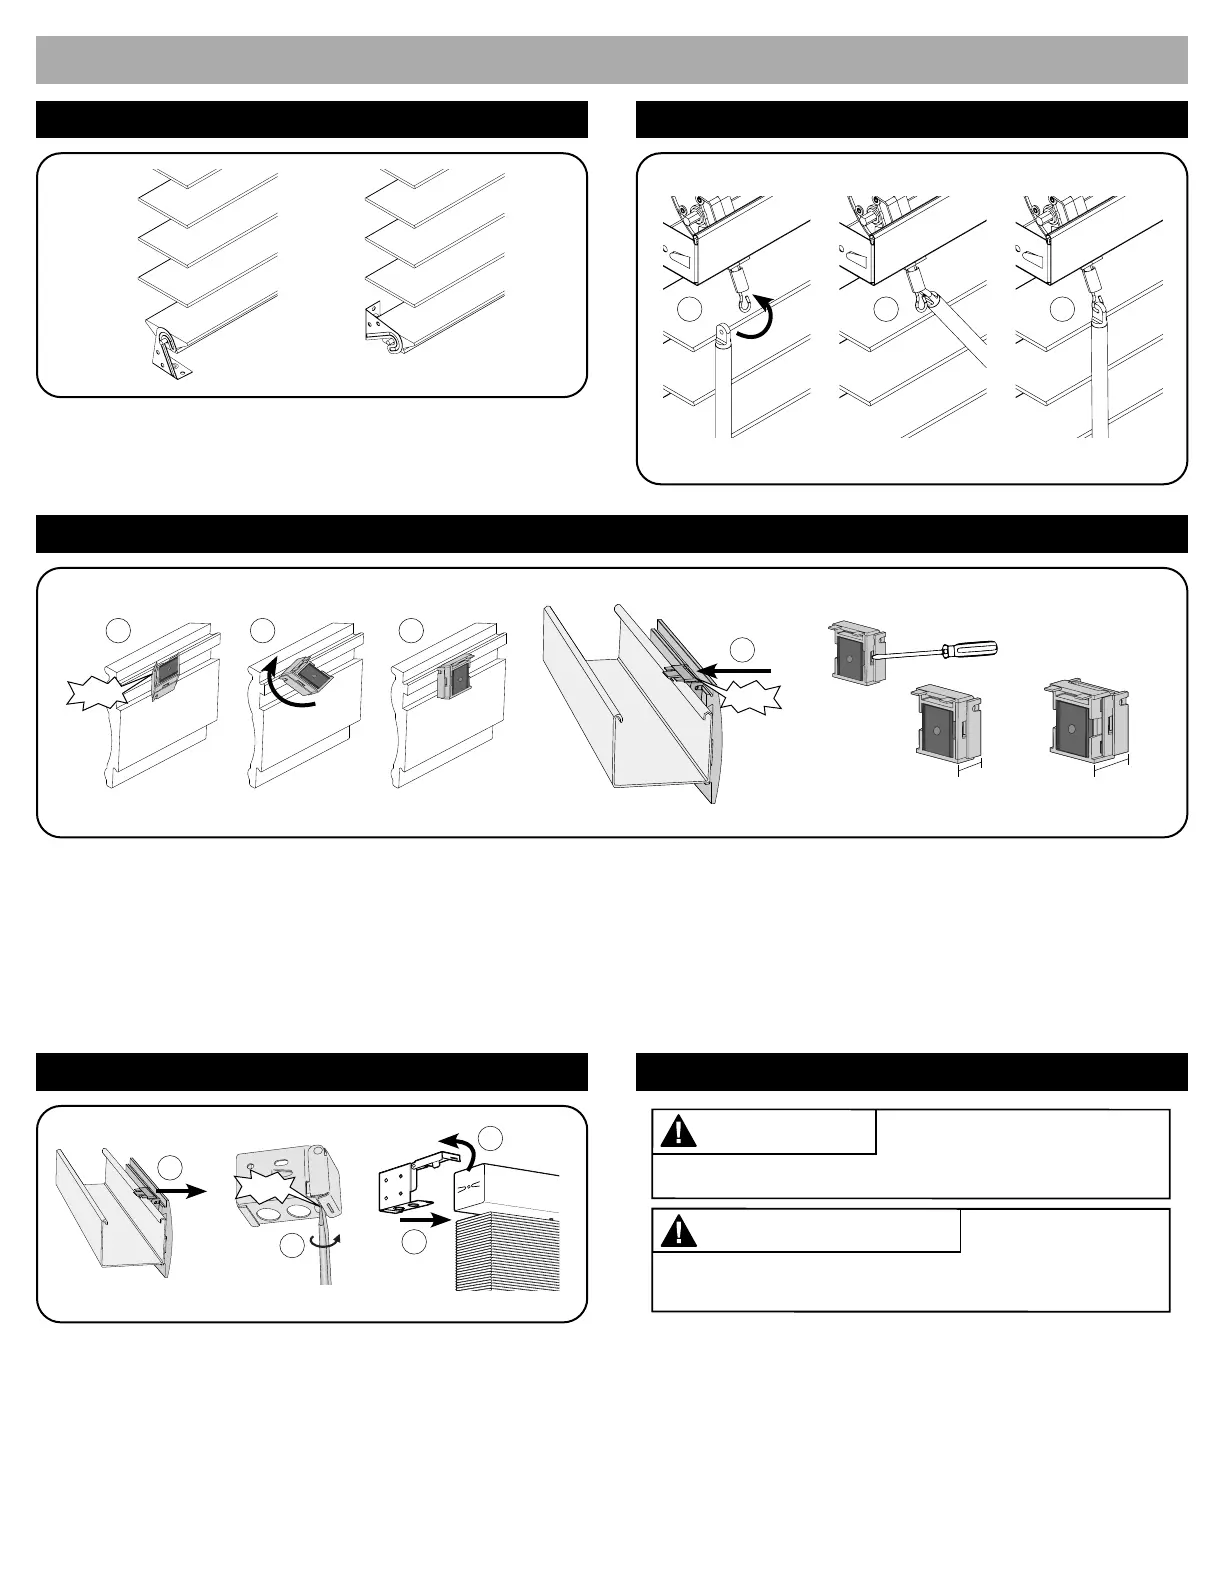
3a. Install Components — Hold-Down (Optional) 3b. Install Components — Wand (Optional)
5. Remove the Blind (only if necessary)
4. Install the Valance
First, lower the blind and connect the bottom rail pins to the hooks on both
sides. Then, mark the hold-down bracket locations on the mounting surface.
With the brackets level, attach the hold-downs using the provided screws.
First, lay the valance face down on a protected surface with the back side up. Insert the clip dovetail into the valance groove and twist the clip until it is straight
with the clear tabs at the top of the valance. Then, install and space all provided clips evenly.
Important: The magnetic clip has three projection positions (5/8”, 3/4” and 7/8”). To change the projection, rst insert a small at head screwdriver into the slot
on one side of the magnet. Push the screwdriver in, towards the magnet, and then move the magnetic valance clip to the desired position.
Finally, align the valance to the headrail, making sure to hold the valance securely from the front side with both hands. Position the magnetic valance clips to the
top-front lip of the headrail until it is level and in position. Then, press the valance gently forward, just enough so the magnetic valance clips adhere to the headrail.
IB
OB
Immediately remove this product if a cord longer than 22 cm or a loop
exceeding 44 cm around becomes accessible.
Rev 7/21 Print 7/21
WARNING
RISQUE D’ÉTRANGLEMENT–
Les enfants en bas âge
MISE EN GARDE
peuvent s’étrangler avec des cordes. Enlevez immédiatement ce produit si une
corde mesurant plus de 22 cm devient accessible ou si le contour d’une boucle de
plus de 44 cm devient accessible.
STRANGULATION HAZARD –
Young chidren can be strangled by cords.
2
1
2
3
4
First, remove the Valance by gently pulling it. Then, open the end brackets
by inserting a at blade screwdriver between the bottom of the cover and the
quick release tab and twisting. You may also push up on the bottom of the
end brackets to release the locking tab. Finally, slide the headrail out.
4
Optional projections positions:
5/8”
7/8”
Narrow Projection Wide Projection
Click
1 2 3
Click
Snap
1 2 3
 Loading...