Installing the Altro Whiterock hand
wash station
1. Handling the unit is a two person job. Make sure that
appropriate health and safety precautions and lifting
techniques are used.
2. Carefully lift the unit and place it onto the securely
installed plinth, ensuring that the unit is in the desired
location.
3. Using a spirit level, check that the unit is vertical and
square to the wall.
4. Whilst securely supporting the unit in place, open the
top access door with the key supplied and check that
the upper brackets are evenly spaced, in contact with
the wall, and are accessible.
5. Using a pencil, mark the position of the holes in the
upper fixing brackets onto the wall.
6. Close and lock the top access door.
7. Open the bottom access door with the key supplied
and check that the lower brackets are evenly spaced, in
contact with the wall, and are accessible.
8. Using a pencil, mark the position of the holes in the
bottom fixing brackets onto the wall.
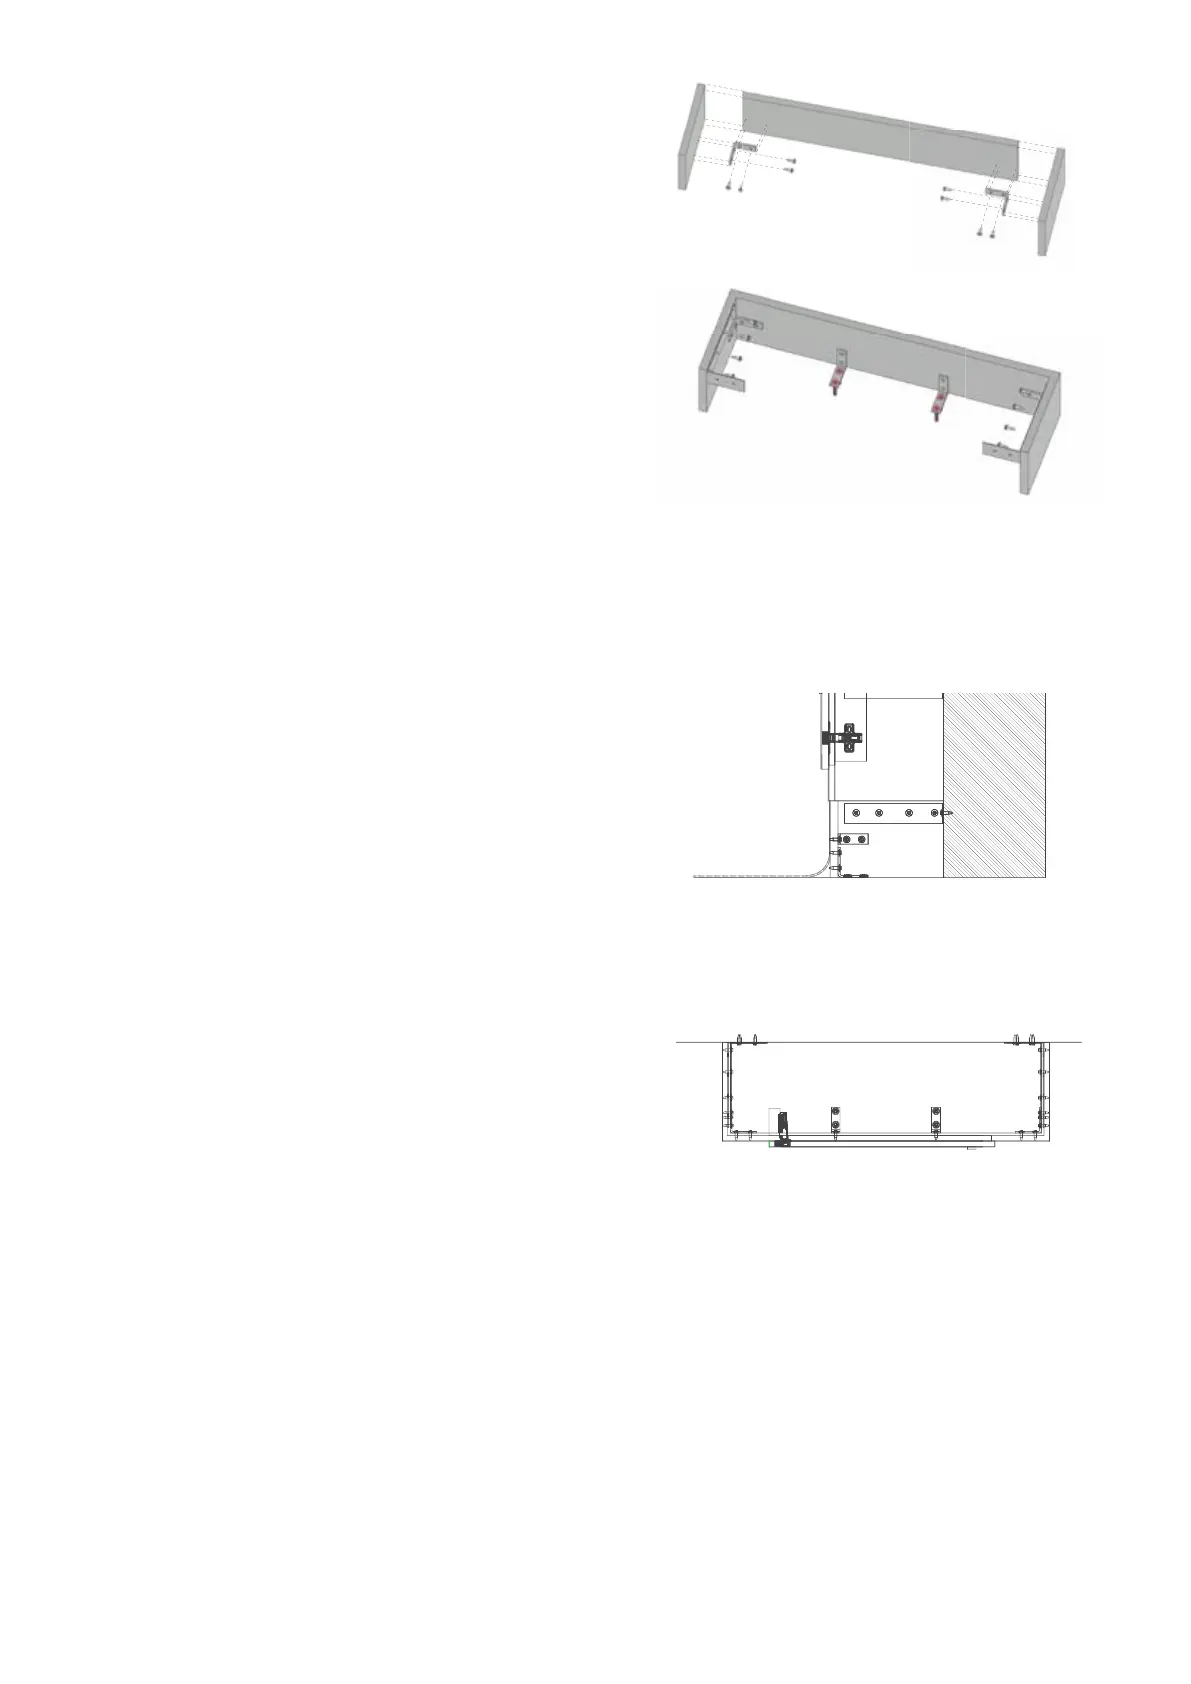
Side section at the base of the
unit showing plinth xings
Top view
Installing the Altro Whiterock hand
wash station plinth
1. Assemble the floor plinth using the L-brackets and
screws provided.
2. Mark the required position of the unit on the wall using
the units outer dimension so the unit can be accurately
positioned.
3. Screw the plinth to the floor/wall in the desired location
using the L brackets and screws provided. Ensure that
the plinth is level and square.
4. If the flooring is to be coved up to the plinth this
procedure should be done before the Altro hand wash
station is set onto the plinth and attached to the wall.
Plinth assembly
 Loading...