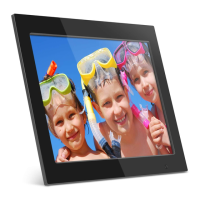
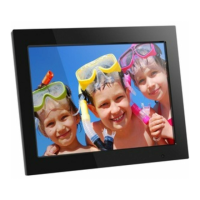
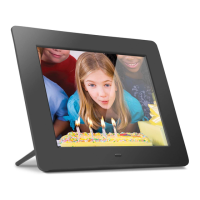
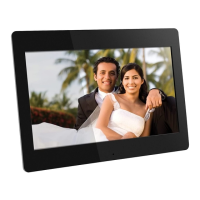
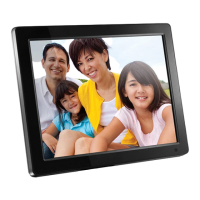
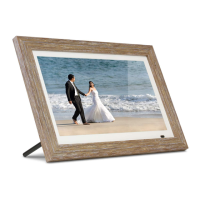
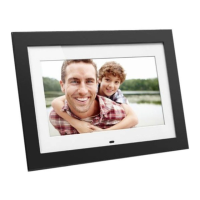
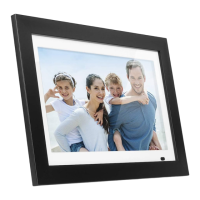
The Aluratek 14" Digital Photo Frame (model ADMPF214FB) is a device designed for displaying photos, videos, and music. It features a 14-inch LCD screen and comes with 4GB of built-in memory, allowing users to store and share their favorite media files.
Function Description:
The primary function of this device is to serve as a digital photo frame, capable of displaying a slideshow of images. Beyond photos, it also supports video playback and music playback, making it a versatile media display unit. Users can transfer files to the frame's internal memory from a PC or Mac using a USB 2.0 cable, or directly access media from external storage devices such as USB hard drives, USB flash drives, or SD/SDHC cards. The frame automatically starts a slideshow when a memory card is inserted.
Important Technical Specifications:
- Screen: 14" LCD Screen
- Internal Memory: 4GB built-in memory
- Connectivity:
- Mini USB Port (for connecting to PC/Mac)
- USB 2.0 Port (for connecting external USB devices)
- SD/SDHC Card Slot
- Power Adapter Port
- Audio: Headphone Jack, Speakers
- Mounting: VESA Mount
- Aspect Ratio: Recommended 16:9 for optimal full-screen display; supports 4:3 with scaling options.
Usage Features:
The digital photo frame offers a variety of features for media management and display, controlled via on-frame buttons or a remote control.
Frame Controls (On-device):
- Power Button: Turns the device on/off.
- Enter Button: Confirms selections.
- Up, Down, Left, Right Buttons: Navigate through menus.
- Exit Button: Returns to the previous menu.
Remote Control Features:
- Power On/Off: Turns the device on/off.
- SlideShow: Initiates or controls slideshows.
- Enter: Confirms selections.
- Up, Down, Left, Right Arrows: Navigate through menus.
- Exit: Returns to the previous menu.
- Zoom: Adjusts image zoom.
- OSD (On Screen Display): Toggles on-screen display information.
- View: Changes the view mode.
- Aspect Ratio (16:9/4:3): Adjusts the display aspect ratio.
- Music: Accesses music functions.
- StepShow: Advances to the next photo.
- Rotate: Rotates the displayed image.
- Volume +/-: Adjusts the volume.
- Menu: Takes the user to the main menu.
Operating Instructions:
Viewing Photos:
- Insert a memory card (SDHC, SD) into the card slot.
- The frame will automatically start a slideshow.
- The slideshow can be stopped by pressing the "Play/Pause" button on the frame.
- Use the "Left" or "Right" buttons to navigate between pictures.
Screen Resolution / Aspect Ratio:
- For optimal full-screen display, 16:9 aspect ratio pictures/videos are recommended. Users should check their camera/phone manual for setting changes.
- For 4:3 aspect ratio photos, the frame's system settings can be adjusted to "scale" or "original size."
- Grayscale, Brightness, and Contrast can be adjusted in the system settings.
Transferring Files:
- Connect the digital frame to a PC/Mac using the included USB cable.
- The frame's internal memory will appear as a removable drive (PC) or a drive icon (Mac).
- Copy photo, video, and music files to the frame's internal memory.
- Disconnect the USB cable (eject the drive icon on Mac before disconnecting).
- The frame will return to normal operation.
- Access the "Photo Setup" menu from the main menu by selecting the "Settings" icon and pressing "Enter," then pressing "Enter" again.
- Options include: Display Mode, Background Music, Display Ratio, Slide Speed, Slideshow Repeat, Slide Mode, and Photo Random Slideshow.
- Navigate options using "Up/Down" arrows and select using "Left/Right" arrows.
- Press "Exit" to return to the Setup menu, and "Exit" again to return to the Main menu.
- Access the "Video Setup" menu from the main menu by selecting the "Settings" icon and pressing "Enter," then pressing "Enter" again.
- Options include: Playback Mode and Display Ratio.
- Navigate and select options similarly to the Photo Function.
- Press "Exit" to return to the Setup menu, and "Exit" again to return to the Main menu.
- Access the "Music Setup" menu from the main menu by selecting the "Settings" icon and pressing "Enter," then pressing "Enter" again.
- Options include: Play Mode and Show Spectrum.
- Navigate and select options similarly to the Photo Function.
- Press "Exit" to return to the Setup menu, and "Exit" again to return to the Main menu.
- Access the "System Setup" menu from the main menu by selecting the "Settings" icon and pressing "Enter," then pressing "Enter" again.
- Options include: Language, Grayscale, Brightness, Contrast, Saturation, Auto Power On, Auto Power On Time, Auto Power Off, Auto Power Off Time, Auto-Power Frequency, Volume, Reset Setting, System Upgrade, and Start Up Mode.
- To change Power Off/Power On times, highlight the option, press "Enter," then use "Left/Right" to highlight hour/minutes and "Up/Down" to set the time. Press "Enter" to confirm or "Exit" to cancel.
- Navigate and select options similarly to the Photo Function.
- Press "Exit" to return to the Setup menu, and "Exit" again to return to the Main menu.
- Access the "Calendar Setup" menu from the main menu by selecting the "Settings" icon and pressing "Enter," then pressing "Enter" again.
- Options include: Date, Set Time Format, Clock Time, Alarm Status, Alarm Time, and Alarm Frequency.
- To change Date/Clock Time, highlight the option, press "Enter," then use "Left/Right" to highlight the number and "Up/Down" to set the desired number. Press "Enter" to confirm or "Exit" to cancel.
- Navigate and select options similarly to the Photo Function.
- Press "Exit" to return to the Setup menu, and "Exit" again to return to the Main menu.
Maintenance Features:
- Getting Started:
- Remove the plastic insulator from the remote control battery.
- Plug in the power adapter.
- Remove the protective film from the LCD.
- Insert the frame stand.
- Warranty: Aluratek provides a 1-year warranty against defects in material or workmanship from the date of purchase. The warranty is void if the serial number or "warranty void" sticker is removed or altered. It does not cover cosmetic damage, damage due to acts of God, accident, misuse, abuse, negligence, modification, improper operation/maintenance, connection to improper equipment, attempted repair by non-Aluratek personnel, or products sold "AS IS" or "WITH FAULTS."
- Technical Support: For assistance, users can contact Aluratek Technical Support via email (support@aluratek.com), web (aluratek.com/helpdesk), local phone (714-586-8730), or toll-free phone (1-866-580-1978).
- Radio and TV Interference Statement (FCC Compliance): The device complies with Class B digital device limits under FCC rules, designed to provide reasonable protection against harmful interference in residential installations. Users are advised to correct interference by measures required if the equipment causes harmful interference to radio or television reception.