EasyManua.ls Logo

Aluratek ADPFR09 - User Manual

Aluratek ADPFR09
24 pages
Print Icon
To Next Page IconTo Next Page
Loading...
mnl M10598 Copyright © 2021 Aluratek, Inc. All Rights Reserved.
aluratek.com
model ADPFR09
Instructional Manual
9” Multimedia Digital Photo Frame
Question and Answer IconNeed help?

Do you have a question about the Aluratek ADPFR09 and is the answer not in the manual?

Summary

Remote Control Functions

Remote Control Button Functions

Details the functions of each button on the remote control for user operation.

Operating Instructions

Viewing Photos

Instructions on how to view photos on the digital frame, including memory card insertion.

Photo Function

Photo Set-up

Configuration options for photo display settings like mode, ratio, and slide speed.

Video Function

Video Set-up

Configuration options for video playback, including play mode and display ratio.

Music Function

Music Set-up

Configuration options for music playback, including play mode and volume settings.

Motion Function

Motion Setup

Settings for motion detection, including sensor activation and time delays.

System Function

System Setup

Configuration of general system settings like language, brightness, and power management.

Calendar Function

Calendar Set-up

Setup options for the calendar, including date, time format, and alarm settings.

Delete Function

How to Delete Files from Internal Memory

Procedure for deleting files from the digital photo frame's internal storage.

Technical Support

Radio and TV Interference Statement

Warranty Information

Overview

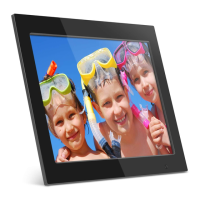
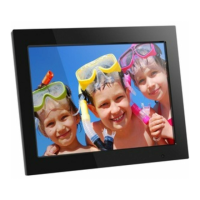
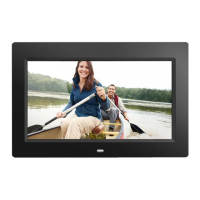
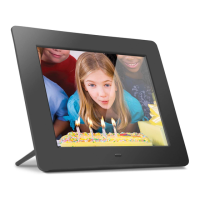
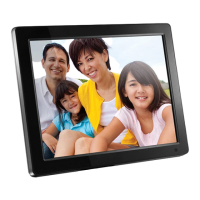
This document is an instructional manual for the 9" Multimedia Digital Photo Frame, model ADPFR09, manufactured by Aluratek. The manual provides detailed information on the frame's features, operation, and maintenance.

Function Description:

The 9" Multimedia Digital Photo Frame is designed to display photos, play videos, and play music. It features a 9" IPS LCD screen and 16GB of built-in memory for storing media files. Users can also insert a microSD memory card to easily access and share their favorite pictures, videos, and music. The frame supports automatic slideshows when a memory card is inserted and offers various settings for customizing the display and playback of media. It also includes a calendar function and a motion sensor.

Important Technical Specifications:

  • Screen: 9" IPS LCD Screen
  • Frame: Black Matte Frame
  • Memory: 16GB built-in memory
  • Card Slot: microSD Card Slot
  • Ports: MicroUSB Port, Power Adapter Port
  • Audio: Speakers
  • Security: Security Lock
  • Mounting: Wall Hang Holes
  • Power: Power ON / OFF Button
  • Input: Motion Sensor
  • Accessories: Power Adapter, Remote Control, USB 2.0 Cable, Frame Stand

Usage Features:

Getting Started:

To power on the photo frame, plug in the power adapter and press the power button.

Viewing Photos:

Insert a microSD memory card into the card slot. The frame will automatically start a slideshow. The slideshow can be stopped by pressing the "Play/Pause" button on the remote. Users can then press the "Previous" or "Next" buttons to navigate through pictures.

Transferring Files:

Files can be transferred from a PC or Mac to the frame's internal memory using the included USB cable. Connect the small connector to the digital frame and the larger connector to the PC/Mac. The frame's internal memory will appear as a removable drive (on PC) or a drive icon (on Mac). Users can copy photo, video, and music files to this drive. After transferring, disconnect the USB cable (eject the drive icon on Mac first). The frame will then return to normal operation.

Photo Function (Photo Setup):

From the main menu, select the "Photo" icon and press "OK" or "Play/Pause". Options include:

  • Display Mode: Adjust how photos are displayed.
  • Music: Enable or disable background music during slideshows.
  • Display Ratio: Set the aspect ratio for photos.
  • Slide Speed: Adjust the speed of the slideshow.
  • Slideshow Repeat: Enable or disable repeating the slideshow.
  • Play Random Slideshow: Play photos in a random order.
  • Slideshow Effect: Choose transition effects between photos.
  • Slide Mode: Select the slideshow mode. Navigation is done using the arrow buttons, and selections are made with "OK" or "Play/Pause". The "Return" button navigates back through menus.

Video Function (Video Setup):

From the main menu, select the "Video" icon and press "OK" or "Play/Pause". Options include:

  • Play Mode: Set the video playback mode.
  • Display Ratio: Adjust the aspect ratio for videos. Navigation and selection are similar to the Photo Function.

Music Function (Music Setup):

From the main menu, select the "Music" icon and press "OK" or "Play/Pause". Options include:

  • Play Mode: Set the music playback mode.
  • Volume: Adjust the volume level. Navigation and selection are similar to the Photo Function.

Motion Function (Motion Setup):

From the main menu, select the "Motion Sensor" icon and press "OK" or "Play/Pause". Options include:

  • Motion Sensor: Enable or disable the motion sensor.
  • Motion Sensor Time: Set the duration for the motion sensor. Navigation and selection are similar to the Photo Function.

System Function (System Setup):

From the main menu, select the "Settings" icon and press "OK" or "Play/Pause". Options include:

  • Language: Select the display language.
  • Start Up Mode: Choose the default mode when the frame starts.
  • Brightness, Contrast, Saturation, Hue: Adjust display settings.
  • Auto Power On/Off: Schedule automatic power on and off times.
  • Auto On Time/Auto Off Time: Set specific times for auto power functions.
  • Auto Power Frequency: Adjust power frequency.
  • Eco: Enable or disable eco mode.
  • No Activity Standby: Set standby mode after a period of inactivity.
  • Reset Setting: Reset all settings to default. To change Auto Power On/Off times, highlight the option, press "OK" or "Play/Pause", then use arrow buttons to select hours/minutes and "Up/Down" arrows to set the desired time. Confirm with "OK" or "Play/Pause".

Calendar Function (Calendar Setup):

From the main menu, select the "Calendar" icon and press "OK" or "Play/Pause". Options include:

  • Date: Set the current date.
  • Set Time Format: Choose between 12-hour or 24-hour format.
  • Clock Time: Set the current time.
  • Alarm Status: Enable or disable the alarm.
  • Alarm Time: Set the alarm time.
  • Alarm Frequency: Set the alarm repetition. To change Date and Clock Time, highlight the option, press "OK" or "Play/Pause", then use arrow buttons to highlight parts of the date/time and "Up/Down" arrows to set the desired numbers. Confirm with "OK" or "Play/Pause".

Remote Control:

The remote control provides various buttons for easy navigation and control:

  • BGM: Start slideshow with background music.
  • Power: Turn the frame on/off.
  • Menu: Access the main menu.
  • Up, Down, Left, Right Arrows: Navigate through menus.
  • OK: Confirm selections.
  • Setup: Access the setup menu.
  • Volume + / Volume -: Adjust volume.
  • Previous/Next: Advance to previous/next music/video.
  • Mute: Mute audio.
  • Return: Go back to the previous screen.
  • Play / Pause: Play or pause media.
  • Zoom: Zoom in on photos.
  • Rotate: Rotate photos.

Maintenance Features:

Delete Function:

To delete files from the internal memory, navigate to the "File" icon from the main menu and press "OK" or "Play/Pause". Use the arrow buttons to select the file to delete, then press "Play/Pause". In the pop-up menu, select "Delete" and press "OK". Confirm by selecting "Yes".

Technical Support:

For assistance, users can contact Aluratek Technical Support via:

  • E-mail: support@aluratek.com
  • Web: aluratek.com/helpdesk
  • Local (Irvine, CA): 714-586-8730
  • Toll free: 1-866-580-1978

Warranty:

Aluratek provides a 1-year warranty against defects in material or workmanship from the date of purchase. The warranty is void if the serial number or "warranty void" sticker is removed or altered. The warranty does not cover cosmetic damage, damage due to acts of God, accident, misuse, abuse, negligence, modification, improper operation or maintenance, connection to improper equipment, attempted repair by non-Aluratek personnel, or products sold "AS IS" or "WITH FAULTS". Aluratek's liability is limited to the price paid for the product. The company reserves the right to revise or update its products, software, or documentation without prior notification.

Aluratek ADPFR09 Specifications

General IconGeneral
BrandAluratek
ModelADPFR09
CategoryDigital Photo Frame
LanguageEnglish

Related product manuals