Do you have a question about the Amana ADB1600AW and is the answer not in the manual?
This document provides installation and setup information for an Amana undercounter dishwasher, model ADB1600AW. It outlines the necessary requirements for drain, water supply, and electrical connections to ensure proper and safe operation of the appliance.
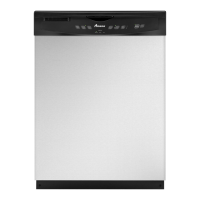
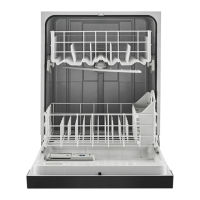
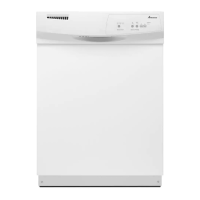
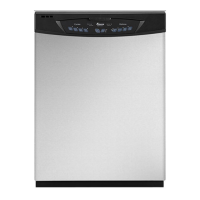
The Amana undercounter dishwasher is designed to clean dishes, silverware, and other kitchenware efficiently. It is intended for permanent installation beneath a kitchen countertop, integrating seamlessly into the kitchen cabinetry. The dishwasher operates by circulating hot water and detergent to remove food particles and grime, followed by rinsing cycles. Its primary function is to automate the dishwashing process, providing convenience and hygiene in the kitchen.
The dishwasher is designed for ease of use and reliable performance. For optimal drainage, a new drain hose is supplied with the dishwasher. If this hose is not long enough for a particular installation, a replacement drain hose with a maximum length of 12 feet (3.7 meters) can be used. This replacement hose must meet current AHAM/IAPMO test standards, ensuring it is resistant to heat and detergent, and it must fit the 1-inch (2.5 cm) drain connector of the dishwasher.
Proper drain connection is crucial for the dishwasher's operation. The drain hose must be connected to a waste tee or disposer inlet located above the drain trap in the house plumbing. Additionally, this connection point must be a minimum of 20 inches (50.8 cm) above the floor. To prevent backflow and ensure efficient drainage, it is recommended that the drain hose either be looped up and securely fastened to the underside of the counter, or connected to an air gap. An air gap is particularly important if the drain hose is connected to house plumbing at a point lower than 20 inches (50.8 cm) above the subfloor or floor, as it provides an essential barrier against contaminated water re-entering the dishwasher.
For water supply, the dishwasher requires a hot water line with a pressure ranging from 20 to 120 psi (138-862 kPa). This water pressure can be verified by a licensed plumber, ensuring the dishwasher receives an adequate and safe water supply for its cleaning cycles.
The electrical requirements for the dishwasher are specific to ensure safe and efficient operation. It requires a 120-volt, 60 Hz, AC-only electrical supply, protected by a 15- or 20-ampere fused electrical circuit. Only copper wiring should be used for the electrical connections. For enhanced safety and performance, it is recommended to use a time-delay fuse or circuit breaker and to dedicate a separate circuit for the dishwasher.
If connecting the dishwasher with a power supply cord, a UL Listed power supply cord kit (Part Number 4317824) specifically marked for use with the dishwasher must be utilized. This power supply cord must plug into a grounded 3-prong outlet. This outlet should be located in the cabinet adjacent to the dishwasher opening and must comply with all local electrical codes and ordinances.
For direct wiring connections, flexible, armored, or non-metallic sheathed copper wire with a grounding wire is required. This wiring must meet the specific requirements of the home and local electrical codes and ordinances. Additionally, a UL Listed/CSA Approved strain relief must be used to secure the wiring connection, preventing tension on the electrical terminals.
The dishwasher is designed to fit within standard cabinet cutouts. Corner locations require a minimum clearance of 2 inches (5.1 cm) between the side of the dishwasher door and any adjacent wall or cabinet. The shaded areas in the cabinet cutout diagram indicate where utility connections, such as electrical and plumbing, can be installed. It is important to ensure that all surfaces within the cabinet cutout are free of protrusions that could hinder or prevent the dishwasher's installation.
While the document primarily focuses on installation, the emphasis on proper electrical and plumbing connections inherently contributes to the long-term maintenance and reliability of the dishwasher. Using the specified drain hose, ensuring correct drain height, and installing an air gap when necessary are all preventative measures that help avoid drainage issues, potential water damage, and the need for frequent repairs.
Similarly, adhering to the recommended electrical specifications, including the use of appropriate wiring, fuses, and a dedicated circuit, safeguards the appliance from electrical faults and extends its operational life. The requirement for UL Listed/CSA Approved components and adherence to local codes further ensures that the dishwasher operates within safety standards, minimizing the risk of electrical hazards and reducing the likelihood of premature component failure.
The continuous commitment by Whirlpool Corporation to improve its products suggests that the dishwasher is designed with durability in mind, aiming for a long service life with proper installation and usage. While specific user-level maintenance instructions are not detailed in this installation guide, the foundation for a well-maintained appliance is laid through these rigorous installation requirements.
| Type | Built-In |
|---|---|
| Place Settings | 12 |
| Number of Wash Cycles | 4 |
| Energy Star Certified | Yes |
| Control Type | Electronic |
| Soil Sensor | Yes |
| Delay Start | Yes |
| Drying Option | Heated Dry |
| Color | White |
| Width | 24 inches |
| Wash Cycles | Normal, Heavy |
| Dimensions (H x W x D) | 34.5 x 24 x 24 inches |