EasyManua.ls Logo

Amana AMV1150VAS - User Manual

Amana AMV1150VAS
12 pages
Print Icon
To Next Page IconTo Next Page
Loading...
MICROWAVE HOOD COMBINATION
INSTALLATION INSTRUCTIONS
MICROWAVE HOOD COMBINATION SAFETY
This product is suitable for use above electric or gas cooking products up to and including 36" (91.4 cm) wide. See “Installation
Requirements” section for further notes.
These installation instructions cover different models. The appearance of your particular model may differ slightly from the illustration in
these installation instructions.
Table of Contents
MICROWAVE HOOD COMBINATION SAFETY ..............................1
INSTALLATION REQUIREMENTS ...................................................2
Tools and Parts...............................................................................2
Remove Cardboard Template ........................................................2
Location Requirements...................................................................2
Product Dimensions .......................................................................3
Electrical Requirements..................................................................3
INSTALLATION INSTRUCTIONS .....................................................4
Remove Mounting Plate .................................................................4
Rotate Blower Motor.......................................................................4
Locate Wall Stud(s).........................................................................6
Mark Rear Wall................................................................................7
Drill Holes in Rear Wall....................................................................7
Attach Mounting Plate to Wall........................................................8
Prepare Upper Cabinet...................................................................8
Install Damper Assembly ................................................................9
Install the Microwave Oven ............................................................9
Complete Installation....................................................................10
VENTING DESIGN SPECIFICATIONS............................................11
ASSISTANCE ...................................................................................12
Replacement Parts .......................................................................12
Accessories...................................................................................12
W10247296B
You can be killed or seriously injured if you don't immediately
You
can be killed or seriously injured if you don't
follow
All safety messages will tell you what the potential hazard is, tell you how to reduce the chance of injury, and tell you what can
happen if the instructions are not followed.
Your safety and the safety of others are very important.
We have provided many important safety messages in this manual and on your appliance. Always read and obey all safety
messages.
This is the safety alert symbol.
This symbol alerts you to potential hazards that can kill or hurt you and others.
All safety messages will follow the safety alert symbol and either the word “DANGER” or “WARNING.”
These words mean:
follow instructions.
instructions.
DANGER
WARNING

Other manuals for Amana AMV1150VAS

Question and Answer IconNeed help?

Do you have a question about the Amana AMV1150VAS and is the answer not in the manual?

Summary

Microwave Hood Safety and Warnings

General Safety Alerts

Provides critical safety alerts and definitions for hazard symbols like DANGER and WARNING.

Installation Requirements Overview

Tools, Parts, Location, and Dimensions

Lists required tools, parts, and criteria for choosing an installation location and dimensions.

Electrical and Venting Specifications

Details electrical supply requirements, grounding, and specific venting needs.

Microwave Hood Installation Steps

Blower Motor and Mounting Plate Preparation

Instructions for preparing the blower motor and mounting plate for venting installation.

Wall and Roof Venting Preparation

Steps for preparing the wall or roof for venting and the microwave's role.

Locating Studs and Marking Wall

Guidance on finding wall studs and marking the rear wall for secure mounting.

Drilling Holes and Attaching Mounting Plate

Procedures for drilling holes and securely fastening the mounting plate to the wall.

Preparing Upper Cabinet and Oven Installation

Steps for preparing the upper cabinet and lifting the microwave into place.

Final Connections and Testing

Completing electrical connections, testing operation, and securing the installation.

Venting System Design

Venting Transitions and Fittings

Details on vent transitions, clearance requirements, and recommended fittings.

Vent Length Calculation

Guidance on calculating total vent length and system limitations for optimal performance.

Support and Additional Options

Replacement Parts and Accessories

Information on ordering replacement parts and available accessories like filler panels.

Overview

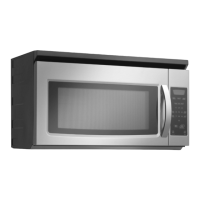
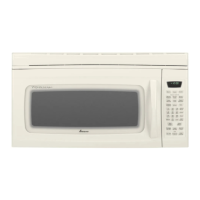
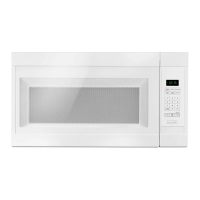
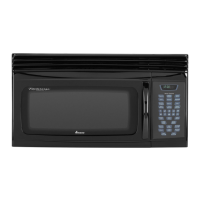
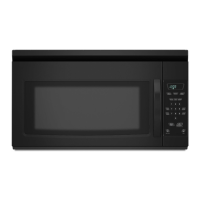
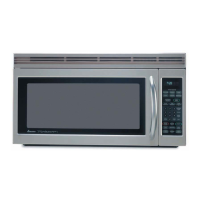
This manual describes the installation, safety, and maintenance of a Microwave Hood Combination appliance. This device serves a dual purpose: it functions as a microwave oven for cooking and reheating food, and it integrates a ventilation system, or hood, designed to remove smoke, steam, and cooking odors from the kitchen environment. The combination design makes it a space-saving solution, typically installed above a range or cooktop, providing both cooking convenience and air purification in one unit.

Function Description:

As a microwave oven, the appliance uses microwave radiation to heat food quickly and efficiently. Users can typically set cooking times and power levels, and many models include pre-programmed settings for common food items. The interior usually features a turntable to ensure even heating. The hood component operates by drawing air from the cooking surface, filtering it, and then either recirculating it back into the kitchen (recirculation installation) or expelling it outside the home (wall or roof venting installation). This helps maintain air quality, reduces grease buildup on kitchen surfaces, and enhances comfort during cooking.

Usage Features:

The installation process is detailed to ensure proper and safe setup. Key features related to usage include:

  • Installation Flexibility: The appliance can be configured for different venting methods—recirculation, wall venting, or roof venting—allowing it to adapt to various kitchen layouts and building structures. This adaptability is a significant usage feature, as it means the appliance can be integrated into nearly any home, regardless of existing ductwork.
  • Clearance Requirements: Specific dimensions and clearances are provided to ensure the microwave oven fits correctly above the cooking surface and within the upper cabinet. This includes minimum and maximum depths for upper cabinets and a typical installation height, which are crucial for both functionality and aesthetic integration.
  • Electrical Safety: The manual emphasizes the importance of a grounded electrical outlet and provides clear warnings against using adapters or extension cords, highlighting the critical role of proper electrical setup for safe operation. This ensures that users are aware of the necessary electrical infrastructure for the appliance.
  • Mounting System: The appliance uses a mounting plate that attaches to the rear wall and bolts through the upper cabinet for secure installation. The manual describes various wall stud configurations (no wall studs at end holes, wall stud at one end hole, wall studs at both end holes) and provides detailed instructions for drilling holes and securing the mounting plate accordingly. This ensures a robust and stable installation, preventing the heavy appliance from falling.
  • Blower Motor Rotation: For wall or roof venting, the blower motor inside the microwave oven must be rotated to direct exhaust air correctly. This feature allows the same appliance model to support different venting types, enhancing its versatility. The instructions for rotating the blower motor are precise, ensuring optimal performance for the chosen venting method.
  • Damper Assembly: A damper assembly is installed to prevent backdrafts of outside air when the vent fan is not operating. For wall venting, the damper is positioned on the back of the microwave, while for roof venting, it's inserted through the cabinet cutout. This is a key feature for maintaining indoor air quality and temperature control.
  • Upper Cabinet Preparation: Detailed steps are provided for preparing the upper cabinet, including using a template to mark and drill holes for the power supply cord and mounting bolts. This ensures that the microwave oven aligns perfectly with the cabinet and that all connections are properly routed.
  • Two-Person Installation: The manual explicitly states that two or more people are required to move and install the microwave oven due to its weight. This is a crucial safety instruction that directly impacts the ease and safety of the installation process.
  • Post-Installation Check: After installation, users are instructed to test the microwave oven's operation by heating water and checking the vent fan. This ensures that the appliance is functioning correctly and that the installation was successful.

Maintenance Features:

While the manual primarily focuses on installation, it touches upon maintenance aspects related to the ventilation system:

  • Filter Installation: The manual mentions installing filters and refers users to the "User Instructions" for filter placement. This implies that the appliance uses filters (likely aluminum grease filters and/or charcoal filters for recirculation models) that require periodic cleaning or replacement to maintain effective ventilation.
  • Replacement Parts: A list of available replacement parts, such as the damper assembly, mounting plate, upper cabinet template, and mounting screw kit, is provided. This indicates that components related to installation and ventilation can be replaced if damaged or lost, supporting the long-term maintainability of the appliance.
  • Troubleshooting: In case the microwave oven does not operate after installation, the manual advises checking household fuses, circuit breakers, and the power supply cord connection. It also directs users to the "User Instructions" for further troubleshooting information, suggesting that common operational issues can often be resolved by the user.
  • Venting Design Specifications: This section, intended for architectural designers and builders, provides guidelines for optimal venting installation, including recommendations for rigid metal vents, minimizing vent length and elbows, and using duct tape and caulking compound for sealing. Adhering to these specifications during installation contributes to the long-term efficiency and reduced maintenance of the ventilation system. For instance, using rigid metal vents over flexible ones reduces airflow resistance and grease buildup, leading to less frequent cleaning and better performance. The emphasis on proper sealing prevents air leaks, which can reduce the effectiveness of the ventilation and lead to energy loss.

In summary, this Microwave Hood Combination appliance offers a versatile cooking and ventilation solution with detailed installation guidance, robust safety features, and provisions for ongoing maintenance to ensure its longevity and optimal performance in the kitchen.

Amana AMV1150VAS Specifications

General IconGeneral
Styleover-the-range
Colorstainless steel
Total Capacity1.5 cubic feet
Sensor Cookingno
Child Lockyes
Timeryes
Microwave Power1000 watts
Weight and Dimensions IconWeight and Dimensions
Depth15.5 inches
Height17.25 inches
Width29.94 inches
Net Weight74 pounds

Related product manuals