x4
3
INSTALL WALL MOUNT
Place the wall mount against the wall, aligning the
4 holes with the installed anchors. With the Phillips
driver bit, drive the screws through the wall mount
holes until they are flat against the wall mount.
PLUG SUPPLIED POWER CORD INTO DEVICE
Once the device is mounted on the wall, you won’t
be able to access its power port. DO NOT plug it
into an electrical socket yet.
SLIDE DEVICE ONTO MOUNT
Place the device flat over the top of the wall mount
and slide it down, ensuring that all 4 hooks in the
wall mount are engaged with the device. Make sure
the device is placed with the camera at the top.
4
5
To change the device’s orientation,
unhook it from the wall mount and
remount it the other way.
x4
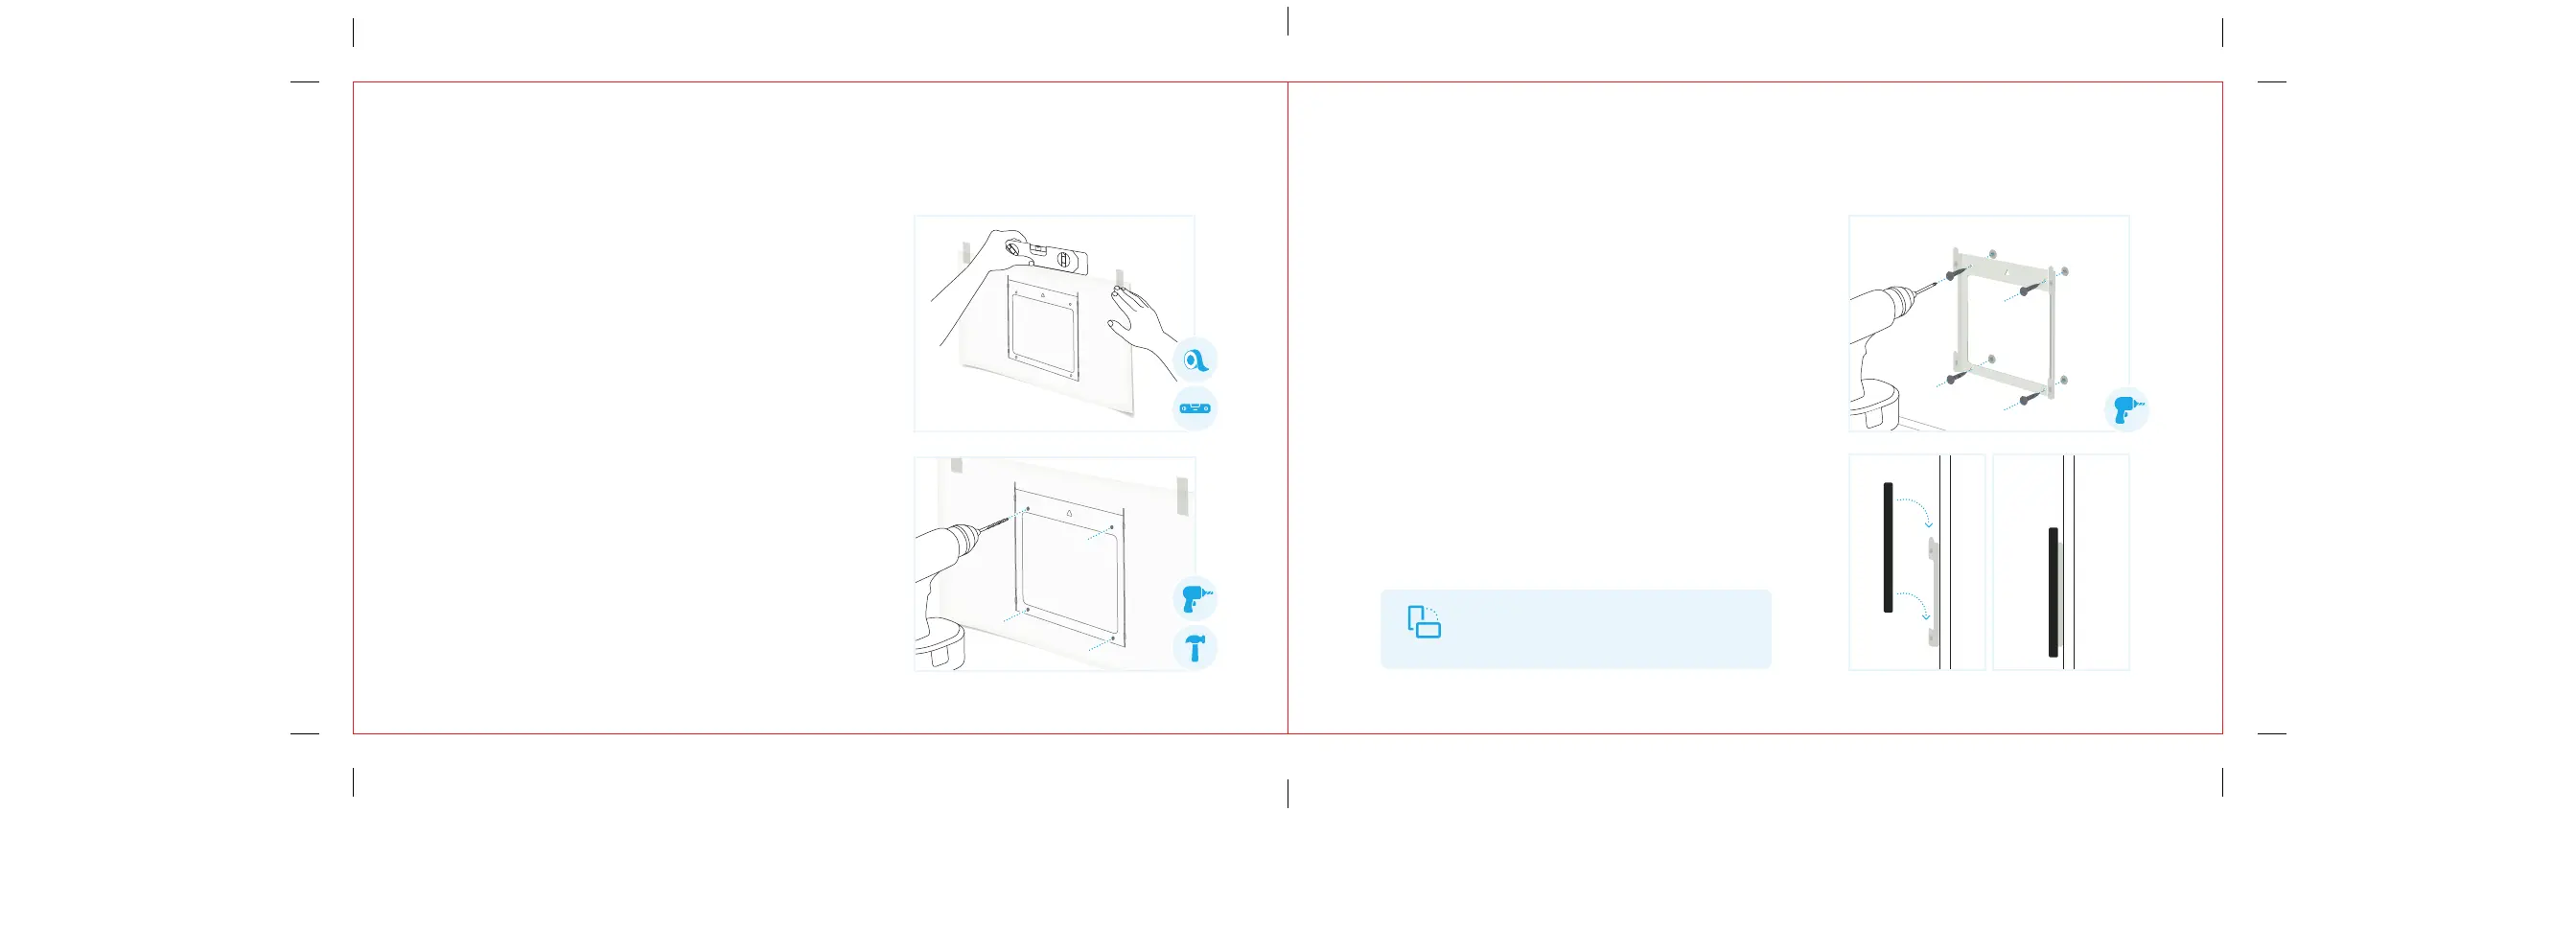
LEVEL AND TAPE TEMPLATE TO THE WALL
• Use the mounting tips and the included
mounting template to identify where to
mount your device.
• Place the template on the wall in your
chosen orientation.
• Use a spirit level or a level app on your
phone to level the template.
• Tape the template in place.
DRILL HOLES AND INSTALL ANCHORS
Using an electric drill with an 8 mm (or 5/16")
drill bit, drill through the designated holes in
the template.
NOTE: remove template after drilling holes.
Slowly hammer each of the 4 anchors into the
holes until they are flat against the wall.
2
1
MOUNTING YOUR DEVICE ON THE WALL
3 4