7
GB
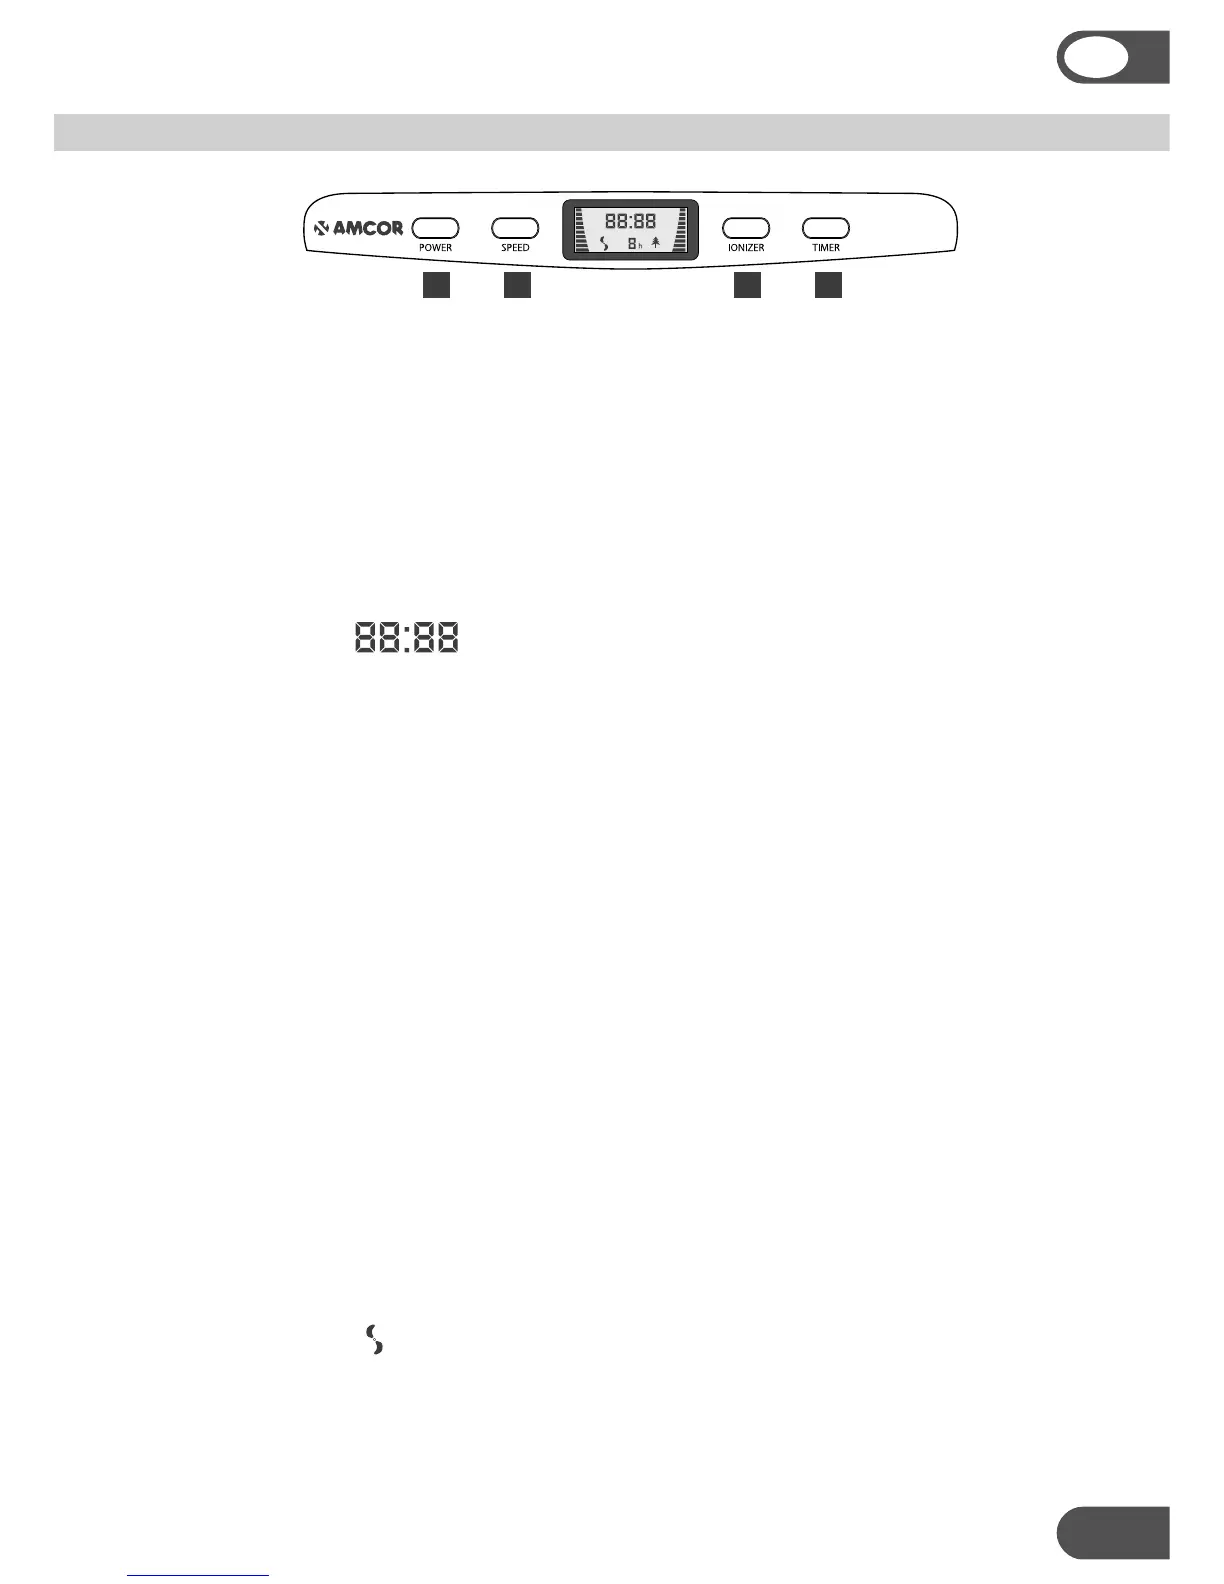
Connecting to the mains power supply and using the POWER button (1):
a. When the unit is plugged into the mains power supply or when one of the
buttons is pressed, the unit will make a beep sound.
b. If the AM90 is off (the LCD screen is blank) and the POWER button (1) is pressed,
it will go into the stand-by mode where only the time will be displayed. The blue
LCD backlight will turn on when one of the control buttons is pressed.
c. If the unit is operating or in stand-by mode and the POWER button (1) is pressed,
the unit will go off.
Setting the time:
a. The first time the AM90 is switched on (after connecting to the mains and
pressing the POWER button), the time will be displayed with all zeros.
b. Press the TIMER button (4) for a few seconds and the hour digits will flash.
c. Hold down the IONISER button (3) and the hour digits will scroll down. Press the
IONISER button (3) and the hours will count down in single steps. Stop when you
have the correct hour setting. In a few seconds the minutes digits will flash.
d. Hold down the IONISER button (3) and the minutes digits will scroll down. Press
the IONISER button (3) and the minutes will count in single steps. Stop when
you have the correct minutes setting. In a few seconds the time digits will stop
flashing and time will be set.
e. The SPEED button (2) works like the IONISER button (3), but the digits count up.
f. As long as the unit is connected to the mains, the unit will keep track of the time
(even in the off mode, when the LCD screen is blank).
g. Note: The time can only be set, when the unit is in the stand-by mode.
Turning the unit on:
a. If the unit is in the stand-by mode and the SPEED button (2) is pressed, the unit
will start operating at the high fan speed.
b. Pressing the SPEED button (2) repeatedly will cycle through this sequence:
high fan speed – medium fan speed – low fan speed – stand-by mode.
c. The fan speed is shown on the LCD screen with bar graphs on each side and by
the fan symbol turning at different rates.
CONTROL PANEL AND OPERATION
1 2 3 4