Do you have a question about the Amcrest SmartHome AD410 and is the answer not in the manual?
Disconnect wires and remove the old doorbell from the wall.
Place bracket on surface, mark drill holes with marker or pencil.
Attach mounting bracket to corner or wedge bracket and snap together.
Use screws for wood/drywall, or anchors for concrete/brick.
Loosen terminal screws, place wiring underneath, and re-tighten screws.
Use extra wires and wire nuts to extend short wiring if needed.
Feed wiring back into wall, then slide doorbell onto mounting bracket to secure.
Turn breaker on; allow up to 2 minutes for the doorbell to power up.
Download the Amcrest Smart Home app for Android or iOS.
Connect your doorbell by following the setup instructions within the app.
Device complies with FCC Rules, Part 15, with conditions to avoid interference.
Device complies with Industry Canada licence-exempt RSS standards.
Information regarding 5GHz band usage for indoor use and antenna gain.
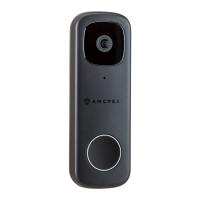
This document outlines the installation and setup of the Amcrest Wi-Fi Doorbell, Model AD410, designed to enhance your smart home security. The doorbell system includes the Wi-Fi doorbell unit, a chime kit, and various mounting accessories to facilitate a smooth installation process.
The Amcrest Wi-Fi Doorbell serves as a smart security device that allows you to see, hear, and speak to visitors at your door from anywhere using your smartphone. It integrates with the Amcrest Smart Home App, providing remote access and control over its features. The doorbell replaces your existing traditional doorbell, utilizing its wiring for power. It is designed to capture video footage of activity at your doorstep, offering peace of mind and enhanced surveillance. The chime kit ensures that you hear a traditional doorbell sound inside your home, complementing the smart notifications on your phone.
The installation process begins by identifying the components included in the box: the Wi-Fi Doorbell, a Wedge Bracket (5°), a Corner Bracket (15°), a pre-installed Mounting Bracket, a Chime Kit, terminal screws, mounting screws, wire nuts, wall anchors, a masonry drill bit, extra wires, a pin, and a wire harness. The wedge and corner brackets offer flexibility in angling the doorbell; the corner bracket can angle the doorbell 15°, while the wedge bracket can angle it 5° upward or downward, allowing for optimal viewing angles depending on your installation surface.
The first step in installation involves removing your existing doorbell and disconnecting its wires, which will be repurposed for the new Amcrest Wi-Fi Doorbell. Next, you will place either the corner or wedge bracket on your mounting surface and mark the drill holes. For wood, drywall, or soft surfaces, the brackets are secured with mounting screws using a screwdriver. For harder surfaces like concrete, stucco, or brick, the included masonry drill bit is used to drill pilot holes before inserting wall anchors and then securing the brackets with screws. After the chosen bracket is mounted, the mounting bracket is attached to it by pressing them together until they snap into place.
Connecting the doorbell to existing wiring requires loosening the terminal screws located on the back of the Wi-Fi Doorbell. The existing doorbell wires are then wrapped underneath the terminal screws, and the screws are re-tightened to secure the wires. If the existing wiring is too short, the included extra wires and wire nuts can be used to extend the wiring. Conversely, if the existing wiring is too long, the excess wire can be trimmed.
The doorbell also supports an optional microSD card for local storage. To install it, locate the microSD card slot on the back of the device, raise the microSD card flap, insert the card (supporting up to 128GB, Class 10 or higher), and then secure the flap back into the doorbell.
Mounting the doorbell involves feeding the wiring back into the wall, then placing the doorbell onto the mounting bracket and sliding it down until it clicks securely into place. A click indicates that the doorbell has been successfully secured to the bracket.
After the physical installation is complete, the next step is to turn the breaker back on to power up the doorbell, which may take up to 2 minutes to fully power up.
The final step is to set up the Amcrest Smart Home App. This involves downloading the app from the App Store or Google Play, and then following the in-app instructions to connect your Amcrest Wi-Fi Doorbell to your Android or iOS mobile device.
The manual includes regulatory information, particularly regarding FCC compliance for devices operating in the United States and IC compliance for devices in Canada. Users are advised that changes or modifications not expressly approved by the party responsible for compliance could void the user's authority to operate the equipment. The device complies with FCC Rules Part 15, ensuring it does not cause harmful interference and accepts any interference received. For Class B devices, the equipment is designed to provide reasonable protection against harmful interference in a residential installation. In case of interference, users are encouraged to reorient or relocate the receiving antenna, increase the separation between the equipment and receiver, connect the equipment into an outlet on a different circuit, or consult a dealer or experienced radio/TV technician. The equipment complies with FCC radiation exposure limits for an uncontrolled environment, requiring a minimum distance of 20cm between the radiator and the user's body.
For Canadian users, the device complies with Industry Canada licence-exempt RSS standard(s), ensuring it does not cause interference and accepts any interference. It also adheres to antenna gain regulations to reduce potential radio interference. Similar to FCC guidelines, the equipment complies with IC RSS-102 radiation exposure limits, requiring a minimum distance of 20cm between the radiator and the user's body.
For devices using 5GHz, specific instructions are provided. The device is for indoor use only in the 5150-5250 MHz band to reduce potential interference with mobile satellite systems. Maximum antenna gain limits are specified for the 5250-5350 MHz, 5470-5725 MHz, and 5725-5825 MHz bands to comply with e.i.r.p. limits. Users are also warned that high-power radars are primary users of the 5250-5350 MHz and 5650-5850 MHz bands, and these radars could cause interference or damage to LE-LAN devices.
Online video tutorials and quick start guides are available at amcrest.com/support, and customer support can be reached at support@amcrest.com for any assistance.
| Night Vision | Yes, up to 16 feet |
|---|---|
| Two-Way Audio | Yes |
| Weather Resistant | IP65 |
| Power Source | Hardwired |
| Connectivity | Wi-Fi (2.4GHz) |
| Storage | MicroSD Card, Cloud |
| Compatibility | Alexa, Google Assistant |
| Resolution | 2560 x 1920 (5 Megapixels) |
| Image Sensor | 1/2.7" CMOS |