2423
| Operating Instructions Manual | Operating Instructions Manual
Directions for Stripping and Cleaving Picasso Plus and Picasso Lite Plus FiberTo Connect Plus Series Handpiece (FIGURE 8-2) to Fiber Optic Assembly:
1. Remove the Surgical Handpiece from the protective packaging and loosen the cap at the back of
the handpiece (but do not remove). (FIGURE 10)
2. Thread the fiber through the handpiece and gently tighten the back cap to secure the fiber.
3. Attach the tip to the front of the handpiece.
4. It may be necessary to momentarily straighten out the tip until the fiber slides all the way through.
You may loosen the back cap to allow the fiber to move to achieve the desired fiber length, then
tighten the cap.
The surgical handpiece can be safely autoclaved. The autoclave parameters are specified in the
Operating Instructions Manual supplied with your laser. We recommend that you separate the silver
adjustment section of the handpiece from the main body prior to autoclaving.
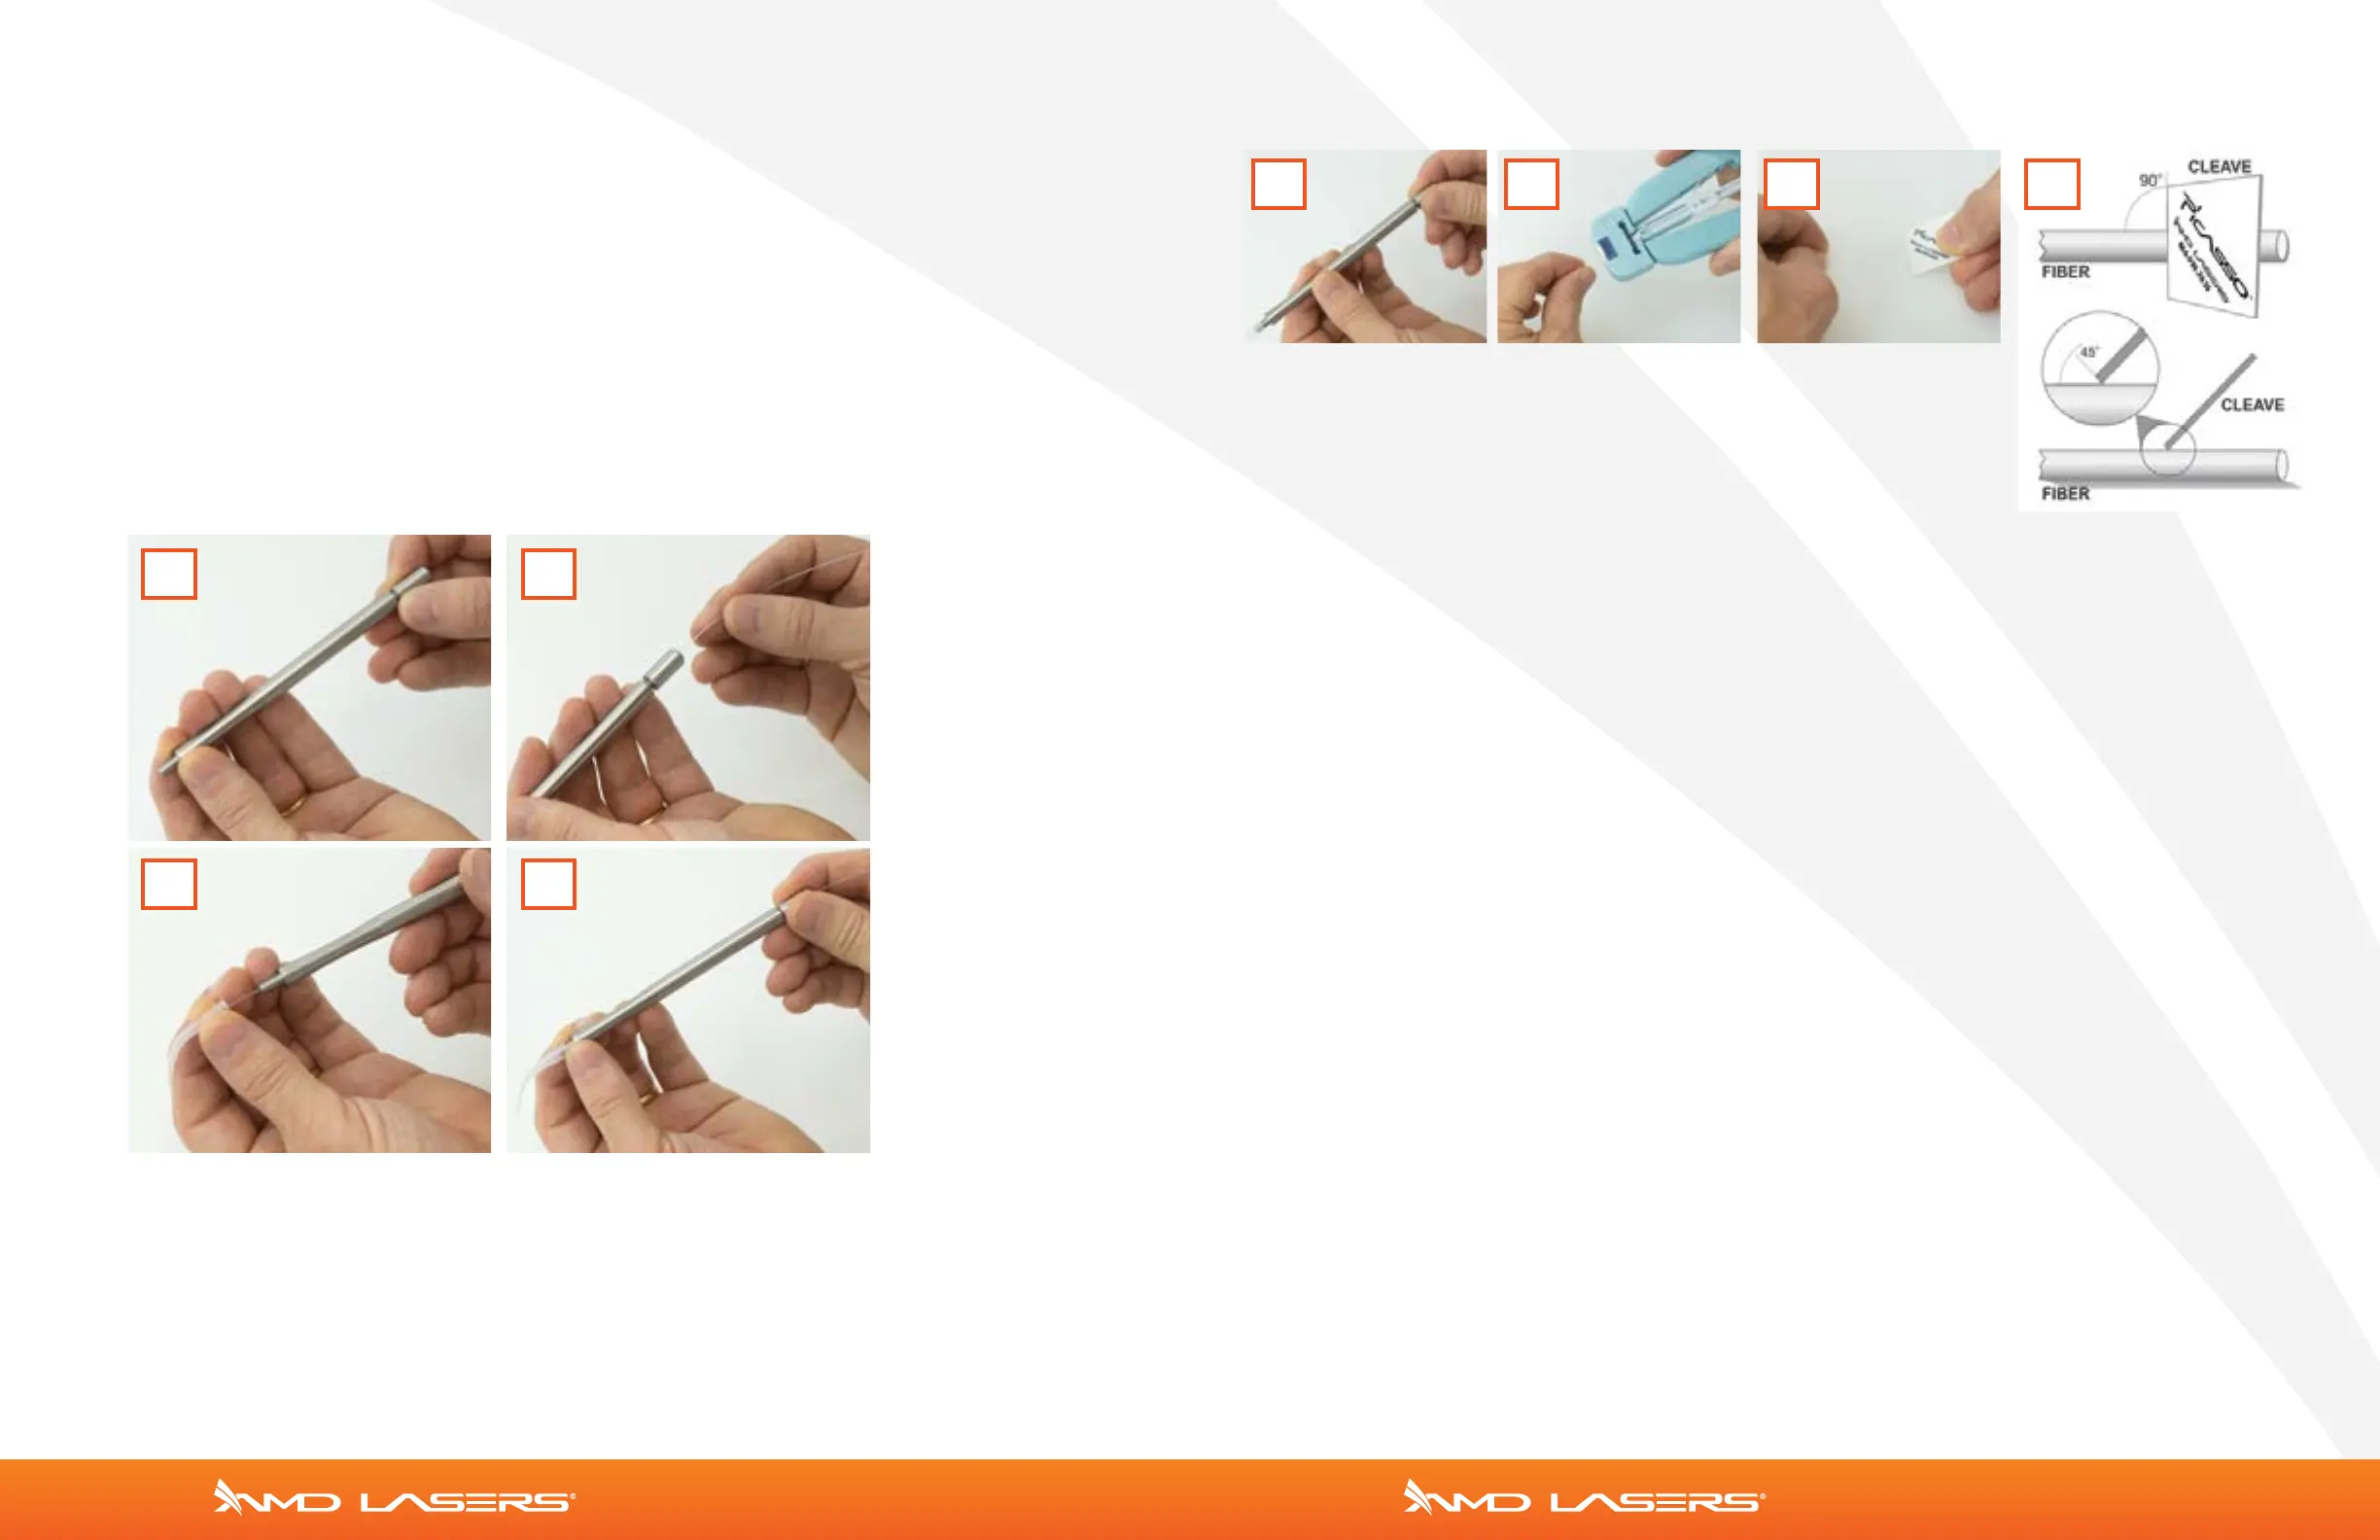
To Connect Legacy Handpiece (FIGURE 8-1) to Fiber Optic Assembly:
1. Loosen handpiece base (FIGURE 11)
2. Slide fiber through handpiece base, handle, and tip
3. Approximately 3–4 in (~7–10 cm) of fiber should protrude
4. Strip and cleave fiber (FIGURES 12 and 13)
5. Adjust to desired length
6. Gently tighten handpiece base to secure the fiber
Strippable fiber should be stripped/cleaved after each procedure.
1. Loosen the proximal end of the handpiece by unscrewing the
handpiece base (FIGURE 11).
2. Push fiber optic cable into the base of the handpiece until fiber
appears from the tip. Pull fiber approximately 3–4 inches (~7–10cm)
out of the tip.
3. Slide the black stop marker on the stripper to approximately 1 inch (2.5 cm). Insert fiber into the
stripper until the end of the fiber touches the marker. Squeeze the red stripper handles pulling the
stripper away from the handpiece in a smooth motion to ensure that the fiber coating is cleanly
removed. Grasp the fiber just above the handpiece with a firm grip (FIGURE 12).
4. Use the ceramic cleaver to lightly scratch the end of the fiber. Place the fiber against a flat surface.
Position the edge of the cleaver approximately ¼ inch (0.6 cm) from the end of the fiber, and make
a gentle scratch perpendicularly across the fiber (FIGURE 13), scribing (scratching) the surface
at a 45° angle with the edge of the cleaver. Make sure that the edge of the cleaver is always
perpendicular to the fiber during cleave/scribing (FIGURE 14).
5. Hold the end of the fiber above the cleaver between fingers and bend the end of the fiber until the
end section breaks off. If the fiber end is removed properly, the fiber should be flat.
6. Verify the cleaver/cleave quality by aiming the fiber at a flat surface and observe the shape of the
spot created by the visible aiming beam. If the visible spot is a full circle, then the power output is
optimal. If the circle is distorted, repeat only the cleave/scribing procedure presented in steps 5 and
6 until you obtain a circular beam.
7. After the fiber is successfully cleaved, pull the fiber back through the handpiece, adjust the fiber
end to desired length. Tighten the handpiece base. Ensure that the fiber is secure by pulling lightly
on the fiber optic cable at the proximal end.
8. Wipe the completed handpiece and fiber with a clean wipe similar to CaviWipe™.
Contamination Control Procedures for the Strippable Fiber and Surgical Handpiece
The contamination control suggested for fiber optic cable, handpiece, and interchangeable tips is the
system sterilization method. However, before sterilization, Picasso Plus and Picasso Lite Plus reusable
accessories (handpiece, fiber optic cable, and interchangeable tips) should be carefully cleaned per the
following procedure.
NOTE: Fiber optic cable is not autoclavable.
FIGURE 10FIGURE 10
FIGURE 11 FIGURE 12 FIGURE 13
FIGURE 14
1
1 2 3
3
2
4
4
 Loading...