1413
| Operating Instructions Manual | Operating Instructions Manual
PICASSO+ AND PICASSO LITE+ SET-UP
For details refer to Quick Start Guide. See FIGURE 1 for identification of components.
WARNING: Use of this equipment adjacent to or stacked with other equipment should be avoided
because it could result in improper operation. If such use is necessary, this equipment and the other
equipment should be observed to verify that they are operating normally.
• Place unit in a clean, dry, and well-ventilated area.
• Verify power switch is in OFF position.
• Insert key into key switch. Verify it is in the OFF position.
• Verify Emergency Stop button is disengaged (UP position).
• Ensure that the battery is installed in the foot control switch.
• Connect power cord to power connector on unit and plug into wall outlet.
• Insert fiber into Fiber Connection Port by first removing small white protective cap from the
connector end of the fiber. Save the protective cap for future use and take care not to touch the
end of the fiber. Next, attach the fiber to the Fiber Connection Port (FIGURE 1, Item #6) by screwing
the aluminum collar onto the Fiber Connection Port until the connection is “fingertight.” If using
strippable fiber, refer to the instructions provided with the fiber.
• Set up Delivery System Handpiece and Fiber (See FIGURE 4).
OPERATION INSTRUCTIONS
Turn ON Picasso Plus and Picasso Lite Plus
• Verify Red Emergency button (FIGURE 1, Item #4) is pushed in.
• Turn power switch to ON position (FIGURE 1, Item #10).
• Rotate key clockwise to ON position.
• Select a PRESET or select a power level
• Press STANDBY/READY to place unit in READY Mode.
• Press foot control switch to fire laser and release to stop.
Turn OFF Picasso Plus and Picasso Lite Plus
• Press the STANDBY/READY button.
• Place handpiece back on handpiece holder.
• Switch power switch to OFF position.
• Turn off and remove key from the unit, and place in a secure area.
SET-UP INFORMATION
CAUTION: VERIFY THAT THE FIBER OPTIC ASSEMBLY IS NOT TWISTED WHEN RETURNING THE
HANDPIECE TO THE HOLDER. FIBER MAY BREAK IF IT IS TWISTED OR CRIMPED.
DO NOT LEAVE THE SYSTEM IN AN UNCONTROLLED ENVIRONMENT WHERE THE TEMPERATURE COULD
DROP BELOW 41°F (5°C) (E.G. THE TRUNK OF A CAR). IF THIS OCCURS, ALLOW THE SYSTEM TO WARM
UP TO ROOM TEMPERATURE FOR TEN TO FIFTEEN MINUTES BEFORE THE UNIT IS ACTIVATED.
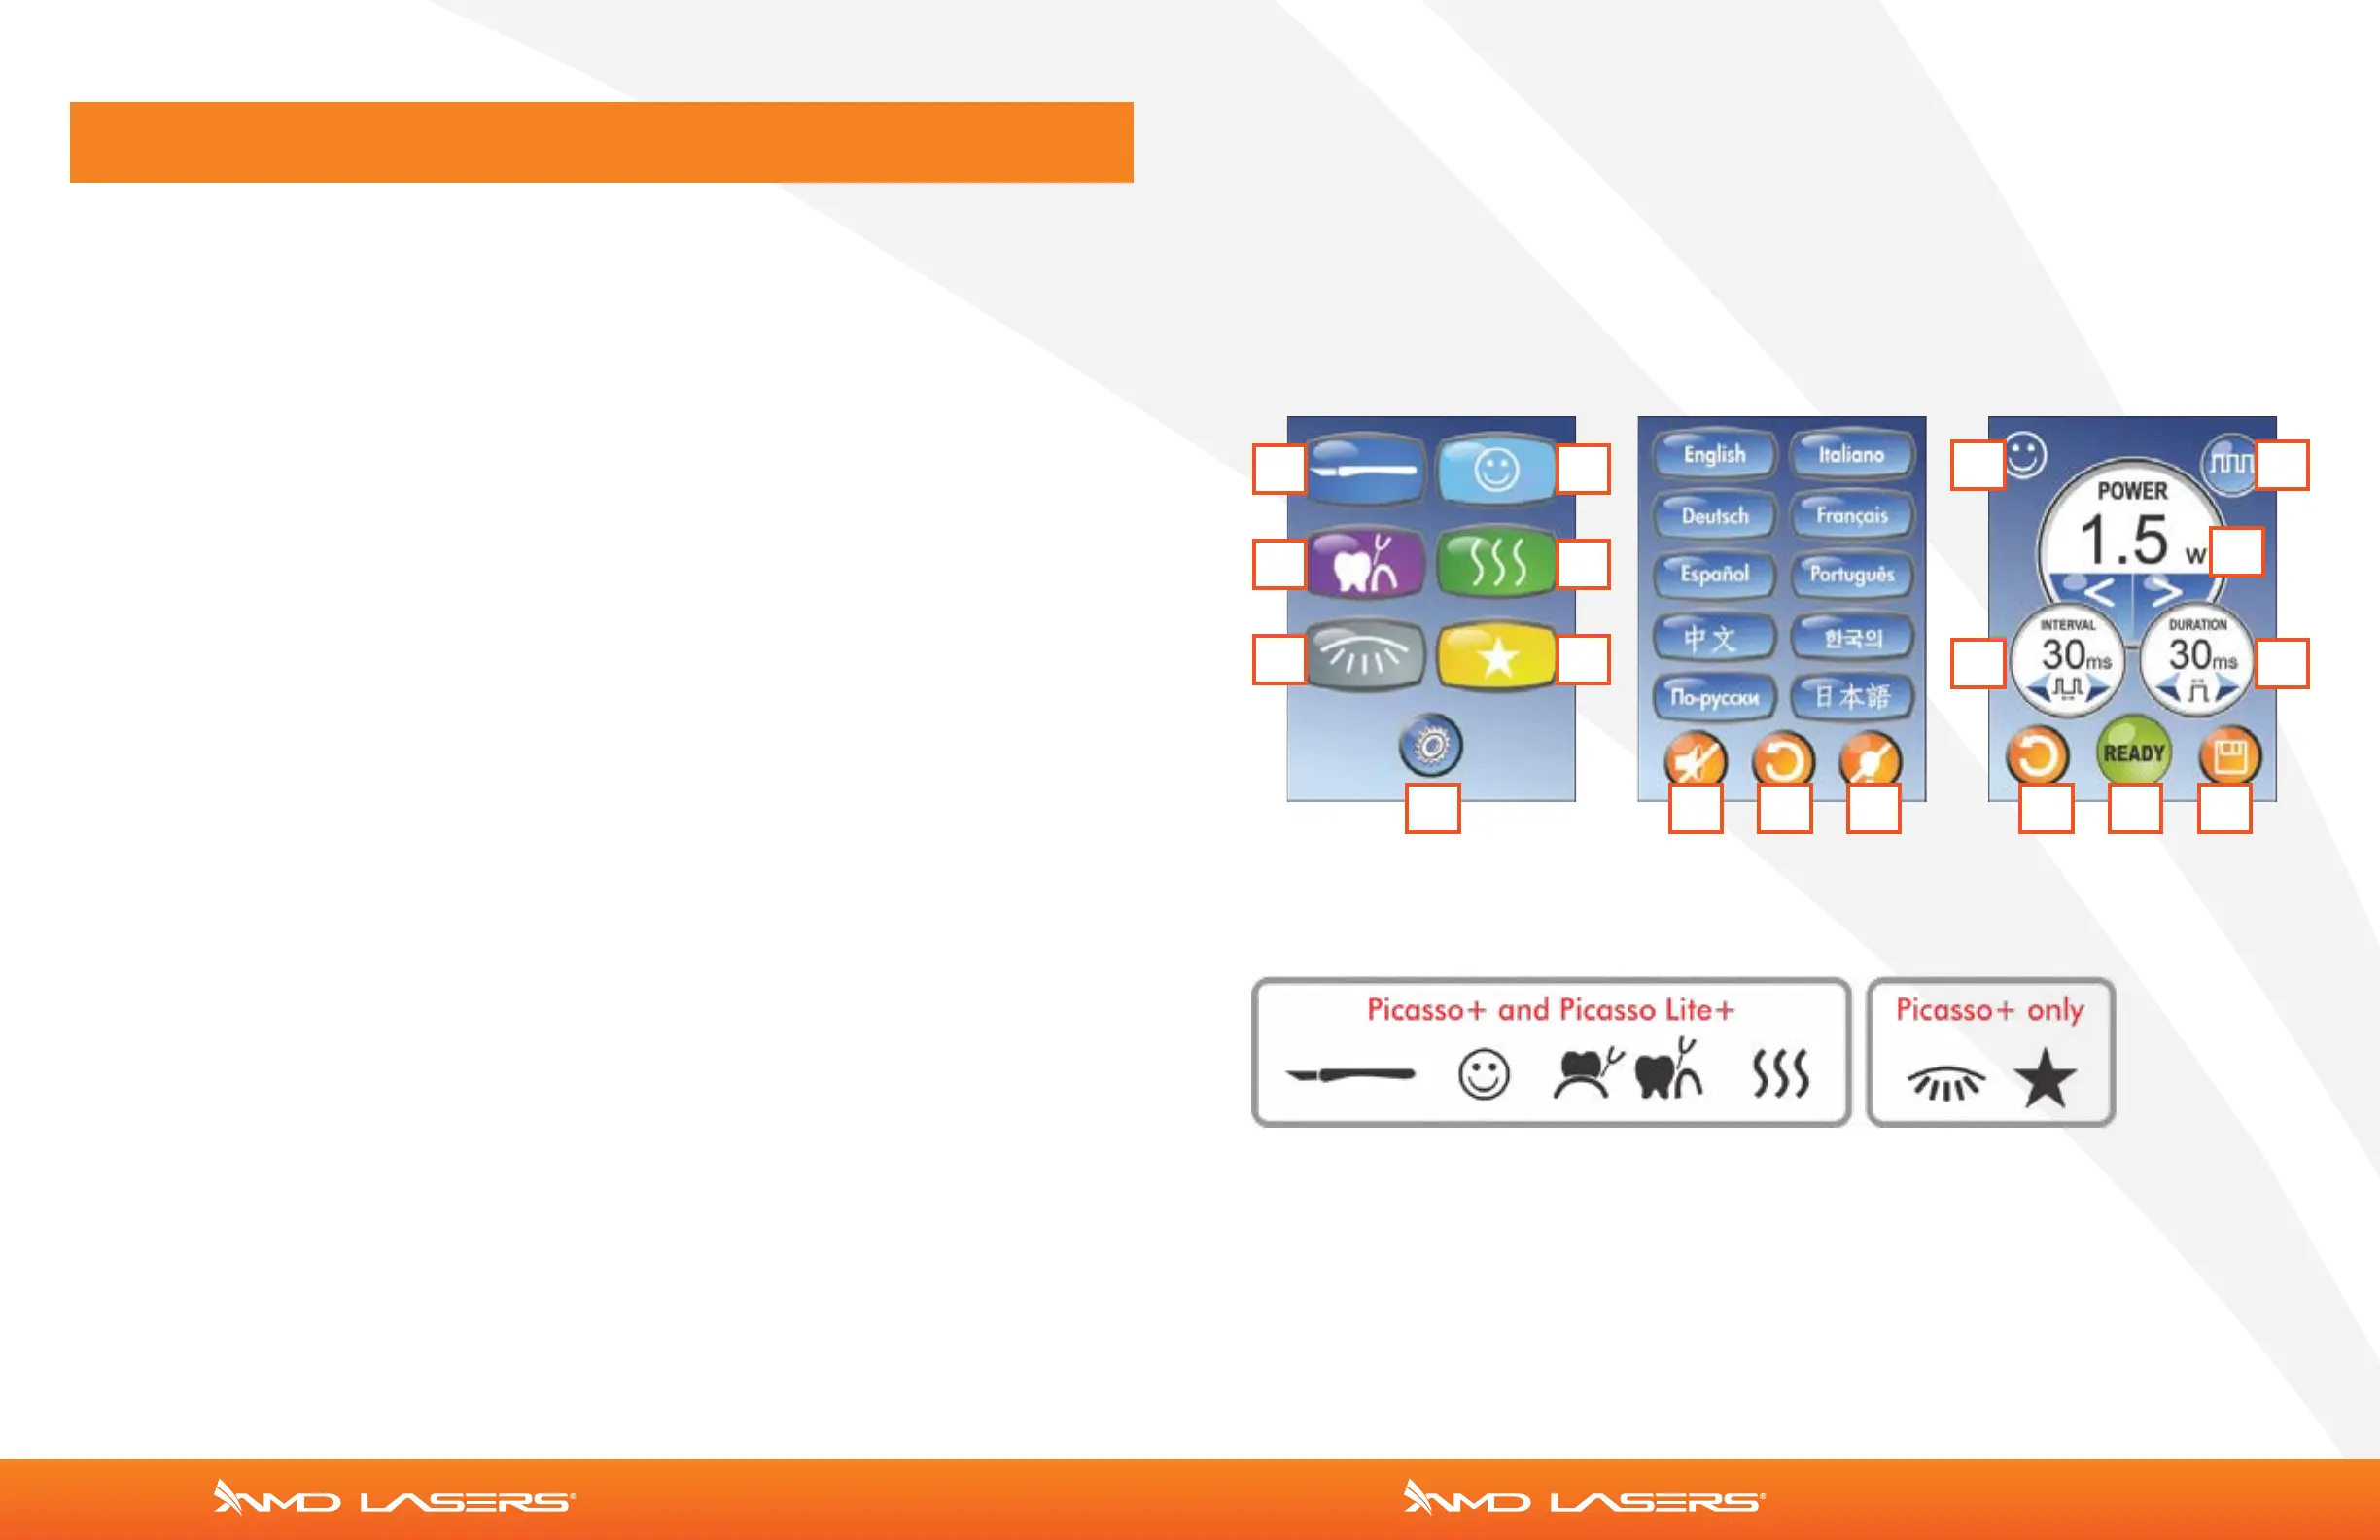
CONTROL PANEL PICASSO+ | PICASSO LITE+ —FIGURE 2
NOTE: Presets 5 and 6 are exclusive to Picasso Plus ONLY
HOME SCREEN SETTINGS SCREEN PRESETS SCREEN
1 2
3 4
5 6
7 8 9 10
11 12
14 15
13
9 16 17
 Loading...