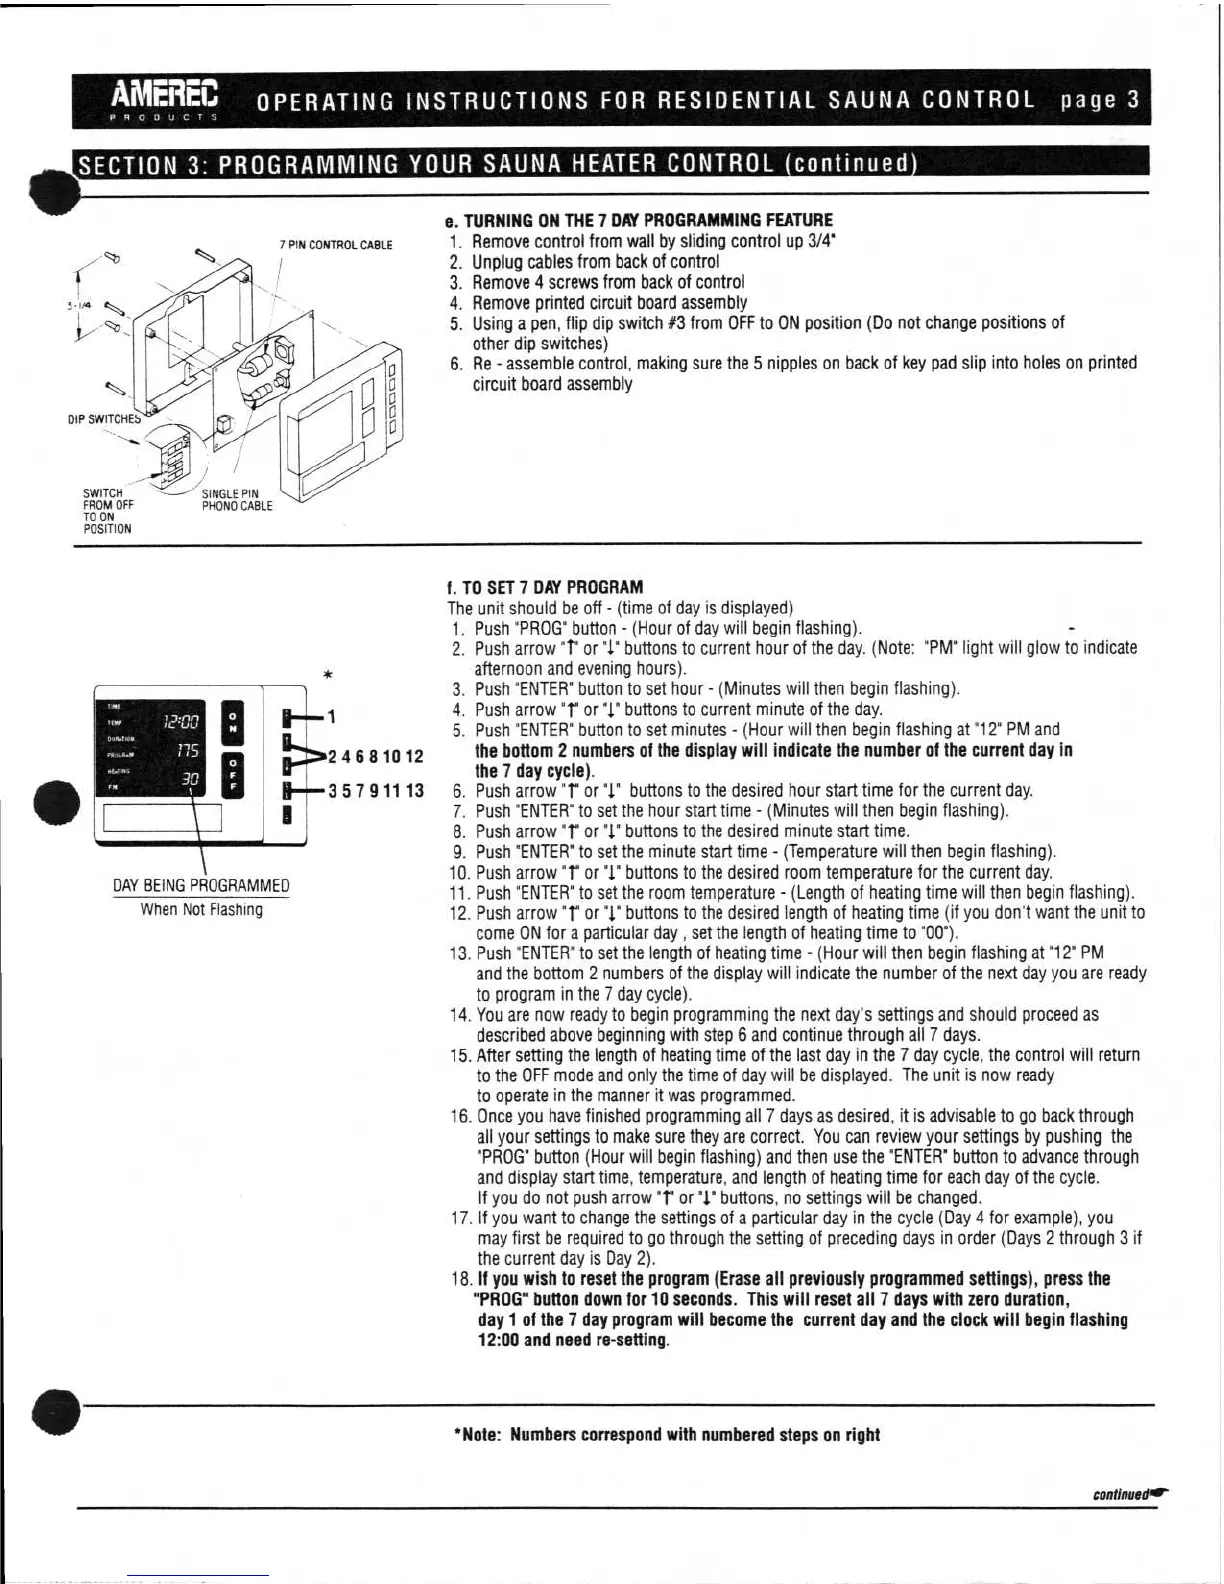
7 PIN CONTROL CABLE
DIP SWITCHES
•
SWITCH --
FROM OFF
TO ON
POSITION
SINGLE PIN
PHONO CABLE
1
::•24681012
1
1—H35791113
000
775
30
DAY BEING PROGRAMMED
When Not Flashing
AMEREC
OPERATING INSTRUCTIONS FOR RESIDENTIAL SAUNA CONTROL page 3
PRODUCTS
dis
SECTION 3:
PROGRAMMING YOUR SAUNA HEATER CONTROL continued
e.
TURNING ON THE 7 DAY PROGRAMMING FEATURE
1.
Remove control from wall by sliding control up 3/4'
2.
Unplug cables from back of control
3.
Remove 4 screws from back of control
4.
Remove printed circuit board assembly
5.
Using a pen, flip dip switch #3 from OFF to ON position (Do not change positions of
other dip switches)
6.
Re - assemble control, making sure the 5 nipples on back of key pad slip into holes on printed
circuit board assembly
f. TO SET 7 DAY PROGRAM
The unit should be off - (time of day
is
displayed)
1.
Push "PROG" button - (Hour of day will begin flashing).
2.
Push arrow
"r
or "1" buttons to current hour of the day. (Note: "PM° light will glow to indicate
afternoon and evening hours).
3.
Push 'ENTER' button to set hour - (Minutes will then begin flashing).
4.
Push arrow
"r
or ".j." buttons to current minute of the day.
5.
Push "ENTER" button to set minutes - (Hour will then begin flashing at '12" PM and
the bottom 2 numbers of the display will indicate the number of the current day in
the 7 day cycle).
6.
Push arrow
"r
or
"1"
buttons to the desired hour start time for the current day.
7.
Push "ENTER" to set the hour start time - (Minutes will then begin flashing).
8.
Push arrow "r or
"1"
buttons to the desired minute start time.
9.
Push "ENTER" to set the minute start time - (Temperature will then begin flashing).
10.
Push arrow
"r
or "1" buttons to the desired room temperature for the current day.
11.
Push "ENTER" to set the
room temperature - (Length of heating time will then begin flashing).
12.
Push arrow
"1"
or
"1"
buttons to the desired length of heating time (if you don't want the unit to
come ON for a particular day , set the length of heating time to "00").
13.
Push "ENTER" to set the length of heating time - (Hour will then begin flashing at "12" PM
and the bottom 2 numbers of the display will indicate the number of the next day you are ready
to program in the 7 day cycle).
14.
You are now ready to begin programming the next day's settings and should proceed as
described above beginning with step 6 and continue through all 7 days.
15.
After setting the length of heating time of the last day in the 7 day cycle, the control will return
to the OFF mode and only the time of day will be displayed. The unit
is
now ready
to operate in the manner it was programmed.
16.
Once you have finished programming all 7 days as desired, it is advisable to go back through
all your settings to make sure they are correct. You can review your settings by pushing the
"PROG" button (Hour will begin flashing) and then use the "ENTER" button to advance through
and display start time, temperature, and length of heating time for each day of the cycle.
If you do not push arrow
"1"
or
°J."
buttons, no settings will be changed.
17.
If you want to change the settings of a particular day in the cycle (Day 4 for example), you
may first be required to go through the setting of preceding days in order (Days 2 through 3 if
the current day is Day 2).
18.
If
you wish to reset the program (Erase all previously programmed settings), press the
"PROG" button down for 10 seconds. This will reset all 7 days with zero duration,
day 1 of the 7 day program will become the current day and the clock will begin flashing
12:00 and need re-setting.
•
*Note: Numbers correspond with numbered steps on right
continuedar
 Loading...