24 N5X Construction guide
Add the heater supply
With the amp switched o, disconnected from the mains and the capacitors safely discharged to under
10V, you can add the heater supply. This runs from the tagstrip to the V3 valve socket, then to V2 and
then to V1 - in three long square-ish loops.
For the rst section, use two pairs of green wires, with one soldered to each of the outer tags of the
tagstrip. Twist the wires together, and run them to the back edge of the chassis, then along the chassis
edge and then inwards to the V3 valve socket position. The basic principle here is that we want to keep
this wire - which carries AC with a 50 or 60Hz hum - well away from the amplier's signal path to reduce
the noise levels in the amplier.
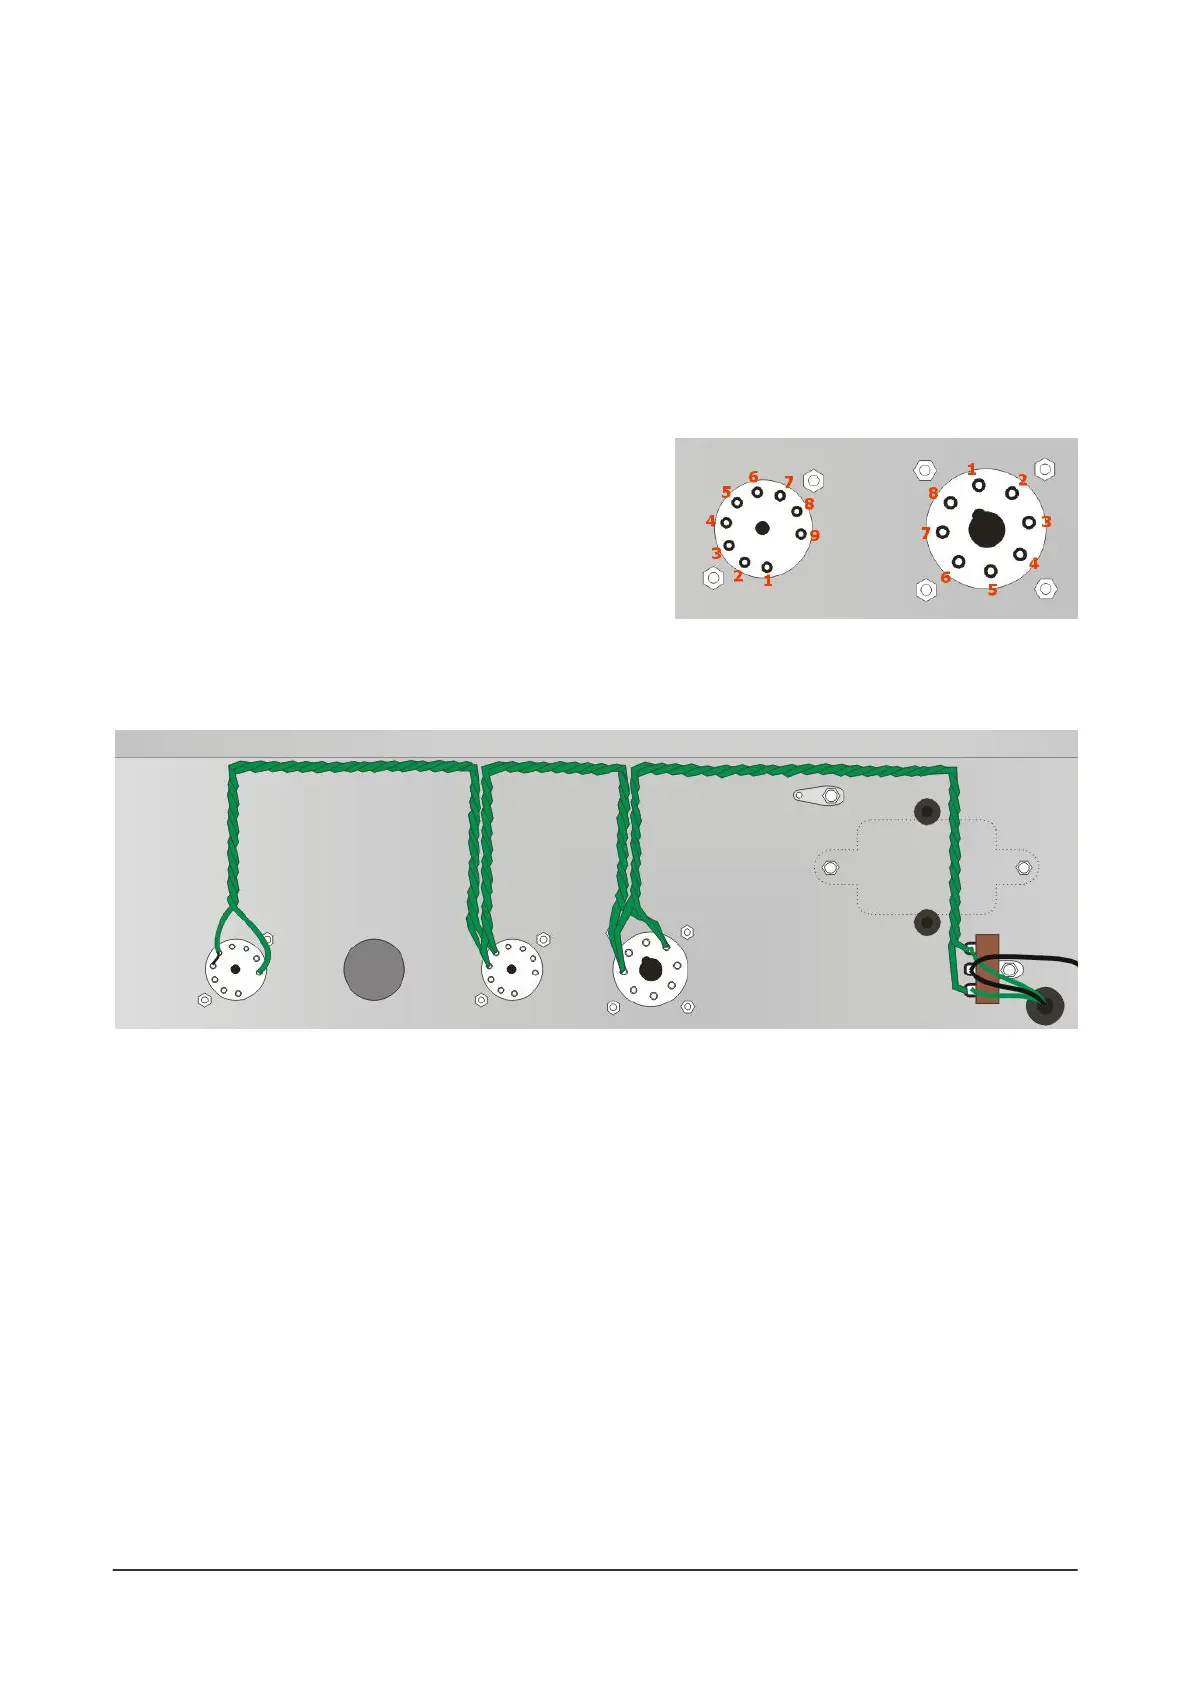
Solder the green wires, one to pin 2 and one to pin 7. Now take two more green wires and make a
similar loop to connect these two pins to pins 4 and 5 of V2.
Here's an annotated diagram to show how the valve pins are
numbered.
Finally, make a similar loop to the V1 valve socket and
this time connect one green wire to pin 9 and the other
green wire to pins pin 4 and 5. When completed, the heater
supply will look like this.
Testing the heater supply
Clear your workbench again and get your DMM ready. Plug an ECC83 valve into the V1 valve socket.
Then, depending on the power valve you want to use, either:
1) plug an EL84 into V2, or
2) plug a 6V6/6L6/EL34 into V3
[Note: you cannot use the amplier with all three valves installed at the same time]
Now attach the mains IEC cable and switch the amplier on. Within a few seconds you should see your
valves each glow as they warm up. In a bright room it can be hard to see - there's just a dull orange glow
within the electrodes of the valve.
With the amp still powered up, carefully check the AC voltage between pins 4 and 9 of V1.
Depending on the valves you are using, you should have a gure of about 6.1-6.5V.
Now unplug the amplier from the mains. Remove the valves from the sockets and put them safely
on one side while you complete the rest of the amp build.
 Loading...