USING THE ER75
3
D-0115622-C (OM011) – ER75 Operating Manual
3. USING THE ER75
3.1. INSTALLING & REPLACING BATTERIES
The ER75 is designed for continuous operation and is powered by batteries.
To fit the batteries, remove the 2 screws in the base of the ER75 and remove the base & back-panel cover by
carefully sliding it down. Fit 2 x 1.5V ‘AA’ alkaline batteries according to the indications on the battery holder.
Replace the cover and refit the screws.
If the instrument is not likely to be used for three months or longer, please remove the batteries from the
instrument.
Batteries should only be changed outside the patient environment. The operator
should not touch the battery connectors and the patient simultaneously.
Note that local regulations are likely to cover disposal of used batteries.
3.2. LOW BATTERY INDICATION
If the power indicator flashes (approximately 3 times per second) when the “on” button is held the batteries
need to be changed.
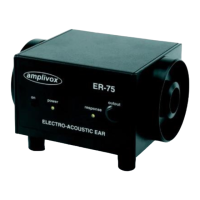
Place the audiometric headset earphones over the earphone couplers located on the sides of the ER75 such
that there is a secure and consistent fit. Connect the supplied interconnecting lead between the socket on the
ER75 marked “output” and the socket marked “RESPONSE” or “RESP” which is normally located on the back
panel of an audiometer.
If using the ER75 within an acoustic booth, the interconnecting lead should be inserted into the patient response
socket inside the booth in place of the patient response switch.
3.3. SERVICE INDICATION
If the power indicator flashes slowly (approximately once every two seconds) when the “on” button is held the
unit needs to be serviced and the performance verified.
3.4. SWITCHING ON AND OFF
To switch the ER75 on, Press and hold the “on” button until the power indicator illuminates green. The
instrument will automatically power down approximately 2 minutes after last response was made.