EasyManua.ls Logo

AMX Acendo Core ACR-5100 - User Manual

AMX Acendo Core ACR-5100
2 pages
Print Icon
To Next Page IconTo Next Page
Loading...
QUICK START GUIDE
ACR-5100 Acendo Core™ Meeting Collaboration System
Overview
The ACR-5100 Acendo Core Meeting Collaboration System (FG4051-00) enables one-
click Skype for Business meeting launch, document sharing, web browsing, room
scheduling, and more, directly from the meeting space touch display or keyboard and
mouse.
What’s in the Box?
The Acendo Core Meeting Collaboration System includes the following accessories:
Power supply/cord
Two antennas
1 Mounting Plate and 2 Stand-off Screws
Safety Instructions and Quick Start Guide
Safe Handling Instructions
Input voltage: 100 – 240Vac • Rated Output current: 5.417A
Rated Output voltage: 12V • Rated temperature at 40C
Rated Altitude 5000 meters
Physical Installation
To install Acendo Core, the following items are needed:
1 HDMI cable (Type A male)
•Ethernet cable
1 HDMI touch screen or HDMI monitor with USB keyboard and/or mouse
Mounting screws are needed for wall or under desk mounting options
Acendo Core can be mounted using the included mounting plate for wall or under desk
mount or can be used as a table-top device.
Attach Mounting Plate
1. Using the mounting plate as a template, place it into the desired position and
mark four of the wall screw holes with a pencil.
Note: If mounting on a wall, a level can be used to set the plate level for aesthetics.
2. Pre drill the holes for your wall screws.
Note: Use a drill bit smaller in diameter than your wall screws.
3. Place the plate back onto the mounting surface, insert wall screws and tighten.
Attaching to Mounting Plate
1. Insert the included stand-off screws into two adjacent holes on the bottom. Align
the stand-off screws on the Acendo Core unit with the slotted holes in the plate
and push through. Slide to lock.
Connections
FIG. 4 displays the ports provided on Acendo Core.
Connecting the Acendo Core to a Video Output
1. Connect the rear HDMI Output port to a display using standard HDMI cabling.
Connecting a Keyboard and Mouse
The front and rear panels of Acendo Core each include Type-A USB ports (USB 2.0 on
the front and USB 3.0 on the rear) to support peripherals, such as camera, microphone,
speakers, and touch monitor or keyboard/mouse. Refer to FIG. 4.
Note: In addition to a directly connected USB keyboard and mouse, Acendo Core also
supports using a 2.4 GHz RF wireless keyboard and mouse using a wireless dongle.
The USB ports can be used for reading from a mass storage device such as a USB hard
drive or flash drive. (USB external hard drives may require their own power sources.
The maximum current allowed across all USB ports is 4W.)
Note: Once a USB drive is physically connected and Acendo Core mounts the drive, the
files on it can be accessed. If a message is not received stating the USB drive is mounted,
Acendo Core did not recognize the drive.
Connecting Antennas
Connect both antennas to the rear corners by screwing them in place finger tight.
Applying Power
1. Connect the included power brick to the Acendo Core +12 VDC (5.5mm) power input.
2. Connect the other end to the AC outlet (100-240VAC).
When power is applied, the power button on the front panel lights up white. The device
usually takes about 30 seconds to boot. When booting is complete, Acendo Core opens
to the Acendo Core desktop (FIG. 5).
Admin Login
1. Press the Admin Key Icon in the bottom left of the screen next to the Power Icon
to bring up the Admin login screen (FIG. 5).
2. The Admin login screen appears (FIG. 6) .
FIG. 1
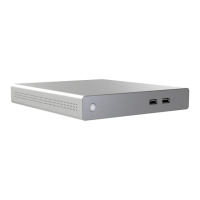
ACR-5100 ACENDO CORE
FIG. 2 BACKPLATE - INSERT SCREWS AND TIGHTEN
FIG. 3 ATTACH STAND-OFF SCREWS, INSERT THROUGH BACKPLATE
X
X
X
X
wall screws and tighten.
Pre drill holes then insert
Insert Stand-off
Screws into Core
Align with slotted holes
and push the unit through
and slide down/back.
Ensure 4 rubber mounting feet are installed first
to create a snug fit.
FIG. 4 ACENDO CORE CONNECTIONS
FIG. 5 CORE HOME SCREEN
FIG. 6 ADMIN LOGIN SCREEN
Network
Power
USB 3.0 Peripherals
HDMI Output
(to 1-2 Displays)
Stereo Audio
(camera/microphone/speakers
Connections
Microphone In
keyboard/mouse)
POWER BUTTON
Front
Rear
USB Thumb Drives
Line Out
Antenna Port
Antenna Port
Press on the Admin Key Icon to make changes to the system (Admin Only).

Other manuals for AMX Acendo Core ACR-5100

Questions and Answers

  • D
    David KrauseAug 19, 2025
    What to do if AMX Conference System shows unauthorized access?
    • P
      Perry WeeksAug 19, 2025
      If the AMX Conference System displays 'Unauthorized access', it indicates the server reported a '401' or 'unauthorized' error. Verify the credentials and permissions to resolve this.
  • A
    Amanda AndersonAug 21, 2025
    What to do if AMX Acendo Core ACR-5100 Conference System server has timed out?
    • J
      John BirdAug 21, 2025
      If the AMX Conference System displays 'Server has timed out, please check host/IP address', it indicates that the network has reported a timeout or the unit is unable to reach the remote server. Ensure that the host/IP address is correct and the network connection is stable.
  • S
    smithjoyAug 23, 2025
    Why does my AMX Conference System say an invalid URL has been entered?
    • C
      Craig CunninghamAug 23, 2025
      If the AMX Conference System displays 'An invalid URL has been entered', it means a malformed URL was entered as the server's address, and the network reports "404" or "403", preventing the unit from reaching the server. Ensure the URL is correctly formatted.
  • S
    Sherry NewmanAug 26, 2025
    What causes 'Server responded with: Login Timeout' on AMX Conference System?
    • A
      Autumn ClarkAug 26, 2025
      If the AMX Conference System displays 'Server responded with: Login Timeout', the most common cause is a partially formed URL. Ensure the end of the URL is similar to 'ews/exchange.asmx' or resolves to a DNS entry similar to string.
  • R
    Robin HenryAug 28, 2025
    What does 'URL may be incorrect or Server may be busy' mean on AMX Conference System?
    • E
      Emily McguireAug 28, 2025
      If the AMX Conference System displays 'URL may be incorrect or Server may be busy', a server has responded, but with invalid XML, meaning it isn't an Exchange/Office 365 server or network load balancing is occurring.
  • D
    daniellegloverAug 30, 2025
    Why AMX Acendo Core ACR-5100 says server is busy?
    • R
      Robert LeeAug 30, 2025
      If the AMX Conference System displays 'Server is busy and cannot service this request right now', it means the credentials and resource configuration could be resulting in the server being unable to complete all types of requests. For more details see • Server request capacity has been reached and is unable to respond to all requests.
  • N
    nicole93Sep 1, 2025
    Why my AMX Acendo Core ACR-5100 shows not configured?
    • J
      Jacob HaleySep 2, 2025
      If the AMX Conference System displays 'Not configured', it indicates that the unit is missing information in the connection details such as URL, Username, Password, or Resource. Ensure all these details are correctly entered.
  • D
    darrenmcgeeSep 4, 2025
    Why AMX Conference System says server throttled?
    • A
      Anna SmithSep 4, 2025
      If the AMX Conference System displays 'Server throttled - You have exceeded the available concurrent connections for your account', this is due to too many active connections to credentials or resource. For more details see "Why Impersonation is Recommended for Exchange/Office 365 on page 50."
  • R
    robin43Sep 6, 2025
    What does 'Resource calendar is not configured' mean on AMX Conference System?
    • K
      Kerry SmithSep 6, 2025
      If the AMX Conference System displays 'Resource calendar is not configured for the username provided', it means the credentials provided do not have adequate permissions for the resource provided. Ensure the correct permissions are assigned.
  • T
    Thomas PaulSep 8, 2025
    What to do if AMX Conference System version is not supported?
    • P
      patriciamilesSep 8, 2025
      If the AMX Conference System displays 'Version Not Supported', the unit only supports Exchange/Office 365 servers 2013 SP1 or higher. Ensure your server version meets this requirement.

Summary

ACR-5100 Acendo Core Meeting Collaboration System

Whats in the Box

Safe Handling Instructions

Details input voltage, output voltage, altitude, current, and temperature ratings for safe operation.

Physical Installation

Attach Mounting Plate

Instructions for using the mounting plate as a template and securing it to a surface.

Attaching to Mounting Plate

Steps for inserting stand-off screws and sliding the unit onto the mounting plate.

Connections

Connect to Video Output

Guide for connecting the Acendo Core to a display using an HDMI cable.

Connect Keyboard and Mouse

Details connecting USB peripherals like cameras, microphones, and keyboards/mice.

Connect Antennas

Instructions for physically connecting both antennas to the rear corners.

Apply Power

Steps for connecting the power brick and AC outlet to power on the device.

Admin Login

Login Process

Procedure for accessing the Admin login screen by pressing the Admin Key Icon.

Administrator Session

Login Credentials

Details on how to log into an Admin session using default credentials.

Locate IP Address

Steps to find the IP address by configuring the unit as a room-grouping master.

Display Scale Settings

Instructions on adjusting display scale for text and icons via System Settings.

Set Date and Time

Change System Clock

Steps to access and change the system's date and time via Windows settings.

Disconnect Power

Power Off Procedure

Steps to safely shut down the unit and disconnect power from the AC outlet.

AMX Acendo Core ACR-5100 Specifications

General IconGeneral
BrandAMX
ModelAcendo Core ACR-5100
CategoryConference System
LanguageEnglish