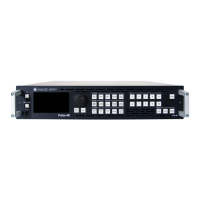
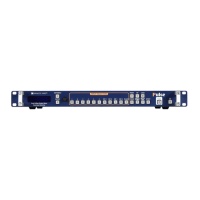
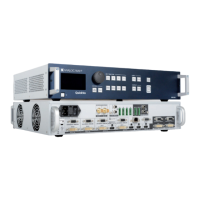
Pulse 4K - Ref. PLS-4K
QUICK START GUIDE
Thank you for choosing Analog Way and the Pulse 4K. By following these simple steps, you will be able to set
up and use your 4K60 mul-layer video mixer and seamless presentaon switcher within minutes. Discover
the Pulse 4K capabilies and intuive interface while conguring your rst show and unleash your creavity
for a new experience in show and event management.
• 1 x Pulse 4K (PLS-4K)
• 1 x Power supply cord
• 1 x Ethernet cross cable (for device control)
• 1 x Web-based Remote Control Soware included and hosted on the device
• 1 x Rack mount kit (the parts are stowed in the packaging foam)
• 1 x User Manual (PDF version)*
• 1 x Quick start guide*
* User Manual and quick start guide are also available on
www.analogway.com
Go on our website to register your product(s)
hp://bit.ly/AW-Register
WHAT’S IN THE BOX
QUICK SETUP & OPERATION
CAUTION!
Damage caused by improper
rack mounng will not be cove-
red under warranty.
Register
your product
The Pulse 4K can be fully operated from the Web RCS or
from the front panel. This guide describes procedures using
the controls of the front panel.
You may wish to reset the unit to factory sengs to get
started. Use the scroll knob and go to Control > Reset to
The Pulse 4K can be set to Mixer or Matrix mode.
manages 1 Screen with 2 Mixing layers + 1
Aux. Screen.
manages 2 Screens with 1 Mixing layer per
Screen.
The Screens of the Pulse 4K have layers called: Background
layer (unscalable), Layer 1, Layer 2 and Foreground layer.
The Aux. Screen has one unscalable layer.
Connect inputs, outputs, power and network cables
before starng the device.
Go to Inputs to set each input (label, audio, crop, etc.).
Go to Inputs > Input 1 (or 2) to select
the acve plug to use.
Go to and select the operang
mode of the device.
Go to and select a
Screen or Aux. Screen to enter a Screen label, set the
Screen audio mode or display a test paern.
Go to and set an output resoluon that
matches the nave resoluon of the connected display. For
example:
UHDTV 2160p > 60 Hz.
Go to to transfer images from a USB key
to the device image library.
Go to and select a Screen.
Assign images of the Library to the Image slots for
Background Image and Foreground Image in each Screen.
Go to then
select a Screen and a Background Set. Set Crop mode and
background content (Background Image or Live input).
Go to to create Current
Time, Countdown or Stopwatch mer sources.
Go to MVW and select a Template, or assign Inputs,
Preview Screens, Program Screens and Timers and place
widgets manually.