2
0005413
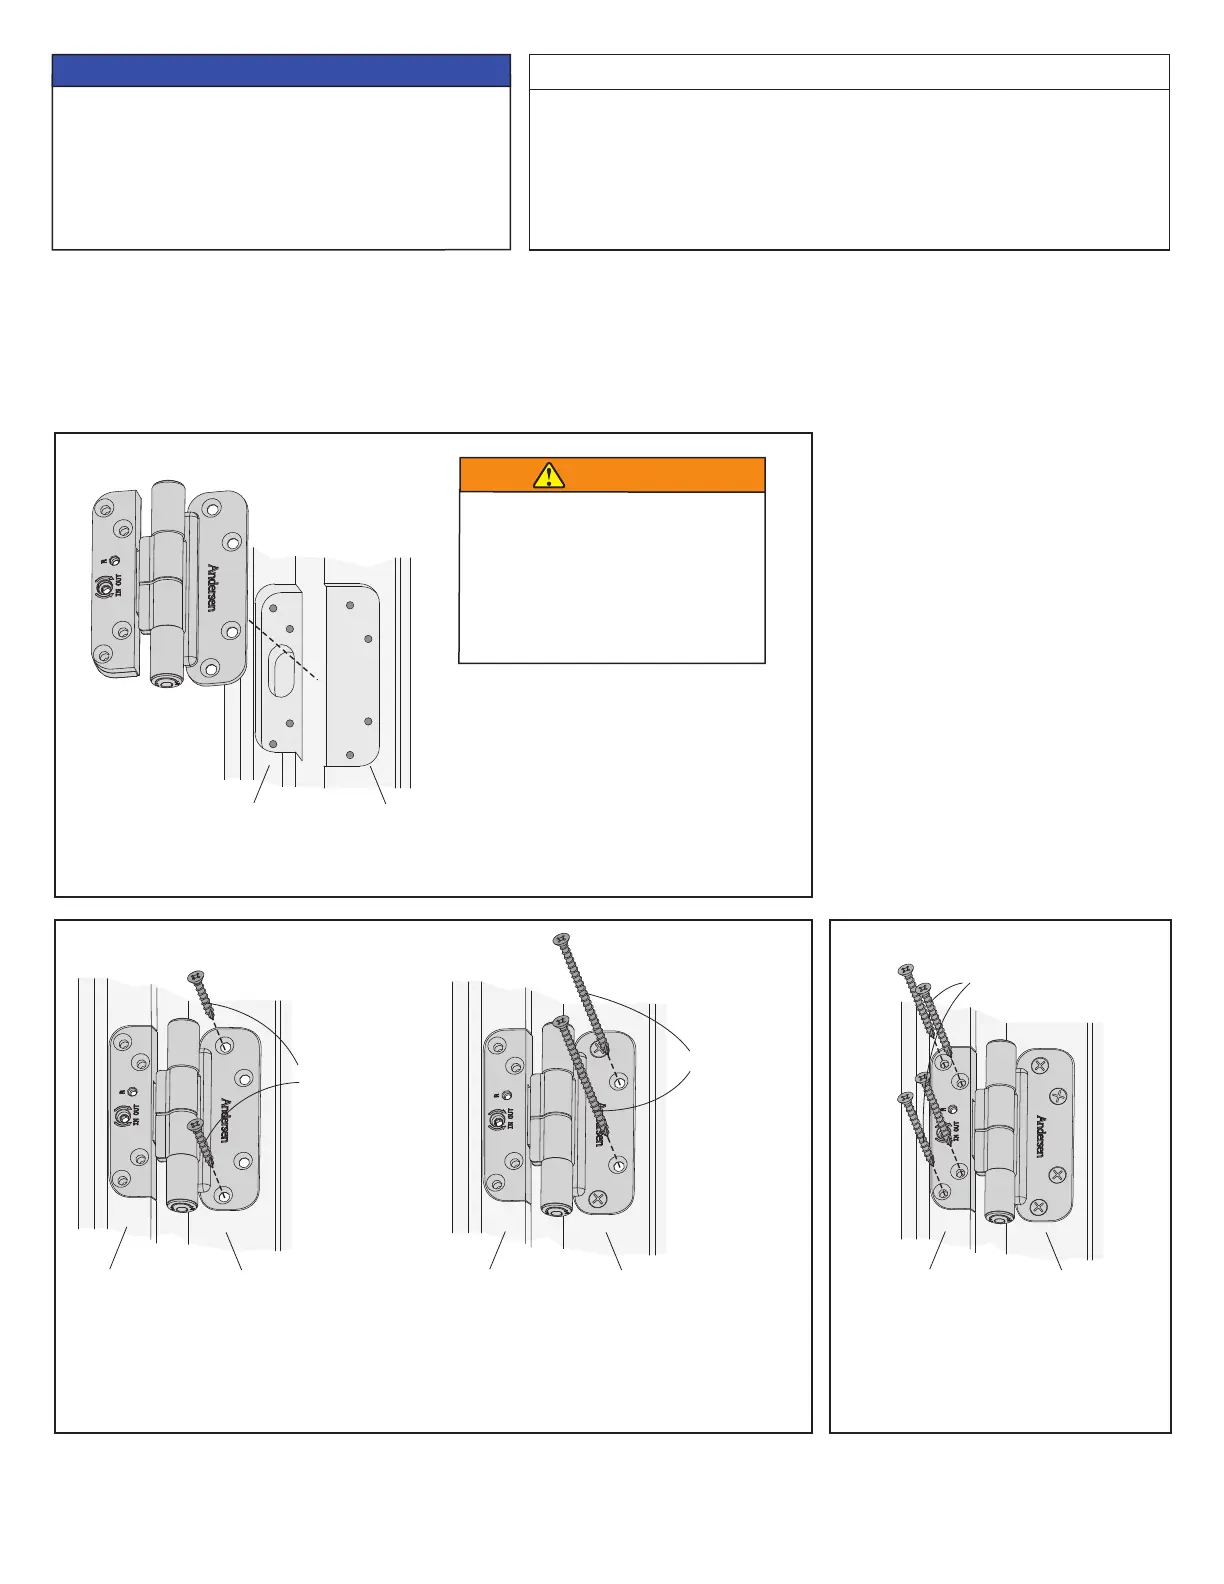
Fasten hinge to door panel using four (4)
#10 x 1-3/4" screws. Repeat steps 1-3
for all hinges being replaced.
3
1
2
▶ Hinge replacement is complete.
Remove screws from hinge using a phillips screwdriver. Dispose of hinge and screws properly.
Apply replacement hinge and fasten to frame using two (2) #10 x 1" screws through top and
bottom holes and two (2) #10 x 3" screws through center holes.
▶ Proceed to hinge and hardware adjustment, below, for operation check and hinge adjustment instructions.
#10 x 1"
Screws
(top and
bottom holes)
#10 x 3"
Screws
(center holes)
#10 x 1-3/4"
Screws
• Hinge replacement WILL NOT correct problems
resulting from improper door installation
Examples of improper installation include units
not being installed plumb, level, and square,
excessively bowed jambs, and/or crowned sills.
NOTICE
IMPORTANT
• Make all horizontal adjustments rst. Horizontal adjustments correct
most problems. Vertical adjustments are rarely needed.
• Adjust hinges with door slightly open. The door panel should be
supported by all hinges for maximum hinge performance.
• Start adjustments at bottom hinge and move upward.
Hinge Replacement
Remove and replace only one
hinge at a time. Removal of more
than one hinge may result in door
panel falling and potentially
causing personal injury, product,
and/or property damage.
WARNING
Door Panel
Frame
Door Panel
Frame
Door Panel
Frame
Door Panel
Frame