9
ADJUSTMENTS,
DUST PLUGS,
PLACE &
FASTEN SILL
ADAPTER
Continued
Tools Recommended:
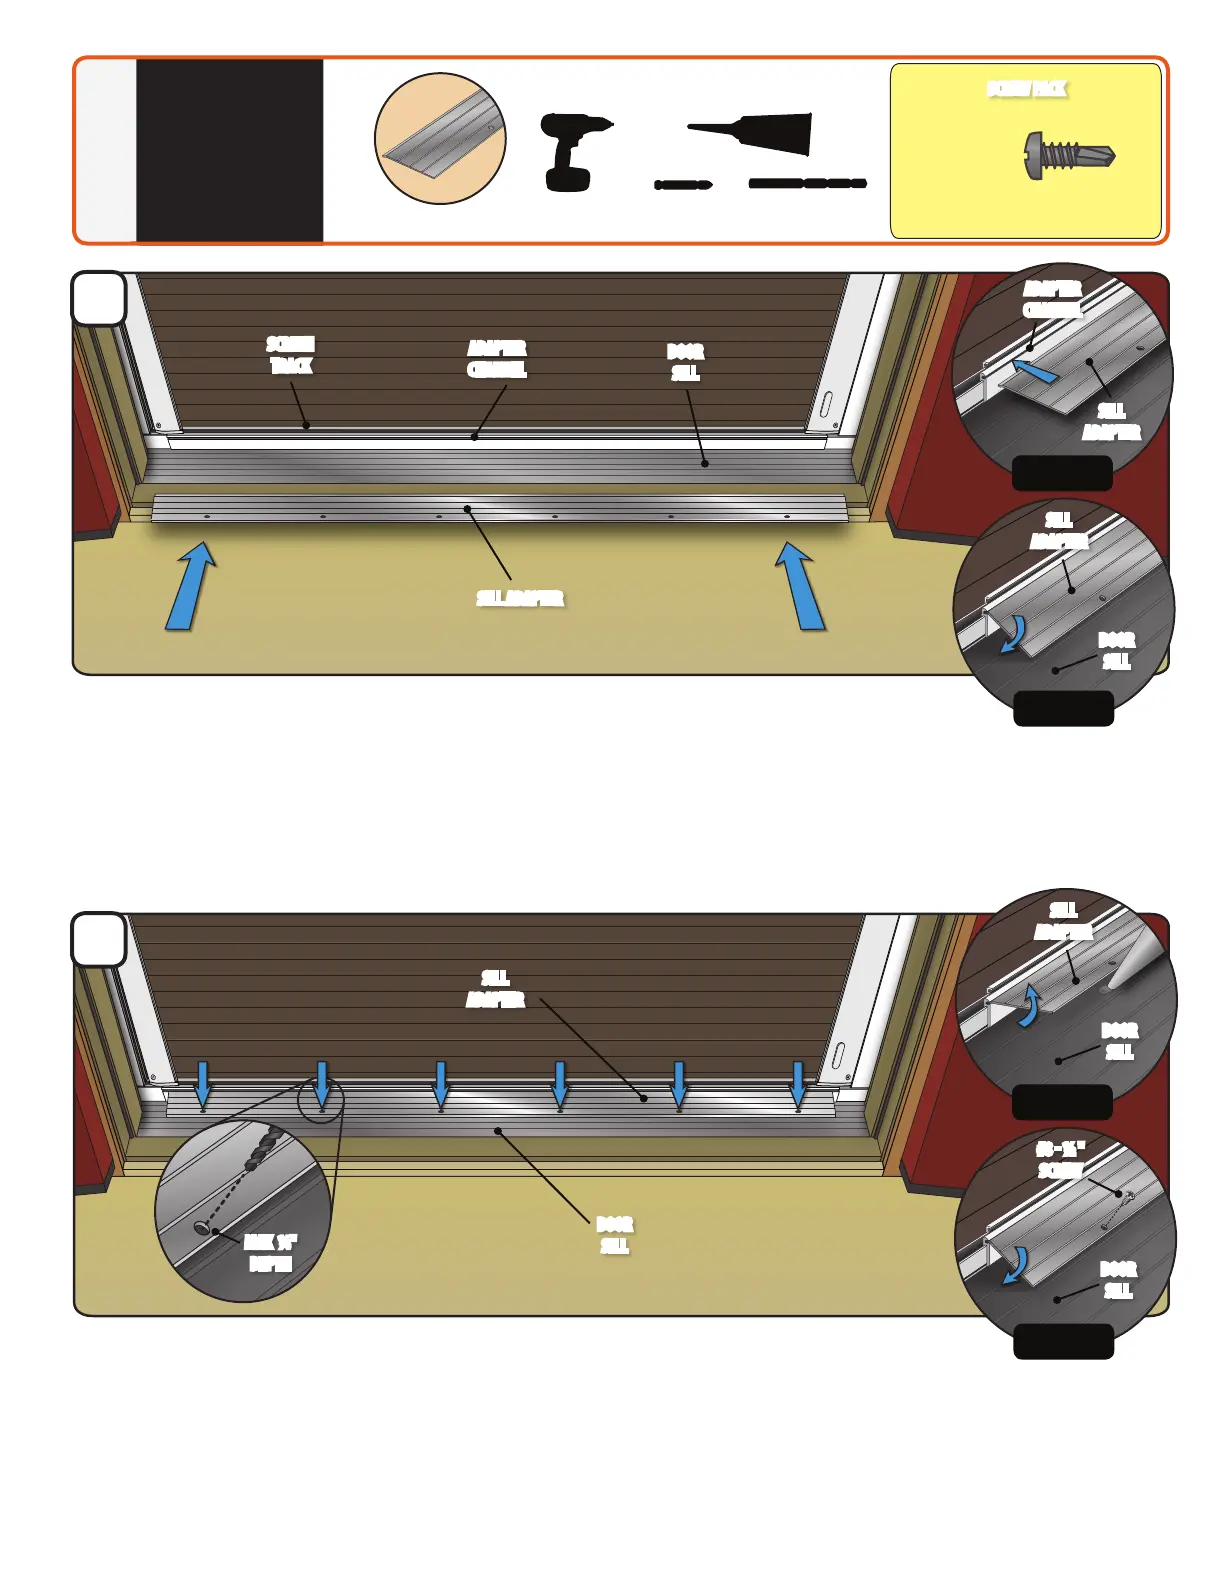
e1 Thoroughly clean the Door Sill.
e2 From the interior of screen assembly, position Sill Adapter with the textured side up
and screw holes in toward the interior of the home.
e3 Insert edge of the Sill Adapter into the Adapter Channel located on the Screen Track (see Figure 1).
e4 Rotate the Sill Adapter down to the Door Sill (see Figure 2).
e5 Center the Sill Adapter in the door opening.*
f1 With ⁄" bit provided, predrill through the six holes on the Sill Adapter into the Door Sill a maximum depth of ¼".
f2 Lift Sill Adapter and apply sealant into predrilled holes until sealant over-ows onto Door Sill surface. (see Figure 3)
f3 Rotate the Sill Adapter back down to the Door Sill and fasten using six #8 - ½" Self-Tapping Screws. Cleanup excess sealant.
(see Figure 4)
* 66.5” sill adapter is designed to avoid the need for cutting during installation. If a wider sill adapter is preferred, visit parts.andersenstormdoors.com
f
SCREW PACK
#8 - ½"
(Qty 6)
#8
#10
#12
#6
3/4” Machine Pan Painted
1/2” SMS Pan
1/2” SMS Pan Painted
1/2” SMS Flathead
1/2” Self-Drill Pan
1/2” Self-Drill Pan Painted
3/4” Machine Flathead
7/8” Machine Pan Painted
1” SMS Pan
1” SMS Pan Painted
1” Machine Pan Painted
1-1/2” Machine Flathead
1-1/2” Machine Flathead
2” SMS Pan Painted
5/8” SMS Pan Painted
1-1/4” SMS Pan
SCREEN
TRACK
SILL
ADAPTER
SILL ADAPTER
SILL
ADAPTER
DOOR
SILL
DOOR
SILL
DOOR
SILL
ADAPTER
CHANNEL
ADAPTER
CHANNEL
SILL
ADAPTER
#8 ½ "
SCREW
SILL
ADAPTER
DOOR
SILL
DOOR
SILL
3
Sill Adapter
e
Figure 1
Figure 3
Figure 2
Figure 4
MAX ¼"
DEPTH
Drill/Driver
Sealant
#2 Phillips Bit
(provided)
1/8 Drill Bit
(provided)
 Loading...