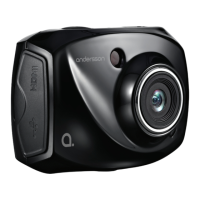
5
Operation
Charge The Battery:
´ Connect the camera to a computer with the USB cable.
The charging indicator will light up (red) during the
charging. When the charging is finished the charging
indicator will turn off. It takes about 2-4 hours for the
camera to be fully charged.
Use of Micro SD Card:
´ Push the Micro SD card into the card slot.
´ To take out the Micro SD card, gently press the end of the
memory card inward and it will pop up.
Note: No built-in memory is available in this video camera.
Make sure to insert memory card before using.
Startup/Shutdown:
´ To turn on the camera, press the ON/OFF button for 3
seconds till the display turns on.
´ To turn off the camera, press the ON/OFF button. The
camera has an automatic shutdown function, the defult
shutdown time is 5 minutes.
Function Modes:
´ Three different modes are available for this camera, i.e.
picture taking mode, video recording mode and vehicle-
mounted mode. Turn on the camera and then change the
Mode switch to the desired mode.
´ Picture taking mode: Take still pictures.
´ Video recording mode: Record videos.
´ Vehicle-mounted mode: Record videos when the camera
is mounted on a moving vehicle.
Indicator Light:
´ Busy light (blue): When the camera is busy (when
recording a video, taking photos, automatic shutdown).
´ Charging light (red): When the camera needs to be
charged.
Video Recording Mode:
´ Press the shutter button once or click on the center of the
display to start recording. Press the shutter button again if
you want to stop the recording.
´ The battery life during video recording mode is 90 minutes.
Icons During The Different Modes:
´ The , or mode icon indicates that the camera
is in video recording mode or in picture taking mode or in
vehicle mounted mode.
´ Click the or icon to choose between FHD/HD(60
FPS)/HD (30 FPS), VGA and 5-12M.
´ Click the icon to set date and time, press the shutter
button to confirm the settings.
´ The icon represents the battery level.
´ Click the icon to zoom.
´ The icon represents the zoom level.
´ Click the icon to zoom out.
´ Click the icon to start playback mode.
´ The icon indicates that the face detection function is
activated.