Do you have a question about the &Tradition Collect Planter SC43 Space Copenhagen 2020 and is the answer not in the manual?
| Designer | Space Copenhagen |
|---|---|
| Year | 2020 |
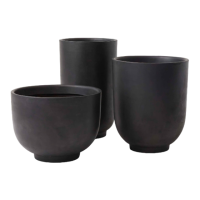
| Category | Planter |
| Brand | &Tradition |
| Product Name | Collect Planter SC43 |
Main title indicating the document provides instructions.
Welcome message and contact information for the product.
Details the various components included in the planter package.
Specifies the tools needed for assembly or installation.
Essential safety measures to follow during product use.
Instructions on how to properly clean and maintain the planter.
Recommendations for water absorption and drainage for plant health.
Position the planter upside down on a soft surface before drilling.
Mark 5 hole positions on the planter base using a spirit level.
Press small indentations with a nail to guide the drill bit.
Drill 5 holes at the slowest speed, perpendicular to the base.
Place the planter onto the planter feet.
Fill the planter base with specified amounts of pebbles.
Place the sleeve into the planter.
For SC43, add pebbles around the sleeve sides for stability.
Place the self-watering insert into the sleeve with the lid exposed.
Add 4 cm of clay pebbles to the bottom of the sleeve.
Add soil and plant, ensuring the self-watering lid remains uncovered.
Remove the lid from the self-watering insert.
Fill water into the insert until the measuring stick rises.
Replace lid and monitor the measuring stick for optimal water level.
