19
STROLLER
ASSEMBLING / DISASSEMBLING
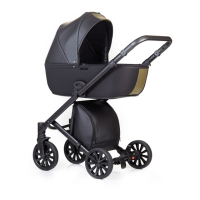
Unbox this stroller’s frame and put it horizontally on
the floor (fig. 1). Disable the lock against accidental
unfolding (fig. 2).While holding the handle pull
upwards vigorously to fix the system (you should
hear a specific sound) (fig. 3, 4). To fold the frame
press and hold the red button, located on the frame`s
right lever. Then simultaneously pull the levers,
located on both sides of the frame (fig. 5). Slightly
pull the frame up to the original position (same when
packed) (fig. 1).
HANDLE HEIGHT ADJUSTMENT
Simultaneously press the round buttons, placed
parallel on both sides of the handle. Set comfortable
handle height for you (fig. 6).
WHEEL MOUNTING / DISMOUNTING
Before mounting a wheel, insert an axle, while
holding the red button (fig. 7). Release the button to
fix the axle (you should hear a specific sound). To
mount a wheel, press its center button, then mount
wheels on an axle till it stops, release button and
slightly pull until it locks (fig. 8). To dismount a
wheel, press at its midpoint and pull along the axle
till its final removal (fig. 8). A wheel can be removed
without axle, but the axle can be removed by pressing
the red button (fig.7).
FRONT SWIVEL WHEELS
DISMOUNTING AND LOCKING
The stroller`s frame is equipped with two front swivel
wheels, which rotate 360° on its axle. To dismount
front wheel press vertically the button located above
this wheel. A wheel can be dismounted together with
the axle (fig.9). To secure the rotary wheels system,
turn the regulator located below the dismounting
button (fig. 10).
BRAKE
The stroller is equipped with parking brakes, which
block its rear wheels (fig. 11). To stop the stroller you
need to press rear wheels blocking pedal (fig. 11).To
continue moving, you need to reset the pedal (fig.11).
SHOCK ABSORPTION
This stroller features a spring shock absorption which
ensures comfort for your baby (fig.12). Spring shock
absorption mechanism is regulated by a special
switch, which is located under the shock absorber
(fig. 12). Always adjust both sides equally.
PORTABLE CRADLE MOUNTING /
DISMOUNTING
To mount the portable cradle, place the adapters into
the adapter pockets, located on the frame’s inner side
(fig. 13). The portable cradle adapters are blocked
automatically. To dismount the portable cradle, press
the buttons of the portable cradle adapters, while
lifting it up (fig. 13). If necessary, the portable
cradle’s inner part can be removed and washed
(fig.14, 15). The portable cradle`s backrest (covered by
a coconut mattress) can be adjusted to the desired
height with the help of regulator, which is located on
the bottom side of the cradle (fig. 16). To adjust the
cradle`s backrest push the regulator and scroll to the
desired height.
PORTABLE CRADLE HOOD, FEET COVER
The portable cradle is equipped with the folding hood
that protects a child from natural phenomena (wind,
sun, snow, rain). The stroller’s hood position is
adjusted with buttons at the bottom of the hood
(fig.17). To lower the hood to the back of the cradle
press the red button, to return to the original position,
press black button (fig. 17). Cradle is equipped with
the additional handle for its transportation (fig. 18).
Cradle is equipped with the feet cover, which puts on
at the front of the cradle and is fixed with buttons on
both sides (fig. 19). The portable cradle’s hood can be
ventilated by unfastening a zipper at the bottom part
of the hood and bending it down (fig. 20). The stroller
has an insect protection which is suitable both for
cradle and seat unit (fig. 21). The stroller has a rain
protection which is suitable both for cradle and
seat unit (fig. 23, 24). The cradle is ventilated (fig.22).
Turn the lever counterclockwise to open the
ventilation and clockwise to close it (fig. 22).
SEAT UNIT MOUNTING / DISMOUNTING
To mount the seat unit, place its adapters into the
adapter pockets located on the frame’s inner side
(fig.25). The seat unit adapters are blocked
automatically.To dismount the seat unit, press the
buttons of the seat unit adapters, while lifting it up
(fig. 25). The seat unit’s backrest can be adjusted to
the desired height using the adjuster located on the
seat backside (fig. 26).
SEAT UNIT HOOD, FEET COVER
The seat unit is equipped with the folding hood that
protects a child from natural phenomena (wind, sun,
snow, rain). The hood position is adjusted by pressing
on its upper part with your hands (fig. 27). The seat
unit is equipped with the feet cover, which is fixed
with buttons on the both sides of a stroller in its front
part (fig. 28). The seat unit`s hood can be ventilated
by unfastening a zipper at the top of the hood and
pulling the top of the hood to the bumper side (fig. 28).
FOOTREST ADJUSTMENT
To adjust the desired hight simultaneously press the
buttons located on both sides of the footrest (fig. 29).
SEAT UNIT`S BUMPER
Every seat unit has a bumper with a protective
mechanism which prevents a child from getting out of
a stroller. Simultaneously press two parallel red
buttons on the both sides of a handle, adjust the
desired height (fig.30). To dismount the bumper press
buttons and pull the handle up slightly (fig. 31). For
bumper mounting insert it into the latching
mechanisms, which are situated on both sides of the
seat unit (you should hear a specific sound) (fig. 31).
SAFETY BELTS
The seat unit features 5-point safety belts. To secure a
PRE-USE PROCEDURES
EN
English
 Loading...