Do you have a question about the ANK L1 EL84 V2 and is the answer not in the manual?
Provides background information on the founding and evolution of ANK Audio Kits.
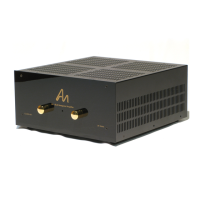
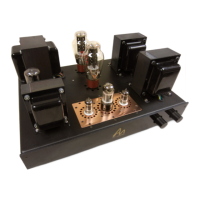
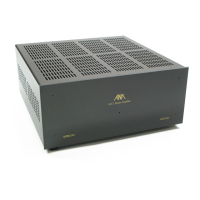
Details the development and key features of the L1 EL84 Integrated Amplifier V2.
Lists the necessary tools and equipment for assembling the amplifier kit.
Offers advice on soldering, component handling, and general build practices.
Outlines general rules, manual organization, and safety warnings for the build.
Introduces the process of installing chassis components and the main transformer.
Step-by-step guide for mounting the feet onto the amplifier chassis.
Details the correct positioning and mounting of the main power transformer.
Instructions for inserting the chassis ground screw for safety.
Guides the user through mounting the IEC power socket and rocker switch.
Explains the wiring connections for the power input and grounding.
Details the wiring process for the IEC printed circuit board.
Final steps for connecting and securely mounting the IEC PCB.
Introduces the installation of the Dyna-Choke, an upgrade for power supply smoothing.
Introduces the installation of RCA jacks, selector switch, and volume pot.
Step-by-step instructions for mounting the RCA input connectors.
Guides the user on installing the volume control and its associated PCB.
Details the grounding connections for RCA jacks and the volume pot.
Explains how to connect the audio signal wires to the RCA jacks.
Introduces the process of building the L1 EL84 PCB.
Step-by-step guide for populating the PCB with resistors.
Instructions for installing various types of capacitors onto the PCB.
Guides the user through mounting the vacuum tube sockets.
Details the assembly of the power supply components on the PCB.
Covers the last few steps before mounting the completed PCB.
Instructions for installing the assembled PCB into the amplifier chassis.
Introduces the installation and wiring of the ELMA selector switch.
Guides the user on mounting the speaker output terminals on the rear chassis.
Details the process of positioning and securing the output transformers.
Wiring instructions for the filament circuits from the mains transformer.
Details the wiring for the high voltage (HT) supply.
Wiring the primary connections of the output transformers to the PCB.
Guides the connections between the volume pot PCB and the main PCB.
Attaching the front faceplate and control knobs to the amplifier.
Mounting the LED indicator onto the front panel.
Securing the top cover of the amplifier chassis.
Congratulatory message and advice on enjoying the amplifier.
Discusses the impact of high-quality cables on audio performance.
Explores options for substituting vacuum tubes to tailor sound.
Thanks the user and requests feedback and photos of their build.
Explains the system for reading resistor color codes for component identification.