*300-5577-00*
300-5577-00
Anthro Corporation
®
| 10450 SW Manhasset Dr. | Tualatin, OR 97062
Toll-free: 800.325.3841 | Fax: 800.325.0045 | email: sales@anthro.com | anthro.com
Outside the U.S. | Tel: 503.691.2556 | Fax: 503.691.2409
Warranty:
The Elevate II electric lift table has a Lifetime Warranty against manufacturing defects on the
table, 5 years on the legs and electrical system. Cords and plugs are not warranted.
Notices:
Technology Furniture and Elevate II are trademarks of Anthro Corporation. Anthro reserves the
right to modify the design and specifications without prior notice.
M6-20 Cap Screw
325-5272-00
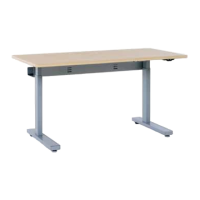
STEP 4B - INSTALL CONTROL BOX AND KEYPAD - SHALLOW TABLES
The keypad can be installed on the left or the right. Choose a location, just
remember that the table's upside down now, so when you flip the table over,
the keypad will be on the opposite side. Align the keypad and its housing with
the four pre-drilled holes at the front of the keyboard surface so the buttons
are face-down at the front edge of the keyboard surface and the flat side of the
housing is against the shelf. Using four Phillips Head Screws, attach the keypad
and its housing to the front of the worksurface.
Align the Control Box with the four pre-drilled holes behind the cross pan so
that the ports on the box face the front of the table. Attach the Control Box to
the shelf with four 1" MDF Screws (325-5580-00) using the Anthro driver.
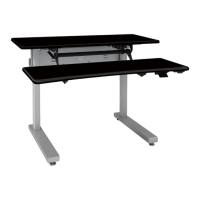
STEP 5 - INSTALL CABLE TRAY
Align the Cable Tray with the back of the table so the holes on the top flange of
the cross pan line up with the holes on the cable tray. While one person holds
the tray in place, attach the tray to the pan with nuts and screws using your
own 3/8" socket (or the 3-way wrench provided) and the smallest hex key (1/8")
in your kit.
Use the provided cable clips to route and organize cords.
1” Btn-Hd Screw
325-5580-00
3/4” Phillips Screw
325-5370-00
Nylock Nuts
325-5186-00
1/2”Button-hd Screw
325-5193-00
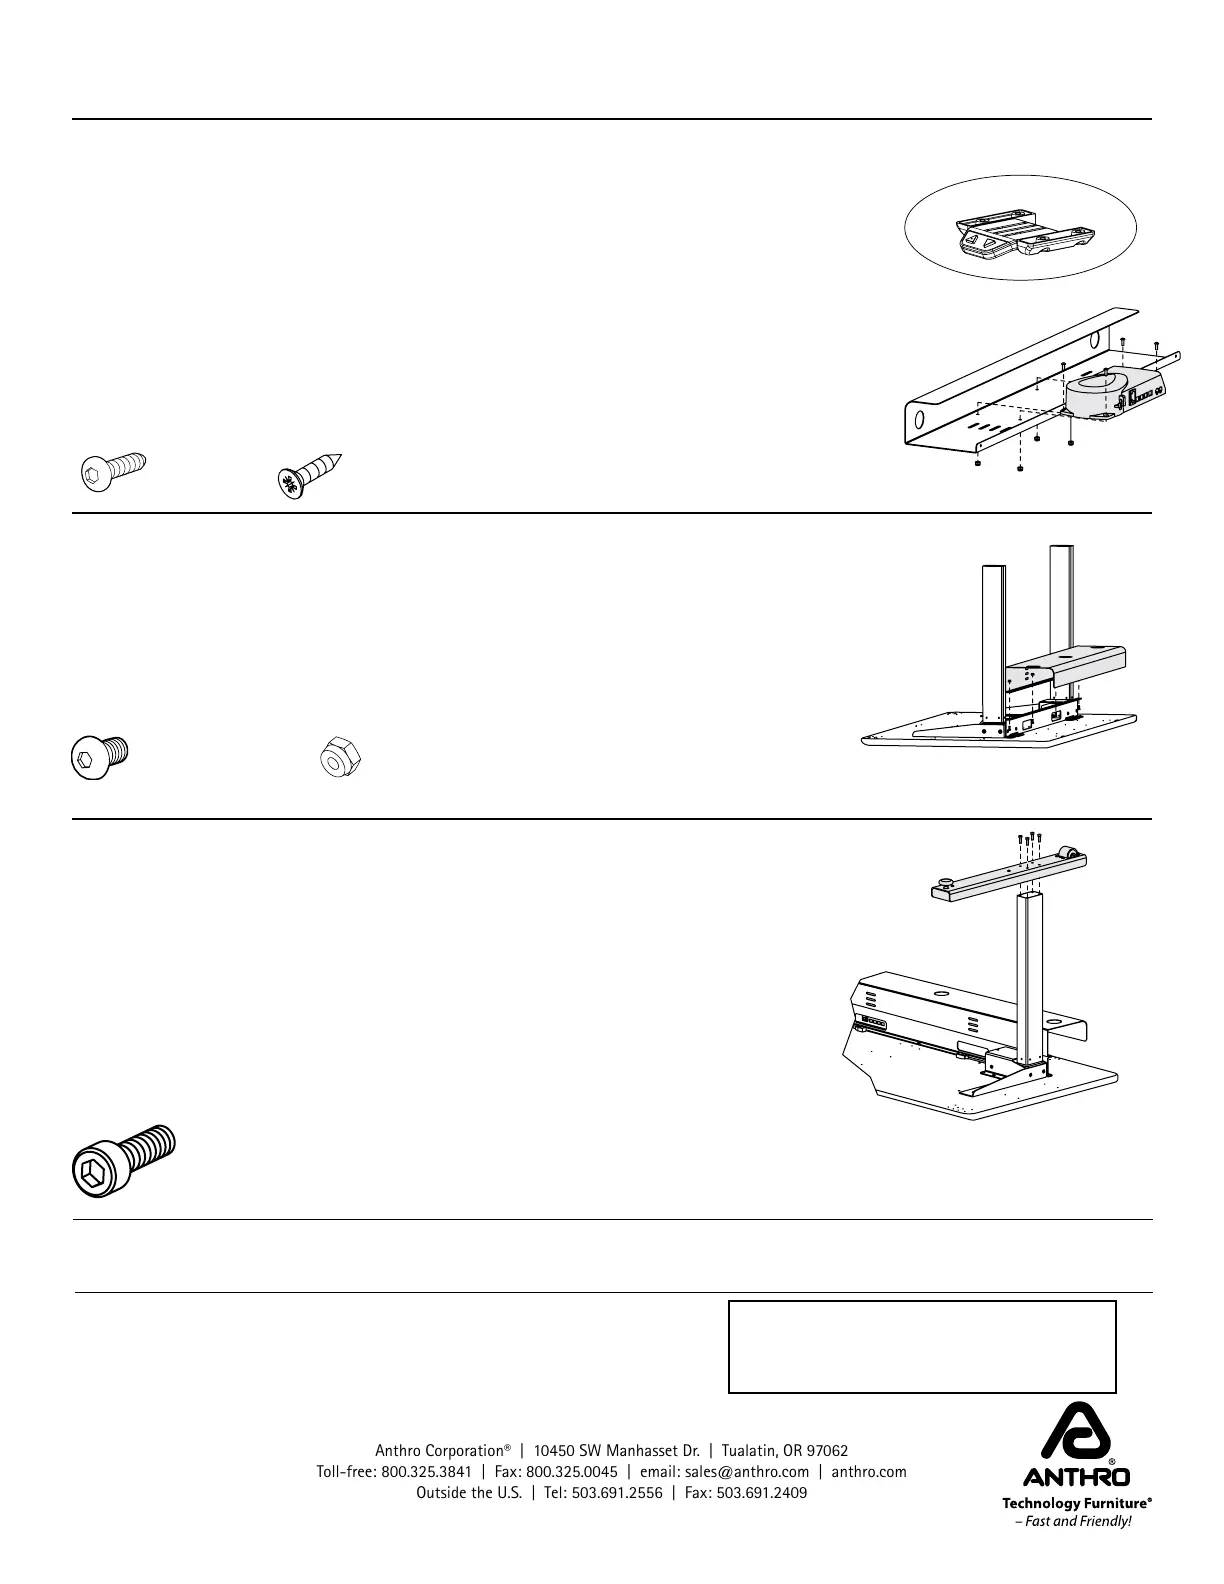
STEP 6 - INSTALL FEET AND HOME THE LEGS
Align one foot with each leg so the wheels are at the back. Attach the foot to
the leg with four M6x20 Socket-head Screws using the Anthro driver. Repeat
for the other foot.
With the help of another person, carefully rotate the table onto its feet. Plug in
the table and use the keypad to move the table all the way down. Release the
button and press it again to Home the legs.
Add your equipment and route cords into the cable tray. Carefully move the
table through its entire range of motion to be sure that your power and data
cables are long enough.
CONGRATULATIONS! YOUR ELEVATE II ASSEMBLY IS COMPLETE!
 Loading...