EasyManua.ls Logo

Antigravity Batteries MICRO-START XP-10-HD - User Manual

Antigravity Batteries MICRO-START XP-10-HD
11 pages
Print Icon
To Next Page IconTo Next Page
Loading...
InstructionDisclaimer
Dennis Kirk provides instructions to help our customers better understand how to install the
products we sell. The instructions are exact copies of what the manufacturer includes with the
product being sold.
That means the quality and accuracy of the instructions is solely dependent on what the
manufacturer produces. We do our best to make the text legible and the pictures viewable.
However, the end result depends largely on the quality of instructions the manufacturer
provides.
Therefore, you will find that some instructions are not of the highest quality. Sometimes text is
hard to read and pictures are not easy to see. At times you will find the overall look of the
instructions to be less than professional. However, we feel it is better to provide what we have
rather than provide nothing at all.
To the best of our knowledge the instructions and application information contained in the
instructions is accurate. However, Dennis Kirk assumes no liability related to any errors that
may be contained in the copy of the manufacturer’s instructions we provide. Buyers are solely
responsible to insure that product use is consistent with their application.
If you have any questions please contact us at customerservice@denniskirk.com
or
800-969-7501 so we can further assist you regarding additio
nal product information or any other
business related questions.
Thank you for doing business with D
ennis Kirk.
Question and Answer IconNeed help?

Do you have a question about the Antigravity Batteries MICRO-START XP-10-HD and is the answer not in the manual?

Summary

Instruction Disclaimer

Welcome

Safety Precautions

Personal Precautions

Safety guidelines for personal handling and product use, highlighting potential risks.

Operating Precautions

Operational safety measures for using the device, focusing on correct connections and usage.

Product Overview

Kit Contents

Specifications

Product Use

Checking Available Capacity

How to check the battery charge level using the capacity indicator lights.

LED Flashlight Operation

Instructions for operating the built-in LED flashlight and its different patterns.

Charging the XP-10-HD

Guidance on charging the device using AC or DC chargers, including charging indicators.

Charging Devices

Charging USB Devices

Instructions for charging various USB-powered devices using the unit's USB output ports.

Charging 12 V and 19 V Devices

How to charge 12V and 19V devices, like laptops, using the appropriate ports and tips.

Jump-Starting a Vehicle

Using the Boost Button on the Smart Clamps

Detailed instructions and cautions for using the boost function on the smart clamps for difficult starts.

Frequently Asked Questions

Overview

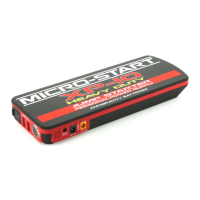
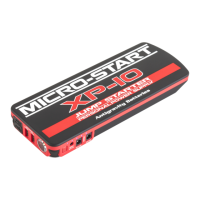
The Antigravity Batteries MICRO-START XP-10-HD (Heavy Duty) is an ultra-compact jump-starter and personal power supply (PPS) designed for portable power on the go, eliminating the need for electricity. This versatile device can jump-start vehicles, charge USB devices like phones, tablets, and GoPro cameras, and power or charge 12V and 19V devices such as mobile DVD players and 19V laptops. It comes as a complete kit with a convenient carry case.

Function Description:

The primary function of the XP-10-HD is to act as a portable power source for various electronic devices and as a jump-starter for 12-volt starter batteries. It is equipped with heavy-duty smart clamps that incorporate built-in protections to prevent accidental reverse-polarity connections, ensuring safer jump-starting. The device features multiple output ports, including two USB output ports (5V-2A and 5V-1A) for charging USB-powered electronics, and dedicated 12V and 19V output ports for powering and charging compatible devices.

Usage Features:

Getting Started:

Upon receiving the XP-10-HD, it will be partially charged and should be fully charged before its first use. Users are advised to carefully read and understand their vehicle's owner's manual for specific jump-starting precautions and recommended methods. It's crucial to determine the voltage of the vehicle's system and battery type before using the XP-10-HD. This device is specifically designed for jump-starting 12-volt starter batteries only and for charging electronic devices.

Before Connecting to Any Battery:

Before connecting to a vehicle's battery, verify that the vehicle has a 12-volt system. The XP-10-HD is not suitable for jump-starting any other battery voltage. Identify the correct polarity of the battery terminals: positive is typically RED and marked by POS, P, or +, while negative is BLACK and marked by NEG, N, or -. Avoid making connections to the carburetor, fuel lines, or thin metal parts for grounding. The instructions provided are for negative ground systems, which are the most common. For positive ground systems (very uncommon), follow the instructions in reverse order.

Checking Available Capacity:

To check the state of charge or capacity, press the Power Switch. The XP-10-HD has a lighted capacity indicator, with each lit light representing 20% capacity.

LED Flashlight Operation:

To turn on the flashlight, press and hold the Power Button for 3 seconds. The flashlight offers three light patterns: Normal, SOS, and Strobe. Users can cycle through these patterns by pressing the Power Switch again. After the last pattern, the flashlight will turn off. Users are cautioned not to stare directly into the LED flashlight to prevent personal injury.

Charging the XP-10-HD:

The XP-10-HD comes with two chargers: an AC Wall Outlet Charger for home/indoor use and a DC Cigarette Lighter Charger for in-vehicle charging. To charge, plug either charger into the XP-10-HD's Input port. While charging, the indicator lights will flash sequentially, and the number of solid lights indicates the current charge level. All lights solidly lit signify a full charge. Once fully charged, remove the charger. Do not leave the device charging for over 24 hours, and never leave any electronic devices unattended during charging.

Charging USB Devices:

The XP-10-HD can charge any USB 5V devices at 2.1 or 1.1 Amps. To charge, plug the provided 4-in-1 USB Cable (or any standard USB Cable) into either USB output port on the XP-10-HD, then connect the other end to the device being charged. Press the Power Switch to begin charging. Disconnect the device once charged. The number of times devices can be charged will vary based on the device's battery size.

Charging 12V and 19V Devices:

The XP-10-HD can charge or power laptops and 12V accessories using its 12V and 19V ports. Both ports feature a 5.1 mm female output port that accepts the provided 5.1 mm DC male-connector cable. The ports are color-coded: 12V is yellow, and 19V is black. For 19V laptop charging, plug the provided DC Cable into the 19V output port on the XP-10-HD, find the appropriate Laptop Tip (8 tips are included in the kit), and connect it to the laptop. Press the Power Button to start charging. For 12V charging, plug the provided DC Cable into the 12V output port on the XP-10-HD and connect it directly to the 12V device (or use the device's cable). Due to the variety of electronic devices and connectors, the kit may not contain the proper connector for all laptops and electronic devices. Users may need to find a compatible cable from online electronics suppliers, ensuring compatibility with their device's manufacturer. The XP-10-HD requires a 5.1 mm x 2.1 mm MALE end to plug into its 12V and 19V ports.

Jump-Starting a Vehicle:

  1. Turn off all vehicle lights, radios, air conditioning, and accessories. Confirm connection to a 12-Volt Battery System.
  2. Connect the Smart Clamps to the vehicle battery: Red Clamp to the Positive (+) Terminal, and Black Clamp to the Negative (-) Terminal. Ensure clean connections by removing any corrosion.
  3. Connect the Smart Clamps to the XP-10-HD, ensuring the blue connector is fully seated into the Jump-Start port.
  4. Observe the LED Light indications on the Smart Clamps:
    • GREEN LED: Indicates correct connection. Proceed to Step 5.
    • GREEN BLINKING LED: Indicates very low vehicle battery voltage but correct connection. Press the "BOOST" Button on the Smart Clamps and attempt to start. Proceed to Step 5. (WARNING: Only press BOOST if a green light is present and the unit is connected to the vehicle battery with correct polarity.)
    • RED LED: Indicates an incorrect connection. Remove clamps, correct the connection, and restart from Step 1.
    • NO LED: Indicates no voltage detected or battery below 2 volts. Ensure clamps are properly connected, then press the BOOST Button. Proceed to Step 5.
  5. Attempt to start the vehicle. After starting, leave the vehicle running but disconnect the Smart Clamps and XP-10-HD within 40 seconds. Do not leave attached.

Using the Boost Button on the Smart Clamps:

The Boost Button is generally not needed but is intended for jump-starting vehicles with very low or no voltage readings. It energizes the clamps for emergency jump-starting.

  • The Smart Clamps must be connected to the XP-10-HD for the Boost Button to operate.
  • Before pressing, ensure all connections are correct. Once pressed, the clamps will have "live" voltage.
  • The Boost Button will "click" when pressed; a pen, fingernail, or key edge may be needed to press it correctly due to its indented housing.
  • After pressing, there is a 25-second window to attempt a jump-start. After this time, the Boost feature will turn off, requiring another press to re-engage.
  • CAUTION: Do not use the Jump-Start Port for anything other than jump-starting. Do not leave the Micro-Start unit connected to the vehicle. Do not press the Boost Button on clamps if they are connected together, as this bypasses safety features and makes the clamps live with energy.

Maintenance Features:

Automatic Power Off:

The Micro-Start XP-10-HD will automatically power off when it is not powering anything, typically within 10 seconds. Disconnect the clamps when not in use.

Charge Retention:

On average, the XP-10-HD can hold a charge for up to 6 months. This can vary depending on storage conditions (heat and cold). It is best to check the state of charge at least once every 3-4 months.

Charging Time:

A completely depleted XP-10-HD can be fully charged in 4-5 hours. If it has some charge, it will charge in less time.

Safety Precautions (Summary):

  • Avoid exposing the product to extremely high temperatures (above 110°F/43°C), such as direct sunlight or hot dashboards, as swelling may occur. Discontinue use if swelling is observed and contact the manufacturer.
  • Use the product only for its intended purpose.
  • The Jump-Start Port is exclusively for jump-starting; do not use it to power other devices.
  • Do not jump-start with fewer than 3 lights lit on the Capacity Indicator.
  • Limit jump-start attempts to 5 seconds per attempt to prevent overheating.
  • Do not make more than 3 consecutive jump-start attempts without allowing the unit to cool.
  • Do not get the XP-10-HD wet or immerse it in water.
  • Do not operate in explosive atmospheres.
  • Do not modify or disassemble the unit; it contains no serviceable parts.
  • Do not use as a replacement battery for vehicles.
  • Remove the XP-10-HD from the vehicle within 40 seconds of starting.
  • Do not clamp the Red and Black Clamps together.
  • Keep out of reach of children and do not allow them to play with the product unsupervised. Not recommended for use by infirm persons.
  • Do not leave battery products unattended while charging.
  • Do not charge frozen batteries; charge only between 34°F (1°C) and 104°F (40°C).
  • Discontinue use if the pack swells or is subjected to heat above 120°F (50°C).
  • Do not store in locations where the temperature may exceed 110°F (43°C).

Operating Precautions (Summary):

  • Ensure the blue plug of the Smart Clamps is fully seated into the XP-10-HD to prevent overheating.
  • Clean all battery connections to ensure a solid connection.
  • Ensure clamps have a good "bite" on battery terminals for optimal power.
  • Ensure the XP-10-HD has a minimum of 3 lights on the Capacity Indicator before jump-starting.
  • Remove the product from the vehicle battery within 40 seconds of jump-starting.
  • Remove clamps from the XP-10-HD when not in use.

Antigravity Batteries MICRO-START XP-10-HD Specifications

General IconGeneral
Dimensions6.5 x 3.25 x 1.5 inches
Weight1.5 lbs
USB Output5V / 2.1A
USB Ports2
Input12V / 1A
Output12V / 10A
LED FlashlightYes
Operating Temperature-4°F to 140°F (-20°C to 60°C)
Capacity18000 mAh

Related product manuals