Do you have a question about the Anton Paar Pico 3000 Ex d and is the answer not in the manual?
Covers liability, installation, use, maintenance, disposal, and returns for the Pico 3000.
Provides additional safety instructions for specific versions and hazardous area operation.
Details specific conditions for installation and operation, including sealing and cable requirements.
Provides a step-by-step checklist for the installation of the Pico 3000 and Pico 3000 RC.
Outlines the general requirements and references needed before installing the Pico 3000.
Details the physical steps for installing the Pico 3000 unit and its housing.
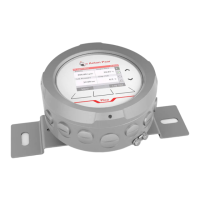
Details on explosion-proof and flameproof instruments marked with an Ex-type plate.
Instructions for grounding the Pico 3000 RC unit to ensure electrical safety.
Recommendations for selecting a suitable power supply for the Pico 3000.
General instructions for wiring the Pico 3000, including accessing terminals.
Describes wiring the sensor to the Pico 3000 RC via a CANopen bus network.
Overview of the analog outputs, analog input, digital inputs, and relay connection.
Detailed instructions for wiring the active, galvanically isolated 4 to 20 mA analog output.
Guidance on connecting active or passive 4-20 mA transmitters to the analog input.
Instructions for wiring passive, galvanically isolated digital inputs for measurement control.
Information on wiring the relay output, which switches when values are out of limits.
Describes the Analog/Digital version providing analog I/O, relay, and additional digital inputs.
Wiring digital inputs for product selection mode or application mode.
Overview of the HART communication protocol for data access between the Pico 3000 and host systems.
Details the three possibilities for connecting the sensor to a control station via the HART bus.
Information on the Pico 3000 Frequency, designed for transferring measuring data to flow computers.
Describes wiring the passive frequency output, which requires external power supply.
Overview of the PROFIBUS DP interface and its system requirements.
Instructions for wiring the non-Ex version of Pico 3000 PROFIBUS with a standard M12 socket.
Overview of the Modbus RTU interface, including wiring and general specifications.
Wiring instructions for PROFINET IO, EtherNet/IP, and Modbus TCP interfaces.
Describes the available functions of the Pico 3000 Software for configuration and data management.
Lists the minimum hardware and software requirements for running the Pico 3000 Software.
Step-by-step guide for installing the Pico 3000 Software package on a computer.
Instructions on how to start the Pico 3000 Software, both online and offline.
Describes how to create and store backup configuration files (.abf) for the Pico 3000.
Guidance on loading, editing, and saving configurations independently of the instrument.
Instructions for installing a configuration onto the instrument using the Pico 3000 Software.
Guides on how to detect and perform software and firmware updates for the Pico 3000.
Overview of the Pico 3000 Human Machine Interface, including screen navigation and keys.
How to perform offset and gain adjustments for sensor measuring values.
Overview of the different applications available for the Pico 3000 system.
Overview of the HART protocol, device identification, and variables.
Information on PROFIBUS DP interface, system requirements, and configuration.
Guide for integrating the Pico 3000 PROFIBUS DP into a master PLC system.
General specifications and interface settings for Modbus TCP and RTU.
Overview of the PROFINET IO interface, system requirements, and configuration.
Guide for integrating the Pico 3000 PROFINET IO into a master PLC system.
Overview of the EtherNet/IP interface, system requirements, and configuration.
Guide for integrating the Pico 3000 EtherNet/IP into a master PLC system.
Information on viewing and understanding warnings and errors displayed on the sensor.
Describes the three types of logging: System Log, Error Log, and Data Log.
Information on how sensor states affect data interface output.
Describes analog output behavior for error conditions and out-of-specification values.
List of warning codes, their descriptions, possible causes, and likely solutions.
List of failure codes for analog outputs, relay, and fieldbus errors.
Error codes and conditions specific to L-Dens, L-Sonic, and L-Rix sensors.
Methods for resetting the sensor after errors occur, using HMI, fieldbus, or software.
| Category | Controller |
|---|---|
| Model | Pico 3000 Ex d |
| Power Supply | 24 V DC |
| Housing Material | Stainless steel |
| Certification | ATEX, IECEx |
| Explosion Protection | Ex d |
| Communication Interfaces | RS485 |