9
Connecting the Monitor
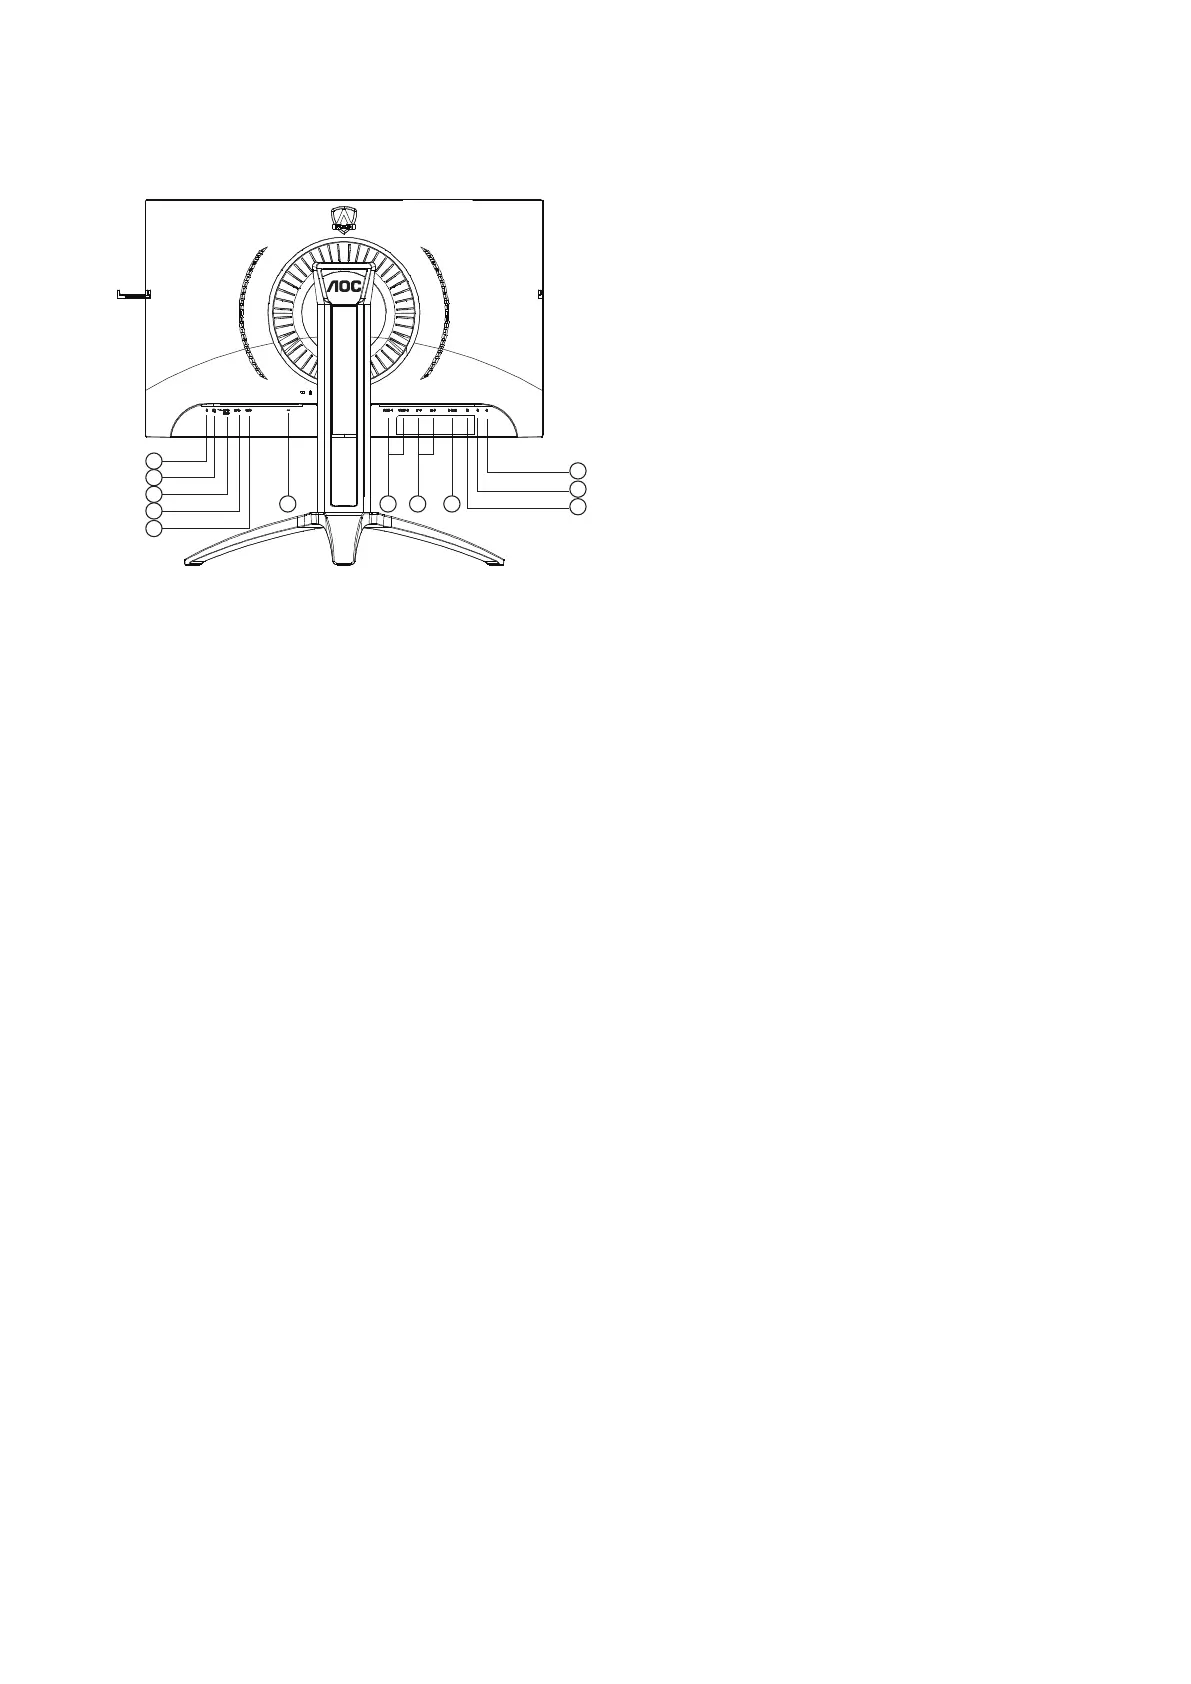
Cable Connections In Back of Monitor and Computer:
1. Microphone in
2. Earphone (Combined with Microphone)
3. USB3.1 Gen1 downstream + fast charging(BC1.2)
4. USB3.1 Gen1 downstream
5. USB3.1 Gen1 upstream
6. AC in
7. HDMI
8. DP
9. D-SUB
10. Audio in
11. Microphone out (Connect to PC)
12. Quick Switch port
To protect equipment, always turn off the PC and LCD monitor before connecting.
1. Connect the power cable to the AC port on the back of the monitor.
2. Connect one end of the 15-pin D-Sub cable to the back of the monitor and connect the other end to the computer’s
D-Sub port.
3. (Optional – Requires a video card with HDMI port) - Connect one end of the HDMI cable to the back of the monitor
and connect the other end to the computer’s HDMI port.
4. (Optional–Requires a video card with DP port) –Connect one end of the DP cable to the back of the monitor and
connect the other end to the computer’s DP port.
5. (Optional –Requires a video card with Audio port) - Connect one end of the Audio cable to the back of the monitor and
connect the other end to the computer’s Audio port.
6. Turn on your monitor and computer.
If your monitor displays an image, installation is complete. If it does not display an image, please refer Troubleshooting.